Starting your sewing journey can feel overwhelming. You see beautiful handmade tops everywhere and wonder if you could create them yourself. The good news is that sewing your own tops is much easier than you think.
This Website contains affiliate links. That means I may earn a small commission if you purchase through my links, at no extra cost to you.
This guide walks you through eight beginner-friendly top projects. Each pattern uses simple techniques that build your confidence. You’ll discover which fabrics work best and what tools you actually need.
These projects require no advanced skills. You’ll learn basic stitches and construction methods that form the foundation of garment sewing. By the end, you’ll have wearable tops you made with your own hands.
Tops make ideal first projects for new sewists. They’re easy to construct and provide quick results. Most beginner sewing projects tops require fewer pattern pieces than dresses or pants.
Simple tops teach you essential skills. You’ll practice straight seams, hemming, and working with different necklines. These techniques transfer to more complex garments later.
The fabric choices for tops are forgiving. Cotton and linen drape nicely and hide minor mistakes. Knit fabrics stretch to fit your body shape. This flexibility makes the construction process less stressful.
Quick Wins for Beginners
Finishing a top takes less time than other garments. Most patterns complete in an afternoon. This fast turnaround keeps you motivated.
You’ll see results quickly and can wear your creation right away. This immediate gratification builds confidence for your next project.
Building Essential Skills
Each top project teaches new techniques. You start with basic seams and progress to sleeves and necklines. Skills build naturally from one project to the next.
These foundations prepare you for advanced sewing. Once you master tops, dresses and jackets become achievable goals.
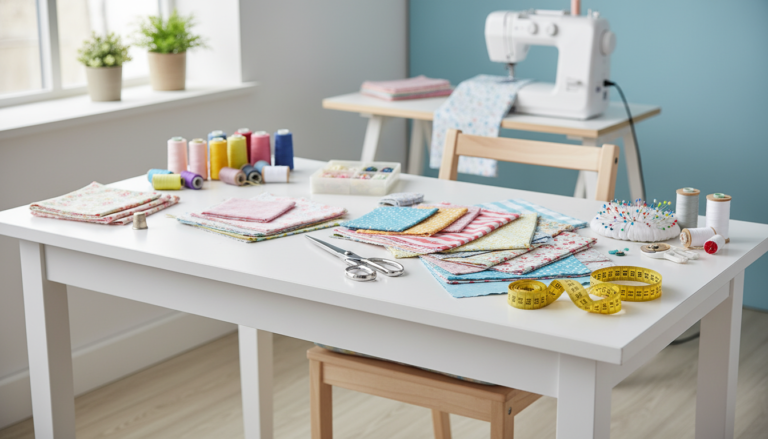
Essential Materials and Tools for Sewing Tops
Gathering the right supplies makes sewing much smoother. You don’t need expensive equipment to start. A basic sewing machine and a few quality tools will serve you well.
Your sewing machine should handle straight stitches and basic zigzag stitches. Most modern machines include these functions. Make sure your machine works properly before starting any project.
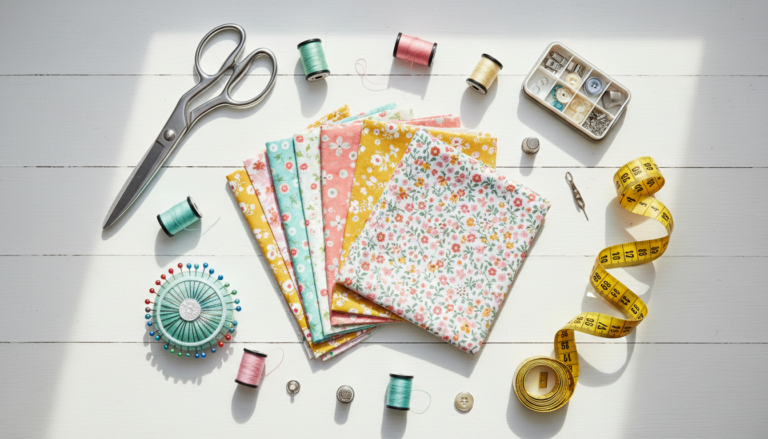
Basic Sewing Supplies You’ll Need
Sewing machine with straight stitch and zigzag capabilities
Sharp fabric scissors dedicated only to cutting fabric
Measuring tape for taking body measurements accurately
Pins and pin cushion for holding fabric pieces together
Seam ripper for fixing mistakes without damaging fabric
Iron and ironing board for pressing seams flat
Thread in colors matching your fabric choices
Fabric marking tools like chalk or washable markers
Choosing the Right Fabrics
Fabric selection affects your project success significantly. Beginners should start with woven fabrics like cotton or linen. These materials cut cleanly and sew predictably.
Cotton fabric comes in countless prints and colors. It washes well and maintains its shape. Linen offers a relaxed, natural look perfect for casual tops.
Knit fabrics work beautifully for fitted tops. Jersey knit and cotton spandex blends provide comfortable stretch. These fabrics require slightly different techniques than woven materials.
Learn Professional Fabric Selection
Master fabric choices with expert guidance. Get access to comprehensive lessons on selecting the perfect material for every project.
Woven fabrics include cotton, linen, and chambray. They don’t stretch and hold their shape well. These materials work great for loose-fitting tops and structured styles.
Cotton is breathable and easy to work with. Linen drapes beautifully but wrinkles easily. Chambray looks like denim but sews more easily.
Knit Fabrics
Knit fabrics stretch in at least one direction. Jersey, interlock, and cotton spandex blends fall into this category. They create comfortable, body-hugging garments.
These fabrics need special handling. Use a ballpoint needle and stretch stitches. The results are worth the extra attention to technique.
Project 1: Simple Tank Top for Beginners
The simple tank top is where most beginners should start. This project uses minimal fabric and creates a versatile wardrobe piece. You’ll practice straight seams and basic finishing techniques.
Tank tops require only a few pattern pieces. Most designs include front and back panels plus bias binding for the neckline and armholes. The construction process takes just a few hours.
Materials Needed
One yard of cotton or linen fabric for main body
Bias binding tape for neckline and armholes
Matching thread for seams and topstitching
Basic sewing pattern or free pattern downloaded online
Step-by-Step Construction
Start by cutting your fabric according to the pattern pieces. Lay the pattern on your fabric carefully. Pin the pieces and cut around them with sharp scissors.
Sew the shoulder seams first. Place the front and back pieces right sides together. Stitch along the shoulder line using a straight stitch. Press the seams open with your iron.
Next, attach the bias binding to the neckline. Pin the binding around the neck opening. Sew it in place using a consistent seam allowance. Fold the binding over and topstitch it down.
Repeat the binding process for both armholes. Take your time to keep the binding smooth and even. This finishing touch makes your top look professional.
Sew the side seams from armhole to hem. Make sure the shoulder seams match up perfectly. Press the seams toward the back of the garment.
Hem the bottom edge by folding the fabric twice. Pin the hem and stitch it close to the folded edge. Press the finished hem for a crisp look.
Lightweight cotton works perfectly for tank tops. Choose prints or solid colors that match your wardrobe. The fabric should have some body but remain breathable.
Linen creates beautiful summer tanks. The natural fibers keep you cool in warm weather. The slight wrinkle adds to the relaxed aesthetic.
Avoid heavy fabrics for your first tank top. Thick materials make the bias binding difficult to attach. Stick with fabrics that drape easily and sew smoothly.
Styling Your Tank Top
Layer your handmade tank over long-sleeve shirts in cooler weather. Pair it with high-waisted shorts or skirts for summer. Add a cardigan for transitional seasons.
The simple design works for casual outings and dressed-up occasions. Change the look with different accessories and bottom pieces.
Common Mistakes to Avoid
Don’t skip pressing your seams. This step makes a huge difference in the finished look. Each seam should be pressed before moving to the next step.
Measure your bias binding carefully. Too tight and the neckline puckers. Too loose and it gaps. Test the fit before stitching it permanently.
Customization Ideas
Add decorative topstitching along the bias binding. Use contrasting thread for visual interest. Experiment with different binding colors against your main fabric.
Try varying the neckline shape. Scoop necks, V-necks, and square necklines all work with this basic pattern. Small changes create completely different looks.
Project 2: Basic T-Shirt Pattern
The basic t-shirt teaches you to work with knit fabrics. This project introduces sleeves and neckline bands. You’ll create a comfortable, wearable top perfect for everyday wear.
T-shirts use stretchy knit fabrics that move with your body. Jersey knit and cotton spandex blends work wonderfully. These materials require a ballpoint needle to prevent snags and runs.
Preparing to Work with Knits
Knit fabrics behave differently than woven materials. They stretch and can distort easily. Handle them gently while cutting and sewing to maintain the correct shape.
Let your knit fabric relax after purchasing. Lay it flat for several hours before cutting. This prevents distortion and shrinkage issues later.
Use a ballpoint or stretch needle in your sewing machine. These needles slip between fibers instead of piercing them. Regular needles can create holes or cause the fabric to run.
Construction Steps
Cut all your pattern pieces on the fold or following the grainline. Knit fabrics have maximum stretch going across the grain. Position your pattern to use this stretch correctly.
Sew the shoulder seams first using a narrow zigzag stitch. This allows the seam to stretch with the fabric. A straight stitch would pop when the fabric stretches.
Attach the sleeves next. Pin the sleeve cap to the armhole carefully. Ease any extra fabric smoothly. Sew using a zigzag or stretch stitch.
Create the neckline band by cutting a strip of knit fabric. The band should be slightly smaller than the neck opening. Stretch it gently while sewing to create a snug fit.
Sew the side seams and sleeve seams in one continuous line. Start at the sleeve hem and sew down to the shirt hem. This creates a strong, neat seam.
Hem the sleeves and bottom using a twin needle if available. This creates a professional double topstitch. A regular zigzag stitch works too.
Cotton jersey remains the most beginner-friendly knit option. It’s easy to sew and comfortable to wear. Look for stable jerseys that don’t curl excessively at the edges.
Cotton spandex blends offer great recovery. The fabric springs back to its original shape after stretching. This quality creates well-fitting garments that maintain their form.
Avoid slippery rayons and very thin knits for your first project. These fabrics require more experience to handle successfully. Stick with stable, medium-weight knits initially.
Benefits of Knit Tops
Comfortable and stretchy for all-day wear
Forgiving fit that flatters various body types
No closures needed thanks to stretch fabric
Easy care and machine washable
Professional results with basic techniques
Challenges to Expect
Fabric can stretch while cutting and sewing
Requires special needles and stitches
Edges may curl during construction
Needs careful handling to avoid distortion
Seam choices affect garment stretch
Project 3: Easy Wrap Top Design
Wrap tops offer a flattering fit for many body types. The design creates a beautiful neckline without complicated closures. This project builds on your basic sewing skills.
The wrap style adjusts to fit different sizes easily. You can tie it tighter or looser based on your preference. This flexibility makes it perfect for beginners still learning about fit.
Understanding Wrap Top Construction
Wrap tops feature overlapping front panels. One side crosses over the other and ties at the waist or hip. This creates a V-neckline that’s easy to construct.
The pattern includes extended front pieces that wrap around. These ties can be separate or cut as part of the main panels. Attached ties are simpler for beginners.
Sewing Your Wrap Top
Cut your fabric pieces according to the pattern. Pay special attention to the front wrap pieces. These need to be mirror images of each other.
Finish the edges of the wrap panels first. Fold the fabric over twice and stitch close to the edge. These finished edges show when the top is worn.
Sew the shoulder seams and press them open. Attach any sleeves if your pattern includes them. Many wrap tops work beautifully as sleeveless designs too.
Create the neckline by folding the fabric edge and stitching it down. The V-shape forms naturally when you wear the top. No special neckline treatment is needed.
Sew the side seams from armhole to hem. Leave the wrap panels free. These should move independently to create the wrap effect.
Hem the bottom edge and sleeve edges if applicable. Try on the top and adjust the tie length if needed. The ties should be long enough to wrap comfortably and tie securely.
Drapey fabrics work best for wrap styles. The fabric should flow nicely and not be too stiff. Rayon, lightweight cotton, and soft linen all create beautiful wrap tops.
Prints can make wrap tops especially interesting. The way the fabric overlaps creates unique pattern placements. Floral prints and abstract designs work particularly well.
Avoid very stretchy knits for your first wrap top. The fabric might stretch out of shape at the wrap panels. Stable woven fabrics give you more control over the fit.
Ready to Master All These Techniques?
Learning beginner sewing projects tops becomes easier with step-by-step video guidance. Get access to complete courses that walk you through every technique, from choosing fabrics to finishing professional-looking garments. Build your skills systematically with expert instruction designed specifically for beginners.
Peasant tops feature gathered necklines and relaxed fits. This style originated from traditional European folk costumes. Modern versions create comfortable, bohemian-style garments perfect for casual wear.
The gathered neckline sits off the shoulders or on them. Elastic creates the gathering effect. This technique is simple to execute and looks impressive.
Creating the Gathered Neckline
The neckline uses a casing that holds elastic. You sew a channel in the fabric and thread elastic through it. When pulled, the elastic creates even gathers across the neckline.
Measure the elastic to fit comfortably around your shoulders or upper chest. It should be snug but not tight. The gathered fabric will sit on top of the elastic band.
Sewing Instructions
Cut a rectangular piece of fabric for the main body. The width should be about twice your hip measurement. This extra width creates the gathered fullness.
Fold the top edge over to create the elastic casing. The fold should be wide enough to accommodate your elastic plus seam allowance. Pin and stitch close to the raw edge.
Leave a small opening in the casing. Thread your elastic through using a safety pin. Pull the elastic to create gathers. Overlap the elastic ends and stitch them securely.
Close the casing opening with a few hand stitches. The gathered neckline is now complete. Adjust the gathers to distribute them evenly.
Sew the side seams of the main body piece. If adding sleeves, attach them before sewing the side seams. Peasant tops often feature loose, gathered sleeves that echo the neckline.
Hem the bottom edge and sleeve edges. A narrow rolled hem works beautifully on lightweight peasant tops. The finished garment should have a relaxed, flowing silhouette.
Fabric Choices
Lightweight, flowing fabrics suit peasant tops perfectly. Cotton voile, gauze, and lightweight linen create the right drape. The fabric should gather easily without adding too much bulk.
Embroidered fabrics add extra charm to peasant styles. Look for cotton with delicate embroidery around the edges. This detail enhances the romantic aesthetic.
Project 5: Trendy Boxy Crop Top
Boxy crop tops feature straight, loose-fitting silhouettes. The style sits at or above the natural waist. This modern shape flatters many body types and feels comfortable to wear.
The construction is wonderfully simple. Most patterns use basic rectangles with minimal shaping. This makes them ideal beginner sewing projects tops that look contemporary and stylish.
Cutting and Construction
Measure from shoulder to where you want the hem to hit. Add seam allowances to this measurement. The width should be generous to create the boxy shape.
Cut front and back pieces as simple rectangles. Add armhole curves by drawing gentle scoops at the top corners. These don’t need to be perfectly shaped.
Sew the shoulder seams first. Keep these seams short to create dropped shoulders. The relaxed fit is part of the design aesthetic.
Finish the neckline with a facing or bias binding. A simple folded hem also works well. The neckline should be wide enough to slip over your head easily.
Finish the armholes with bias binding or folded hems. These raw edges need clean finishing since there are no sleeves to cover them.
Sew the side seams from armhole to hem. Try on the top before hemming. Adjust the length if needed to hit your preferred spot on your torso.
Hem the bottom edge with a wide hem. This adds weight to help the top hang properly. Press the hem thoroughly for a professional finish.
Pair boxy crops with high-waisted bottoms. Jeans, skirts, and shorts all work beautifully. The high waist balances the cropped length.
Layer crop tops over fitted long-sleeve shirts. This creates interesting proportions and extends their wearability into cooler seasons. The boxy shape layers well without adding bulk.
Project 6: Feminine Peplum Top
Peplum tops feature a flared ruffle at the waist. This detail adds visual interest and creates a flattering silhouette. The style works well in both casual and dressy fabrics.
The peplum construction introduces you to working with gathers and attached ruffles. These techniques apply to many other sewing projects. You’ll use these skills repeatedly as you advance.
Creating the Peplum Effect
The bodice fits smoothly through the shoulders and bust. At the waist, a gathered piece attaches to create the peplum flare. This piece can be a separate strip or cut as part of the pattern.
Gather the peplum piece to match the bodice waist measurement. Use two rows of long basting stitches. Pull the bobbin threads gently to create even gathers.
Assembly Steps
Construct the bodice first. Sew the shoulder seams and any darts or shaping details. Fit the bodice to your body before adding the peplum.
Prepare the peplum strip by finishing one long edge. This will be the bottom hem of the ruffle. A narrow rolled hem works nicely here.
Gather the opposite long edge of the peplum strip. Adjust the gathers to match the bodice waist measurement. Pin the gathered edge to the bodice waistline.
Sew the peplum to the bodice with right sides together. Take your time to keep the gathers even. Backstitch at the beginning and end for security.
Press the seam toward the bodice. From the right side, topstitch close to the seam line. This keeps the gathers in place and looks polished.
Complete the top by adding sleeves or finishing armholes. Sew the side seams in one continuous line through both bodice and peplum.
Fabric Selection
Crisp cottons hold the peplum shape beautifully. The fabric needs enough body to maintain the flare. Avoid very soft or drapey materials that will collapse.
Ponte knit creates structured peplum tops with stretch. This fabric combines the structure of woven materials with the comfort of knits. It’s perfect for fitted bodices.
Project 7: Versatile Tunic Length Top
Tunic tops extend past the hips for a longer silhouette. This length offers great coverage and creates elegant proportions. Tunics work beautifully over leggings, skinny jeans, or paired with wide-leg pants.
The extended length requires more fabric but doesn’t add construction difficulty. You’re essentially making a longer version of a basic top. The same techniques apply throughout.
Planning Your Tunic
Decide on your desired length before cutting fabric. Tunics typically fall anywhere from mid-thigh to just above the knee. Measure from your shoulder to your preferred hemline.
Consider adding side slits for ease of movement. These small details make longer tops more comfortable to wear. Slits should start about six inches from the hem.
Construction Process
Cut your pattern pieces with the extended length. Everything else remains the same as a regular top. The shoulders, neckline, and sleeves use standard construction methods.
Sew the shoulder seams and attach any collar or neckline treatment. Add sleeves if your design includes them. Many tunics work well as sleeveless or short-sleeved styles.
Create the side slits before sewing the side seams. Finish the slit edges with narrow hems or bias binding. The slits should be reinforced at the top to prevent tearing.
Sew the side seams from armhole down to the slit. Backstitch at the slit point for extra strength. Press the seams open for a professional finish.
Hem the bottom edge with a deeper hem than you’d use on a shorter top. The weight of a wider hem helps the tunic hang nicely. Press thoroughly for best results.
Best Fabrics
Drapey fabrics create flowing tunics that move beautifully. Rayon challis and lightweight linen work wonderfully. These materials have enough weight to hang well without clinging.
Cotton lawn makes crisp, structured tunics. This fabric maintains its shape through the longer length. It’s perfect for more tailored tunic styles.
Project 8: Simple Kimono Sleeve Top
Kimono sleeve tops feature wide, flowing sleeves cut as part of the bodice. This construction method eliminates set-in sleeves entirely. The result is a comfortable, dramatic top that’s actually quite simple to sew.
This style introduces you to different construction methods. Instead of separate sleeve pieces, the sleeve and bodice are one piece. This technique appears in many patterns and is useful to master.
Understanding Kimono Construction
The pattern piece extends from the center front or back all the way to the sleeve hem. When you sew the top together, the sleeves form naturally. This creates a relaxed, comfortable fit through the shoulders and arms.
Kimono sleeves can be short or long. The width varies from close-fitting to very dramatic. Beginners should start with a moderately wide sleeve that’s easy to handle.
Sewing Steps
Cut your front and back pieces on the fold. The pattern should be symmetrical. Pay attention to the grainline to ensure the fabric drapes correctly.
Finish the neckline first. A simple binding or facing works well. The wide neckline should slip over your head easily without additional closures.
Sew the top shoulder seam if your pattern includes one. Some kimono patterns have no shoulder seam at all. The fabric just folds over the shoulder naturally.
Sew from the sleeve hem down the underarm and continue to the side hem. This creates one long seam on each side. Take care at the underarm curve to keep it smooth.
Clip the underarm curve carefully. This allows the seam to lay flat without puckering. Press the seams open or to one side as the pattern directs.
Hem the sleeve edges and bottom edge. Wide kimono sleeves often feature deeper hems that add weight. This helps the sleeves drape beautifully.
Lightweight, flowing fabrics showcase kimono sleeves beautifully. The wide sleeves need fabric that drapes well. Rayon, silk, and soft cotton voile all work wonderfully.
Avoid heavy fabrics that add too much bulk. The wide sleeves can become overwhelming in thick materials. Keep the fabric weight light to medium for best results.
Essential Tips for Sewing Success
Certain practices improve every sewing project significantly. These tips apply whether you’re making your first simple tank or your tenth top. Following these guidelines helps you achieve professional results.
Pre-Washing Your Fabric
Always wash your fabric before cutting. Many fabrics shrink the first time they’re washed. Pre-washing prevents your finished garment from shrinking unexpectedly.
Dry and press the fabric after washing. This returns it to a smooth, workable state. Your pattern pieces will lay flat and cut accurately on prepared fabric.
Pressing Makes Perfect
Press your seams after every step. This single habit makes the biggest difference in finished quality. Pressed seams lay flat and look professional.
Use steam when pressing natural fabrics like cotton and linen. The moisture helps set the fabric in place. Avoid steam on some synthetics that might melt or distort.
Press seams open or to one side as the pattern directs. Each method serves different purposes. Open seams reduce bulk while seams pressed to one side add strength.
Take Accurate Measurements
Measure yourself carefully before choosing a pattern size. Don’t guess or use ready-to-wear clothing sizes. Sewing patterns follow different sizing than store-bought clothes.
Measure over the undergarments you’ll wear with the finished piece. This ensures accurate fit. Take bust, waist, and hip measurements at their fullest points.
Compare your measurements to the pattern size chart. Choose the size closest to your measurements. You can adjust between sizes if needed.
Master Professional Sewing Techniques
These tips are just the beginning. Learn comprehensive techniques that take your sewing from beginner to confident creator. Get access to detailed lessons on fabric preparation, precise measuring, professional pressing methods, and much more.
Always sew a test seam on scrap fabric first. This lets you check your stitch length and tension. Adjust settings if needed before sewing your actual project pieces.
Different fabrics require different settings. Knits need more stretch in the stitch. Heavy fabrics need longer stitch lengths. Testing prevents frustration and wasted fabric.
Use Quality Thread
Invest in good thread for your projects. Cheap thread breaks easily and creates weak seams. Quality thread sews smoothly and creates durable garments.
Match your thread fiber to your fabric when possible. Cotton thread for cotton fabric, polyester for synthetics. This ensures the thread and fabric shrink at the same rate.
Take Your Time
Rushing leads to mistakes that take longer to fix than careful sewing. Work at a comfortable pace. Sewing should be enjoyable, not stressful.
Pin carefully and remove pins as you sew. Never sew over pins as this can damage your needle or machine. Taking time to pin properly prevents shifting fabric.
Building Good Habits
Develop consistent practices from your first project. Clean your machine regularly and change needles often. Store fabric properly to prevent wrinkles and fading.
Keep your workspace organized. You’ll work more efficiently when tools are easy to find. A tidy space makes sewing more pleasant.
Learning from Mistakes
Every sewist makes mistakes, even experienced ones. View errors as learning opportunities. Understanding what went wrong prevents repeating the same mistake.
Keep a seam ripper handy and don’t fear using it. Fixing a mistake properly is better than leaving a flaw. Your skills improve with each correction.
How to Choose the Right Pattern
Pattern selection affects your project success significantly. The right pattern matches your skill level and style preferences. Understanding pattern information helps you make smart choices.
Reading Pattern Envelopes
Pattern envelopes contain crucial information. The front shows the finished garment and lists included sizes. The back provides fabric requirements and skill level indicators.
Look for patterns marked “easy,” “beginner,” or “quick to sew.” These designations indicate simpler construction methods. Save intermediate and advanced patterns for when you’ve built more skills.
Check the fabric recommendations carefully. The pattern designer tested specific fabric types. Following these suggestions increases your success rate.
Free Patterns vs. Purchased Patterns
Free sewing patterns are widely available online. Many bloggers and companies offer quality free patterns. These work perfectly for trying new styles without financial investment.
Free patterns often have less detailed instructions than purchased ones. You might need to fill in some gaps with your knowledge. This becomes easier as you gain experience.
Purchased patterns typically include more comprehensive instructions. The pattern pieces are usually better drafted. Consider these for important projects or when learning new techniques.
Understanding Ease
Ease refers to how much bigger the finished garment is than your body measurements. Positive ease means the garment is larger than your body. Negative ease means it’s smaller and relies on fabric stretch.
Different styles require different amounts of ease. Fitted tops have minimal ease. Loose, boxy styles have lots of ease. The pattern should specify the intended ease.
Choose patterns with ease amounts that match your style preferences. If you like fitted clothes, look for patterns with minimal ease. For relaxed fits, choose patterns with generous ease.
Start with patterns rated for beginners or easy skill levels
Read all pattern information before purchasing or downloading
Check fabric requirements to ensure you have enough material
Look for patterns with clear, detailed instructions and diagrams
Consider the number of pattern pieces as an indicator of complexity
Choose styles you’ll actually wear to stay motivated to complete them
Common Beginner Mistakes and How to Avoid Them
New sewists often make the same mistakes. Recognizing these pitfalls helps you avoid them. Your projects will turn out better when you know what to watch for.
Skipping the Instructions
Reading pattern instructions thoroughly saves time and frustration. Instructions guide you through the correct construction order. Skipping ahead often leads to mistakes that are difficult to fix.
Review the entire instruction sheet before starting. This gives you an overview of the construction process. You’ll understand how pieces fit together and which steps come first.
Not Testing Fit
Many beginners cut their fabric and sew without testing the fit first. Creating a muslin test garment prevents wasting good fabric. Use cheap fabric to test the pattern before cutting your final material.
Try on the test garment and make adjustments. Mark any changes needed for better fit. Transfer these adjustments to your pattern before cutting the good fabric.
Choosing Difficult Fabrics
Slippery, stretchy, or very thick fabrics challenge even experienced sewists. Beginners should stick with stable, medium-weight cottons and linens. These fabrics are forgiving and easy to handle.
Save special fabrics for when you have more experience. Your third or fourth project will turn out better than your first. Build skills on easy materials first.
Quick Tip: If you make a mistake, don’t panic. Most errors can be fixed with a seam ripper and patience. Learning to correct mistakes is part of developing sewing skills. Each fix teaches you something valuable.
Neglecting Pattern Adjustments
Commercial patterns are drafted for standard body shapes. Most people need some adjustments for perfect fit. Common adjustments include lengthening or shortening the bodice and adjusting for different bust sizes.
Learn basic pattern adjustments early in your sewing journey. Small tweaks make a huge difference in how your finished garments fit and feel. Well-fitting clothes are more rewarding to sew and wear.
Rushing Through Projects
Trying to finish too quickly leads to sloppy work. Take your time with each step. Careful sewing produces better results than rushing through to reach the end.
Set realistic timelines for projects. A simple top might take a full afternoon or several shorter sessions. Don’t expect to complete complex projects in an hour.
Taking Your Sewing Skills Further
After completing several beginner sewing projects tops, you’ll be ready for new challenges. Your skills have developed significantly. You understand basic construction and feel comfortable at your machine.
Intermediate Techniques to Explore
Set-in sleeves offer more tailored looks than simple sleeves. This technique requires careful pinning and easing. The results are worth the extra effort.
Buttonholes and zippers add functional closures to your garments. These skills open up new pattern possibilities. Start with simple projects to practice these techniques.
Darts and princess seams create fitted, shaped garments. These techniques require precision but aren’t difficult. They dramatically improve how your clothes fit and look.
Expanding Your Pattern Collection
Build a library of patterns in styles you love. Having go-to patterns you’ve tested and adjusted saves time. You can make the same pattern multiple times in different fabrics for completely different looks.
Try indie pattern designers for unique styles. Many small companies create interesting, modern designs. These patterns often include helpful sew-alongs and community support.
Joining the Sewing Community
Connect with other sewists online and locally. Sewing groups offer support, inspiration, and friendship. You’ll learn new techniques and discover helpful resources.
Share your makes on social media using hashtags. The sewing community is welcoming and supportive. Seeing others’ work inspires new projects and techniques to try.
Continue Your Sewing Education
You’ve learned the basics of beginner sewing projects tops. Now take your skills to the next level with comprehensive courses covering intermediate and advanced techniques. Access detailed video tutorials, downloadable patterns, and expert guidance that builds on what you’ve learned here.
Create achievable sewing goals to maintain momentum. Maybe you want to sew one garment per month. Perhaps you want to master a specific technique. Clear goals keep you progressing.
Track your projects in a sewing journal or online. Note what worked well and what you’d change. This record becomes valuable reference material for future projects.
Challenge yourself gradually with slightly more complex projects. Each success builds confidence. You’ll be amazed at how quickly your skills develop with regular practice.
Start Creating Your Handmade Wardrobe
You now have eight complete beginner sewing projects tops to try. Each pattern teaches important techniques while creating wearable garments. Start with the project that excites you most.
Remember that every experienced sewist started exactly where you are now. The first project might not be perfect, and that’s completely normal. Each piece you create improves your skills and confidence.
Gather your supplies and choose your first project. Select fabric you love and follow the instructions carefully. Take your time and enjoy the creative process. Soon you’ll be wearing tops you made with your own hands.
The sewing journey offers endless opportunities for creativity and self-expression. These beginner projects are just the beginning. Your handmade wardrobe starts today.