Creating your own tops through sewing opens up a world of creative possibilities. You can craft unique pieces that fit perfectly and express your personal style. This tutorial will walk you through every step of the process, from selecting your first pattern to finishing your handmade top.
This Website contains affiliate links. That means I may earn a small commission if you purchase through my links, at no extra cost to you.
Whether you’ve never touched a sewing machine or you’re looking to expand your skills, this guide makes the journey simple. You’ll discover practical techniques that transform basic fabric into wearable art. The best part? You don’t need expensive equipment or years of experience to get started.
Ready to Start Your Sewing Journey?
Access comprehensive patterns and step-by-step video tutorials designed specifically for beginners who want to create beautiful tops with confidence.
Selecting appropriate fabric makes all the difference in your sewing experience. Beginners should start with forgiving materials that are easy to handle and sew. Cotton and cotton blends work wonderfully for your first projects because they don’t slip or stretch excessively.
Woven fabrics provide stability during construction. They hold their shape well and press beautifully. Look for medium-weight cotton, linen, or chambray at your local fabric store. These materials forgive small mistakes and create professional-looking results.
Knit fabrics offer comfort and stretch but require more experience. If you choose stretch fabric, select one with good recovery. The fabric should bounce back to its original shape after you pull it. Jersey knits work well for casual everyday tops once you’ve completed a few woven projects.
Best Fabrics for Beginners
Medium-weight cotton (quilting cotton works great)
Cotton lawn for lightweight summer tops
Linen and linen blends for breathable garments
Chambray for structured casual tops
Fabrics to Avoid Initially
Slippery satins and silks
Very stretchy jerseys without stability
Sheer or delicate fabrics
Heavy denims or canvas
Purchase extra fabric beyond pattern requirements. Having additional material allows you to practice techniques and fix mistakes. Most patterns for a simple top require two to three yards of fabric, depending on your size and the design.
Understanding Sewing Patterns and Measurements
A sewing pattern serves as your blueprint for construction. It provides all the piece shapes, cutting instructions, and assembly steps needed. Reading a pattern might seem overwhelming at first, but the process becomes intuitive with practice.
Start by taking accurate body measurements. You’ll need your bust measurement, waist, and the length from shoulder to desired hem. Measure over the undergarments you’ll wear with the finished top. Compare your measurements to the pattern size chart to select the right size.
Don’t assume your pattern size matches your ready-to-wear clothing size. Pattern sizes often run differently than store-bought garments. Always choose based on your actual measurements. If you fall between sizes, select the larger size for easier fitting adjustments.
Pro Tip: Many beginner-friendly patterns include multiple sizes on one pattern sheet. This feature lets you blend between sizes if your measurements don’t match one size perfectly. You can trace your custom size before cutting.
The pattern envelope contains crucial information. Look for the recommended fabric types, yardage requirements, and notions list. The back of the pattern shows technical drawings and finished measurements. Study these details before purchasing fabric.
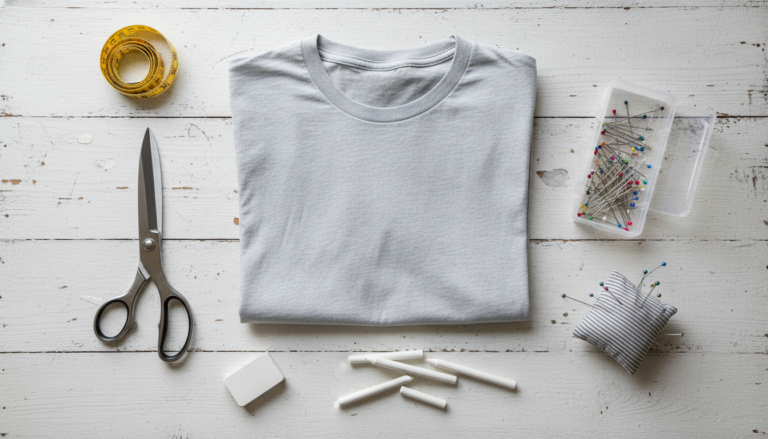
Having the right tools makes your sewing experience enjoyable and efficient. You don’t need every gadget available, but certain basics ensure quality results. Start with essential items and add specialty tools as you progress.
Cutting Tools
Sharp fabric scissors (8-inch dressmaker shears)
Small detail scissors for clipping
Rotary cutter and mat (optional but helpful)
Marking and Measuring
Fabric marking pen or chalk
Measuring tape (flexible)
Clear ruler for straight lines
Construction Essentials
Glass-head pins or safety pins
Hand-sewing needles
Seam ripper for fixing mistakes
Your sewing machine doesn’t need to be expensive or complex. A basic machine with straight stitch and zigzag capabilities handles most top construction. Learn to thread your machine properly and practice on scrap fabric before starting your project.
Keep your machine in good working order. Clean out lint regularly and change needles frequently. A dull or damaged needle causes skipped stitches and fabric damage. Replace the needle after every major project or eight hours of sewing time.
Quality thread makes a significant difference in stitch quality. All-purpose polyester thread works for most projects. Match the thread color to your fabric or choose a shade slightly darker. Keep both white and black thread on hand as universal options.
Preparing Your Fabric Before Cutting
Proper fabric preparation prevents disappointing results after the first wash. Most fabrics shrink to some degree when laundered. Pre-washing eliminates this shrinkage before you cut and sew your top.
Wash your fabric using the same method you’ll use for the finished garment. If you plan to machine wash and dry your top, do the same with the fabric before cutting. Use warm water and regular detergent. Dry completely and press out any wrinkles.
Some fabrics require special pre-treatment. Linen benefits from washing twice to achieve maximum softness. Dark colors may bleed during the first few washes, so wash them separately. Check for colorfastness by dampening a small corner and pressing it against white fabric.
Important: Pre-washing also removes sizing and chemicals used during fabric manufacturing. These substances can cause needle gumming and interfere with stitch formation. Clean fabric sews more smoothly.
Press your fabric thoroughly before laying out pattern pieces. Use a hot iron appropriate for your fabric type. Remove all wrinkles and fold lines. Smooth fabric ensures accurate cutting and proper pattern piece alignment.
Straighten the fabric grain if necessary. The lengthwise and crosswise threads should form perfect right angles. Gently pull the fabric on the bias to square up the grain. This step ensures your finished top hangs correctly on the body.
Cutting Out Your Pattern Pieces Accurately
Accurate cutting sets the foundation for professional results. Take your time during this step. Rushing through cutting leads to ill-fitting pieces that are difficult to assemble correctly.
Fold your fabric according to pattern instructions. Most tops require fabric folded right sides together. This technique allows you to cut symmetrical pieces like the front and back simultaneously. Align the selvage edges and smooth out any bubbles or wrinkles.
Pin pattern pieces to fabric following the grainline arrows. These arrows must run parallel to the selvage edge. Use enough pins to keep the pattern flat against the fabric. Pin inside cutting lines to avoid creating holes in your pattern piece.
Cut carefully along the cutting lines. Use long, smooth strokes with your scissors. Keep the fabric flat on your cutting surface and cut with the lower blade close to the table. Don’t lift the fabric excessively while cutting.
Transfer Pattern Markings
Mark all notches, dots, and symbols onto your fabric pieces. These markings guide assembly and ensure proper alignment. Use tailor’s chalk, fabric pens, or small clips to transfer information.
Mark dart points and stitching lines
Transfer notch locations for matching
Indicate front and back pieces clearly
Note right side versus wrong side of fabric
Label each piece as you cut. Place small sticky notes or pins to identify front, back, sleeves, and any facing pieces. This organization prevents confusion during construction. Keep all pieces together in a safe location.
Master Professional Sewing Techniques
Learn expert cutting and construction methods with detailed video demonstrations. Perfect for beginners who want professional-quality results from their first project.
Assembly follows a logical sequence that builds the garment piece by piece. Most simple tops start with shoulder seams, then add sleeves or finish armholes, and finally close the side seams. This order creates a sturdy structure.
Begin by joining the front and back pieces at the shoulder seams. Place the pieces right sides together, matching the edges perfectly. Pin along the seamline with pins perpendicular to the edge. This placement allows you to sew over the pins or remove them easily as you stitch.
Sew shoulder seams using a straight stitch. Start at one edge and backstitch a few stitches to secure the thread. Sew along the seamline at an even pace. Guide the fabric gently without pulling. Backstitch again at the end of the seam.
Press seams after stitching each one. Use an iron to set the stitches first by pressing the seam flat as sewn. Then open the seam allowances and press them flat to each side. Proper pressing creates crisp, professional-looking seams that lay smoothly.
Pin and sew shoulder seams of front and back pieces
Press shoulder seams open and flat
Finish neck edge with bias binding or facing
Attach sleeves or finish armholes with binding
Sew side seams from hem to sleeve edge
Press all seams and finish raw edges
Hem the bottom edge to desired length
Give final press for professional finish
Finishing Necklines and Armholes with Bias Binding
Bias binding provides a clean, professional finish for curved edges. This technique works beautifully on necklines and armholes, especially for sleeveless tops. The bias-cut strip stretches around curves without puckering.
You can purchase pre-made bias binding or create your own from coordinating fabric. Ready-made binding saves time and comes in many colors. Custom binding allows perfect color matching and adds a designer touch to your top.
To apply bias binding, open one folded edge and align it with the raw edge of your neckline. The right side of the binding should face the right side of the fabric. Pin the binding all around the neck opening, easing it around curves.
Stitch along the fold line of the binding. Sew carefully around curves, going slowly and adjusting the fabric as needed. When you reach the starting point, overlap the binding ends by half an inch. Trim excess binding.
Binding Application Tip: Start and end the binding at a shoulder seam or side seam where the join will be less visible. This placement creates a neater finish and makes connecting the binding ends easier.
Fold the binding over the raw edge to the wrong side of the fabric. The binding should cover the stitching line completely. Pin the binding in place from the right side, catching the folded edge on the back.
Stitch in the ditch from the right side. This technique involves sewing right in the seam where the binding meets the fabric. The stitching catches the folded edge on the back while remaining nearly invisible from the front. Go slowly and keep stitches directly in the seamline.
Press the finished binding edge flat. The binding should create a smooth, even border around the neckline. Repeat the same process for armholes on sleeveless tops. Consistent binding width creates a polished, professional appearance.
Adding Sleeves to Your DIY Top
Sleeves transform a basic top and add variety to your wardrobe. Several simple sleeve styles work well for beginners. Cap sleeves, short sleeves, and three-quarter length sleeves are all manageable options for your first projects.
Set-in sleeves require precision but create a classic look. Pin the sleeve into the armhole, matching notches and shoulder seams. The sleeve cap has extra fabric that eases into the armhole. Distribute this ease evenly around the top of the sleeve cap.
Sew the sleeve seam first before attaching it to the armhole. Fold the sleeve piece right sides together and stitch from the bottom edge to the top. Press the seam open. This step creates a tube that will set into the armhole opening.
With the top turned wrong side out and the sleeve right side out, slip the sleeve into the armhole. Match the underarm seams and shoulder markings. Pin generously around the entire armhole, easing any fullness.
Stitch the sleeve into the armhole with the sleeve side up. This position allows you to control the ease as you sew. Take your time around the curves. A second row of stitching reinforces this stress point and creates a stronger seam.
Side seams connect the front and back pieces to create the body of your top. These long, straight seams are simple to sew and give your garment its final shape. Accurate sewing ensures both sides match perfectly.
Match the front and back at the side edges, right sides together. Align the bottom hems and any waistline markings. Pin from bottom to top, placing pins perpendicular to the edge. If your top has sleeves, the side seam will continue into the sleeve seam as one continuous line.
Sew from the bottom hem up to the sleeve edge in one continuous seam. Keep your seam allowance consistent, typically five-eighths of an inch unless your pattern specifies differently. Press the side seams toward the back of the garment for a smooth finish.
Finish raw edges to prevent fraying. A zigzag stitch along the raw edge works well for woven fabrics. Serging or overlocking creates the most professional edge finish if you have access to a serger machine. Pinking shears offer a simple alternative for fabrics that don’t fray excessively.
The hem finishes the bottom edge of your top. Determine your desired length and mark the hemline evenly all around. Fold the bottom edge up by the hem allowance specified in your pattern. Press the fold to create a crisp edge.
Fold the raw edge under again to enclose it completely. This double-fold hem creates a clean finish without raw edges showing. Pin the hem in place all around the bottom of the top. Distribute any slight fullness evenly.
Stitch the hem close to the inner folded edge. You can use a straight stitch or a blind hem stitch for an invisible finish. Backstitch at the beginning and end of your hem stitching. Press the completed hem for a professional appearance.
Making Simple Fitting Adjustments
A fitting session reveals areas that need adjustment. Try on your top inside out during construction to check the fit. This timing allows you to make changes before finishing all the edges and details.
The bust area should fit comfortably without pulling or gaping. If the top feels tight across the bust, you can let out the side seams slightly. Take in side seams if the top feels too loose. Make matching adjustments on both sides for balanced fit.
Common Fit Issues and Solutions
Address these typical problems with simple adjustments:
Tight shoulders – release shoulder seams slightly
Gaping neckline – take in shoulder seams or add darts
Long waist – adjust length at hemline or add waist shaping
Tight armholes – trim armhole edge and rebind
Perfect Fit Checklist
Your finished top should meet these standards:
Shoulder seams sit on shoulder points
Neckline lays flat without pulling
Bust area has appropriate ease for movement
Side seams hang straight from underarm to hem
Length adjustments are simple to make. Hem the top shorter if needed by folding up more fabric. For a longer top, you can add a contrasting band at the bottom or plan for extra length when cutting your next top.
Keep notes about adjustments you make. Record any changes for future reference. These notes become your personal fitting guide. You’ll make fewer adjustments on subsequent projects as you learn what works for your body.
Creating Variations with Different Fabrics
The same pattern creates completely different looks when sewn in various fabrics. This versatility lets you build a diverse wardrobe from one well-fitting pattern. Experiment with fabric choices to express different styles and suit various occasions.
Cotton prints create casual, everyday tops perfect for weekend wear. Choose small-scale prints for a classic look or bold patterns for statement pieces. Stripe placement adds visual interest, especially when you match stripes at seams.
Linen and linen blends produce elegant, breathable tops ideal for warm weather. The natural texture of linen adds sophistication to simple designs. Expect some wrinkling with linen – it’s part of the fabric’s charm and relaxed aesthetic.
Chambray offers the look of denim with easier handling. This fabric works beautifully for casual button-front tops or simple pullover styles. Pair chambray tops with various bottoms for versatile, year-round wear.
Casual Day Looks
Cotton prints with jeans
Jersey knits for comfort
Chambray for weekend style
Work-Appropriate Fabrics
Solid cotton in classic colors
Subtle striped patterns
Lightweight wool blends
Special Occasion Tops
Silk or silk-like fabrics
Metallic or sparkle materials
Rich jewel-tone solids
Once you master stretch fabrics, knit tops become wardrobe staples. Jersey, ponte, and other stable knits create comfortable, easy-care garments. Use a ballpoint needle and slight stretch when sewing knits for best results.
Expand Your Sewing Skills and Fabric Knowledge
Discover which fabrics work best for different top styles. Get expert guidance on fabric selection, handling techniques, and design variations that multiply your wardrobe options.
Even experienced sewers encounter occasional problems. Knowing how to identify and fix common issues saves time and reduces frustration. Most problems have simple solutions once you understand the cause.
Skipped stitches usually indicate a needle problem. Change to a fresh needle and ensure you’re using the correct needle type for your fabric. Rethread both the top and bobbin, checking that thread flows freely through all guides.
Puckered seams result from tension issues or pulling fabric while sewing. Adjust your thread tension slightly and let the machine feed the fabric naturally. Don’t push or pull as you sew. Press seams carefully to help release minor puckering.
Why does my thread keep breaking?
Thread breakage happens when the thread is old and brittle, the needle is damaged or too small, or the tension is too tight. Replace the needle, use fresh thread, and slightly loosen the upper tension. Check that the thread isn’t catching on any rough spots on the machine.
How do I fix uneven hems?
Measure from the waist down to mark an even hemline all around the garment. Use a hem gauge or ruler to ensure consistent measurement. Pin the hem and try on the top before stitching. Adjust as needed for an even appearance when worn.
What causes my neckline to ripple?
Neckline rippling occurs when the bias binding or facing is stretched during application. Pin carefully without pulling the binding. Sew at a relaxed pace around curves. If rippling appears after sewing, you may need to remove the binding and reapply it without stretching.
Uneven seams need attention before proceeding with construction. Use a seam ripper to remove incorrect stitching. Take your time during removal to avoid damaging the fabric. Re-pin the seam accurately and sew again, maintaining consistent seam allowance.
Pattern pieces that don’t match indicate cutting errors or stretched fabric. Check your pattern piece orientation and grainline alignment. Verify that you haven’t accidentally cut a left and right piece when you needed two of the same side.
Building Your Skills and Next Projects
Completing your first top builds confidence for more advanced projects. Each garment you create teaches new skills and improves your technique. Plan your next projects to gradually increase complexity while maintaining success.
Start with basic shapes and simple construction. Master these fundamentals before adding complex details like buttons, zippers, or elaborate necklines. Solid skills in basic techniques make advanced features much easier to learn.
Try different pattern styles within the beginner category. A simple A-line top differs from a fitted style, teaching you about shaping and darts. Vary necklines, sleeve lengths, and hem styles to expand your skills without overwhelming complexity.
Join sewing communities online or in person. Fellow sewers offer support, answer questions, and share their experiences. Many communities host sew-alongs where everyone makes the same pattern together, providing motivation and shared learning.
Continue Learning
Dedicate regular time to sewing practice. Even thirty minutes a day improves skills quickly. Work through multiple versions of the same pattern in different fabrics. Repetition builds muscle memory and confidence.
Document Your Progress
Photograph each completed project and keep notes about what worked well. Record fabric types, pattern adjustments, and lessons learned. This documentation becomes a valuable resource for future sewing sessions.
Challenge Yourself
Once you’ve completed three or four basic tops, try a pattern with one new technique. Add a button placket, insert a zipper, or work with a new fabric type. Gradual challenges prevent frustration while expanding abilities.
Invest in quality tools as you progress. Better scissors, a reliable machine, and good lighting make sewing more enjoyable. You don’t need everything at once – add tools gradually as your budget allows and your skills develop.
Start Creating Your Handmade Wardrobe Today
Sewing easy DIY tops opens creative possibilities and practical benefits. You control fit, fabric choice, and style details that store-bought clothing cannot offer. Each top you create saves money while building valuable skills that last a lifetime.
The journey from beginner to confident sewer happens one project at a time. Start with simple patterns and forgiving fabrics. Build your skills through practice and patience. Soon you’ll tackle more complex designs with the same confidence you bring to basic tops today.
Remember that every expert sewer started exactly where you are now. Mistakes happen and provide learning opportunities. Embrace the process and celebrate each finished project, regardless of minor imperfections. Your skills improve with every stitch you make.
Your handmade wardrobe reflects your personal style in ways ready-made clothing never can. The satisfaction of wearing something you created yourself brings joy every time you put it on. Start your sewing journey today and discover the rewarding world of handmade fashion.
Begin Your Sewing Journey with Expert Guidance
Access comprehensive sewing tutorials, professional patterns, and step-by-step video instruction designed specifically for beginners. Transform from nervous novice to confident creator with proven methods that guarantee success.