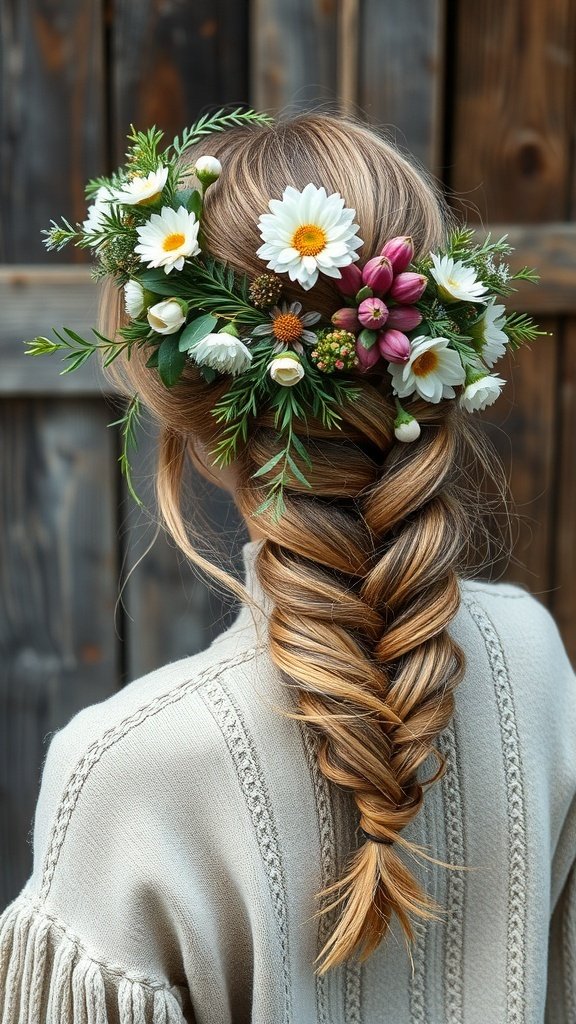
Creating your own dress feels magical. You pick the fabric. You choose the style. You wear something nobody else has.
This Website contains affiliate links. That means I may earn a small commission if you purchase through my links, at no extra cost to you.
Many people think sewing dresses requires years of practice. That’s not true. With the right pattern and basic skills, you can make a beautiful dress this weekend.
This guide shows you exactly how to start. You’ll learn which patterns work best for beginners. You’ll discover simple techniques that professional sewers use. And you’ll finish with a dress you’re proud to wear.
Your pattern choice determines everything. Pick too complicated, and you’ll get frustrated. Pick too simple, and you won’t learn much.
The best first dress patterns share common features. They use basic shapes. They require minimal fitting adjustments. And they look great even if your stitching isn’t perfect.
Best Beginner-Friendly Dress Styles
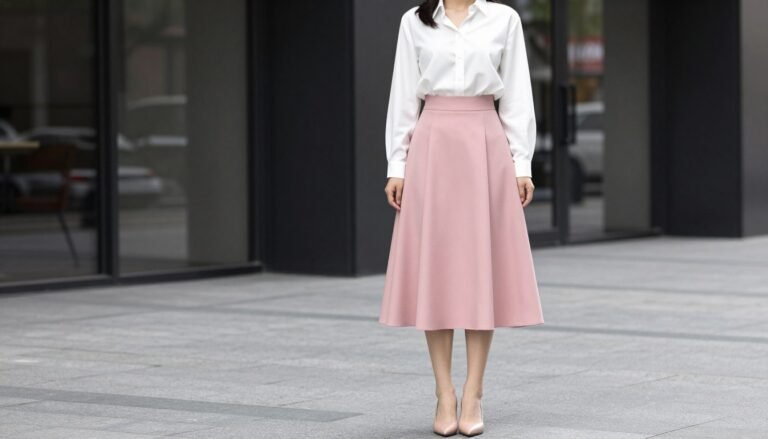
A shift dress makes an excellent starting point. This loose fitting dress hangs from your shoulders. You don’t need darts or complex shaping. Just cut the pieces and sew them together.
The smock dress offers another great option. It features elastic or gathering at the waist. This forgiving style doesn’t require precise measurements. Small mistakes won’t show in the final garment.
Tank top style dresses work well for summer. They skip complicated sleeves entirely. You focus on getting the body right. Once you master this style, adding sleeves becomes easier.
Understanding Pattern Markings
Every dress pattern includes important symbols. Notches show where pieces connect. Grain lines indicate fabric direction. Dots mark pivot points for sewing.
Learning these markings takes about ten minutes. After that, you can read any pattern. The symbols stay consistent across brands and styles.
Fabric choice makes sewing easier or harder. Some materials forgive mistakes. Others show every imperfect stitch.
Best Fabrics for Beginner Dress Patterns
Cotton quilting fabric tops the list for first projects. It doesn’t shift while cutting. It holds its shape while sewing. And it costs less than specialty fabrics.
Knit fabric works wonderfully for casual dresses. It stretches enough to slip over your head. You don’t need zippers or buttons. Just sew and wear.
Linen blends provide structure without stiffness. These fabrics press beautifully. Your seams look crisp and professional. The natural texture hides small irregularities.
Fabric Amounts and Preparation
Most simple dress patterns require two to three yards. Your pattern envelope lists exact amounts for each size. Buy an extra half yard for practice pieces and mistakes.
Always prewash fabric before cutting. Cotton shrinks up to five percent. Washing first prevents your finished dress from shrinking later. It also removes chemical finishes that affect sewing.
Woven Fabrics
Cotton, linen, and chambray don’t stretch. They’re perfect for structured shift dress and loose fitting dress styles. Press seams flat for professional results.
Holds shape beautifully
Easy to cut accurately
Requires finishing seams
Knit Fabrics
Jersey, interlock, and ponte knits stretch for comfort. They’re ideal for summer dress designs and casual styles. Use a ballpoint needle to prevent snags.
Comfortable and forgiving
No closures needed
Requires stretch stitches
Special Occasion
Save silk, satin, and delicate fabrics for later projects. These materials require advanced techniques. Start with cotton and progress gradually to fancier options.
Beautiful but challenging
Shows every mistake
Better for third or fourth dress
Ready to Start Your First Dress?
Get access to beginner-friendly patterns with detailed fabric recommendations and step-by-step guidance perfect for your skill level.
Measurements determine fit. Accurate numbers mean your dress looks tailored. Guesswork leads to baggy or tight results.
Essential Measurements for Dress Sewing
You need just four measurements for most simple patterns. Bust measures the fullest part of your chest. Waist wraps around your natural waistline. Hips circle the fullest part below your waist. Length runs from shoulder to desired hem.
Ask someone to help measure you. Holding the tape yourself pulls it off-center. Stand naturally without sucking in your stomach. Comfortable posture gives accurate numbers.
Choosing Your Pattern Size
Pattern sizes don’t match ready-to-wear clothing. A size twelve pattern might fit someone who wears size eight in stores. Always choose by measurements, not labels.
If your measurements fall between sizes, pick the larger one. Taking in excess fabric is easier than adding more. Loose fitting dress styles forgive sizing variations better than fitted ones.
Measurement Point
How to Measure
Common Mistakes
Bust
Around fullest part, tape parallel to floor
Pulling tape too tight, measuring over bulky clothing
Waist
At natural waistline where you bend sideways
Measuring at belly button instead of natural waist
Hips
Around fullest part, usually seven to nine inches below waist
Measuring too high or with feet together
Length
From shoulder seam to desired hemline
Starting at neck instead of shoulder point
Cutting Your Fabric Correctly
Cutting determines accuracy. Precise cuts mean pieces fit together perfectly. Sloppy cutting creates problems that sewing can’t fix.
Preparing Your Workspace
Use a large flat surface. Kitchen tables work well. Cover carpet with cardboard for floor cutting. You need space to lay out fabric without folds or wrinkles.
Press your fabric before cutting. Wrinkles distort pattern pieces. Iron out every crease. This step takes fifteen minutes but saves hours of frustration.
Layout and Cutting Techniques
Follow the layout diagram included with your pattern. It shows the most efficient arrangement. This saves fabric and ensures grain lines run correctly.
Pin pattern pieces every three to four inches. More pins prevent shifting. Place pins perpendicular to cutting lines. This lets scissors glide smoothly without catching.
Mastering a few techniques unlocks dress sewing. You don’t need fancy skills. Simple methods produce beautiful results.
Straight Seams and Seam Finishes
Most dress seams run straight. Guide fabric evenly under the presser foot. Watch the seam guide, not the needle. Your stitches stay consistent this way.
Finish seams to prevent fraying. Zigzag stitch works on any machine. Sergers create professional edges faster. Pink shears offer a no-sewing option for non-fraying fabrics.
Hemming Your Dress
The hem finishes your dress. A crooked hem ruins the overall look. Take time to get this right.
Try on your dress before hemming. Mark the desired length with pins. Remove the dress carefully. Fold and press the hem allowance. Stitch close to the folded edge.
Beginner Tip: For your first dress, choose a simple hem style. A double-fold hem works for woven fabrics. A single-fold hem with zigzag stitch suits knit fabric. Save fancy hems for later projects.
Adding Simple Necklines and Armholes
Facing finishes necklines professionally. This separate piece folds to the inside. It hides raw edges beautifully. Your pattern includes facing pieces already shaped correctly.
Bias tape offers an easier alternative. Buy pre-made tape or cut your own. Wrap it around the raw edge. Stitch both sides. You’re done in minutes.
Sewing Your Own Dresses
Custom fit matches your exact measurements
Fabric choice creates unique style nobody else has
Cost savings compared to boutique prices
Sustainable fashion reduces clothing waste
Skill building opens endless creative possibilities
Certain patterns appear repeatedly in beginner recommendations. These designs earned their reputation through proven success. Thousands of first-time sewers completed these patterns successfully.
The Classic Summer Dress
A summer dress pattern offers the perfect starting point. Most designs feature simple straps or cap sleeves. The body hangs loosely from the shoulders. You can finish one in an afternoon.
Cotton lawn or voile works beautifully for summer dresses. These lightweight fabrics feel cool against skin. They drape nicely without requiring complex shaping. Machine wash and hang to dry.
The Comfortable Maxi Dress
A maxi dress combines comfort with style. The long length hides hem imperfections better than short dresses. Knit fabrics work especially well for this style.
Most maxi dress patterns use knit fabric with good stretch. Jersey, interlock, or ponte all work well. The fabric stretches as you pull the dress over your head. No zippers or buttons needed.
Simple Shift Dress
This timeless style features straight lines and minimal shaping. Perfect for confident beginners ready to practice straight seams and basic finishing.
Only four to six pattern pieces total
No darts or complex fitting required
Works in woven or knit fabric
Add pockets for extra practice
Gathered Waist Dress
Elastic or drawstring waist creates flattering shape without precise fitting. Forgiving style accommodates measurement variations beautifully.
Elastic waist eliminates zipper installation
Gathering technique adds fullness naturally
Adjustable fit works for size fluctuation
Learn gathering in manageable project
Tank Top Dress
Eliminate sleeve complications entirely with this sleeveless design. Focus on body construction while learning armhole finishing techniques.
No sleeve setting skills required
Bias tape finish looks professional easily
Quick project builds sewing confidence
Perfect for warm weather wearing
Resources from Peppermint Magazine and Others
Peppermint Magazine publishes excellent beginner patterns regularly. Their designs focus on modern style with simplified construction. Clear instructions guide you through each step.
Many free sewing pattern websites offer quality options. Look for patterns marked beginner or easy. Read reviews from other sewers. Their experiences reveal potential challenges before you start.
Troubleshooting Common Beginner Issues
Everyone encounters problems learning to sew. Knowing solutions beforehand prevents frustration. Most issues have simple fixes.
Fabric Bunching Under the Needle
Thin fabrics sometimes get pushed into the needle plate hole. This bunches fabric and jams the machine. Place tissue paper under thin fabric while sewing. Tear it away afterward.
Check your needle size too. Heavy needles create large holes in delicate fabric. Use size nine or eleven needles for lightweight cotton. Save size fourteen and larger for heavy fabrics.
Uneven Hem Length
Hems look crooked when marked while wearing the dress. Fabric shifts as you move. Instead, hang your dress overnight. Gravity settles the fabric. Then mark your hem on a flat surface.
Use a hem gauge or ruler for consistent measurements. Mark every few inches around the entire hem. Connect the marks with pins or chalk. This creates an even hemline.
Stretched Out Necklines
Knit fabric necklines stretch during sewing. Stay tape prevents this problem. Cut a piece of twill tape matching the neckline length. Sew it into the neckline seam. The tape stabilizes knit fabric.
For woven fabrics, avoid pulling fabric through the machine. Let the feed dogs do the work. Guide gently without tension. Your neckline maintains its original size.
How long does it take to sew a simple dress?
Most beginners complete a simple shift dress or tank top style dress in four to six hours. This includes cutting fabric, sewing seams, and finishing the hem. Complex styles like a fitted bodice or maxi dress may require eight to ten hours for first attempts. Your speed increases with each project.
Can I sew a dress without a serger?
Absolutely. Regular sewing machines handle dress construction perfectly. Use zigzag stitches to finish seam edges. French seams create beautiful finishes inside woven fabric dresses. Millions of sewers create professional dresses using only standard machines.
What’s the easiest neckline finish for beginners?
Bias tape creates the simplest neckline finish. Buy pre-made bias tape in coordinating colors. Pin it around your neckline raw edge. Sew both edges down. This method works for any neckline shape and looks professionally finished with minimal effort.
Should I use woven or knit fabric for my first dress?
Woven cotton fabric works best for absolute beginners. It doesn’t stretch or shift while cutting and sewing. Quilting cotton provides excellent practice material. Once you’re comfortable with wovens, try jersey knit fabric for a comfortable summer dress or casual maxi dress style.
Never Get Stuck on Your Sewing Projects
Access comprehensive video tutorials showing exactly how to solve common problems and complete every technique with confidence.
Small details separate homemade looking from handmade beautiful. Professional finishes take minutes but transform your dress.
Pressing as You Sew
Press every seam before crossing it with another. This single habit improves your results dramatically. Pressed seams lie flat. Your topstitching looks straight and professional.
Set up your ironing board next to your sewing machine. Press each seam open immediately after sewing it. This rhythm becomes automatic quickly. Your finished dress looks store bought.
Topstitching for Extra Detail
Topstitching adds visual interest to simple patterns. Sew a straight line near finished edges. This highlights seams and hems beautifully. Use contrasting thread for bold style or matching thread for subtle detail.
Practice topstitching on scrap fabric first. Find your comfortable seam guide distance. Most topstitching runs one-eighth to one-quarter inch from the edge. Consistent distance looks intentional and polished.
Hand Stitching Invisible Details
A few hand stitches secure facings invisibly. Tack facing to shoulder seams with three or four stitches. This prevents facings from rolling to the outside. Nobody sees the stitches, but they keep everything in place.
Hem blindstitch by hand creates an invisible finish on woven fabrics. Take tiny stitches catching just one or two threads of the outer fabric. Your hem disappears from the outside. This technique takes practice but creates beautiful results.
Quick Finishing Checklist
Clip all loose thread tails completely
Press entire dress thoroughly before wearing
Check all seams for gaps or skipped stitches
Secure facing edges to prevent rolling out
Hem hangs evenly all around bottom edge
Neckline lies flat without gaping or pulling
Try on dress to verify comfortable fit
Building Your Sewing Skills Progressively
Each dress you complete teaches new techniques. Smart progression builds confidence without overwhelming you.
Your Learning Path
Start with the absolute simplest pattern you find appealing. Complete it fully, even if it’s not perfect. Wear it proudly. This proves you can finish projects.
For your second dress, add one new element. Try a different neckline. Attempt patch pockets. Each project introduces one new skill. This gradual approach prevents frustration.
4.8
Overall Beginner Success Rate
Pattern Clarity
4.6/5
Instruction Quality
4.8/5
Beginner Success
4.7/5
Time Investment
4.9/5
Joining the Sewing Community
Online sewing communities offer incredible support. Members share photos, answer questions, and celebrate successes. You’ll find people at every skill level.
Search for beginner sewing groups on social media platforms. Ask questions freely. Experienced sewers remember their first projects. They love helping newcomers succeed.
“I’ve never sewn anything before trying my first dress pattern. The instructions seemed scary at first. But I followed each step slowly. Three dresses later, I feel like a real sewist. My friends can’t believe I made my own clothes.”
— Sarah M., Beginner Sewer
Start Creating Your Handmade Wardrobe Today
Sewing your first dress opens doors to creative expression. You choose fabrics that reflect your personality. You create styles unavailable in stores. And you develop skills that last a lifetime.
The journey begins with a single pattern and basic supplies. Pick a simple style that excites you. Gather your materials. Set aside an afternoon. Before you know it, you’ll be wearing your own creation.
Remember that every expert started exactly where you are now. Their first seams weren’t perfect either. But they kept sewing. Each project improved their skills. The same progress awaits you.
Your handmade wardrobe starts with one dress. That dress proves you can create beautiful clothing. It builds confidence for the next project. Soon you’ll have a collection of unique pieces nobody else owns.
The sewing community welcomes you. Millions of people worldwide create their own clothes. They started as beginners too. Now it’s your turn to join them and discover the joy of handmade fashion.