Creating your first tote bag opens the door to endless sewing possibilities. This practical project teaches fundamental techniques while producing something useful you’ll carry proudly. Whether you’re completely new to sewing or looking to refresh basic skills, making a tote bag offers the perfect starting point.
This Website contains affiliate links. That means I may earn a small commission if you purchase through my links, at no extra cost to you.
The beauty of this project lies in its simplicity and versatility. You’ll master essential skills like cutting fabric, creating seams, and assembling pieces. These techniques form the foundation for countless future projects.
Start Your Sewing Journey Today
Get everything you need to create beautiful tote bags with confidence. Our comprehensive beginner’s bundle includes step-by-step guidance, professional techniques, and all the resources to master sewing basics quickly.
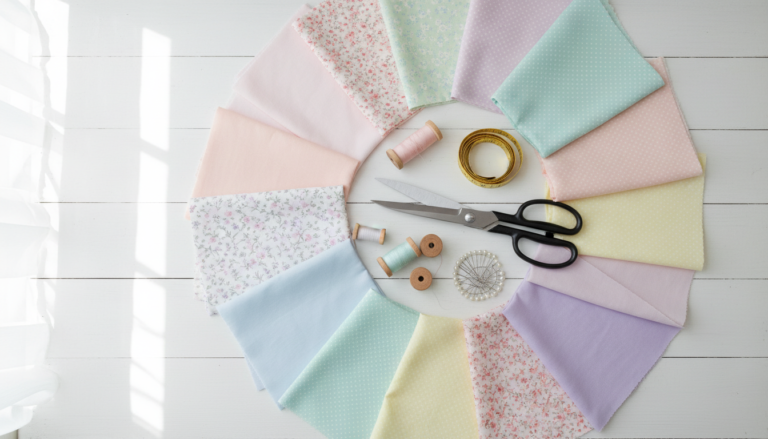
Gathering the right supplies before you begin makes the sewing process smooth and enjoyable. You don’t need expensive materials to create a beautiful bag. Simple, quality basics work perfectly for this beginner-friendly project.
Fabric Requirements
Choose medium-weight cotton fabric for easiest handling. You’ll need two pieces measuring 15 inches wide by 16 inches tall for the bag body. Select coordinating or contrasting fabrics to express your personal style.
Pre-washing fabric prevents future shrinkage. This simple step ensures your finished bag maintains its size and shape through regular use. Iron the fabric smooth before cutting to achieve accurate measurements.
Additional Supplies Checklist
Thread matching your fabric color
Fabric scissors or rotary cutter
Measuring tape or ruler
Pins or fabric clips
Iron and ironing board
Sewing machine (or needle for hand sewing)
Many beginners find success with curated supply kits that include quality materials and eliminate guesswork about what to purchase.
Preparing Your Fabric Pieces
Proper preparation sets the foundation for professional-looking results. Taking time with these initial steps prevents frustration later and ensures your seams align perfectly.
Beginner Tip: New to measuring and cutting fabric? This comprehensive course includes video demonstrations of professional cutting techniques that help beginners achieve accurate results every time.
Cutting Your Fabric
Cut two pieces of fabric to your desired dimensions. For a standard tote, aim for 15 inches wide by 16 inches tall. These measurements include seam allowance built in for easier construction.
Use sharp scissors or a rotary cutter with a ruler for straight edges. Clean cuts make sewing easier and produce better finished edges. Mark your cutting line with fabric chalk if needed for guidance.
Understanding Seam Allowance
Seam allowance refers to the fabric area between the edge and your stitch line. This project uses a standard half-inch seam allowance. Maintaining consistent seam allowance throughout your project ensures proper bag dimensions.
Mark your seam allowance line with a fabric pen or use your machine’s seam guide. Consistency matters more than perfection when you’re learning. Each project improves your accuracy naturally.
Creating the Side Seams
The side seam construction forms the basic structure of your tote bag. This fundamental technique appears in countless sewing projects. Mastering it now serves you well for future creations.
Aligning Right Sides Together
Place your two pieces with right sides together. This means the pretty, printed side of each fabric faces inward. Pin along the sides and bottom, leaving the top edge open.
Position pins perpendicular to the edge for easy removal while sewing. Space pins every three to four inches. This prevents fabric shifting as you sew and keeps raw edges aligned perfectly.
Sewing the Sides and Bottom
Start sewing at the top corner using your half-inch seam allowance. Stitch down the side, across the bottom, and up the other side. Backstitch at the beginning and end to secure your seam.
Remove pins as you approach them. Never sew over pins as this can damage your needle or machine. Take your time and maintain steady, even speed for smooth seams.
Learning proper seam techniques makes all the difference in finished quality. Professional sewing courses teach you advanced seam finishing methods that elevate every project.
Optional French Seam for Professional Finish
A french seam encases raw edges inside the seam itself. This technique creates a clean interior and prevents fraying. While optional for beginners, it adds a professional touch worth learning.
Creating a French Seam
For a french seam, first sew with wrong sides together using 1/8 inch seam allowance. Trim this seam close to the stitch line. Press the seam flat.
Turn the fabric so right sides face together. The first seam now sits inside the fold. Sew again along the same edge using a standard half-inch seam allowance. This second seam encloses the raw edges completely.
French seams work beautifully on lightweight to medium-weight fabrics. They’re particularly useful for bags that carry heavier items regularly. The extra strength prevents seam failure over time.
Straps transform your fabric pieces into a functional bag. The length and width you choose affect both comfort and style. Standard straps measure about two inches wide and twenty inches long.
Cutting and Preparing Strap Pieces
Cut two pieces of fabric measuring 4 inches wide by 22 inches long for each strap. These dimensions allow for folding and seam allowance while creating sturdy, comfortable handles.
Fold each strip in half lengthwise with wrong sides together. Press this fold to create a crisp center line. This crease guides your next folds and ensures symmetrical straps.
Folding and Sewing Straps
Open the strip and fold each long edge toward the center crease. Press these folds. Then fold the entire strip in half again along the original center crease. You now have four layers of fabric creating a strong strap.
Topstitch along both long edges of the strap. Sewing close to the edge secures all layers together. Backstitch at both ends for extra strength. Repeat this process for the second strap.
Attaching Straps to Your Bag
Strap placement affects how your bag hangs and carries. Proper positioning and secure attachment ensure comfortable use and long-lasting durability.
Positioning Straps Correctly
Turn your bag inside out so the seam allowance faces outward. Measure and mark four inches from each side seam along the top edge. These marks indicate strap placement points.
Pin each strap end at these marks with raw edges aligned. The straps should point downward into the bag at this stage. They’ll flip upward when you turn the bag right side out.
Securing Strap Attachment
Sew across each strap end using a half-inch seam allowance. Backstitch several times for reinforcement. These attachment points bear the bag’s weight, so extra stitching prevents failure.
For additional strength, create a box stitch by sewing a rectangle with an X through the center. This distributes stress across more stitching and prevents straps from pulling away.
Finishing the Top Edge
The top edge requires special attention since it remains visible and handles frequent use. A clean finish here elevates your entire project from homemade to handcrafted.
Creating a Clean Top Hem
Fold the top edge down one inch toward the wrong side of the fabric. Press this fold with your iron to create a sharp crease. The heat sets the fold and makes sewing easier.
Fold the edge down one more inch and press again. This double fold encloses the raw edge completely. Pin this hem in place all around the bag opening.
Topstitching the Top Edge
Topstitch along the bottom edge of your hem using a straight stitch. Sew all the way around the bag opening. This visible line of stitching should sit close to the inner fold edge.
Keep your stitching straight by watching the fabric edge rather than the needle. Consistent distance from the edge creates professional-looking results. Remove pins as you approach them during sewing.
Turning Your Bag Right Side Out
This moment reveals your finished creation. Turn the bag inside out carefully to avoid stressing the seams. Reach through the opening and gently pull the bottom corners through.
Pressing Your Completed Bag
Press all seams flat with your iron. Pay special attention to the side seam areas and bottom corners. Push out the corners fully using a turning tool or chopstick for crisp edges.
Press the top edge and straps to remove any wrinkles from construction. This final pressing step transforms your project from “just finished” to “professionally made.” The difference is remarkable.
Ready for More Projects?
You’ve completed your first tote bag! Now expand your skills with dozens of beginner-friendly patterns and advanced techniques. Learn to create market bags, zippered pouches, and designer-style totes.
Customization Ideas for Your Tote Bags
Once you’ve mastered the basic tote bag construction, endless variations await. Customization transforms a simple bag into something uniquely yours. Small changes create dramatically different results.
Adding Pockets
Interior or exterior pockets increase functionality significantly. Cut a fabric rectangle, hem the top edge, and sew the remaining three sides to your bag before assembly. Position pockets where you’ll actually use them.
Divided pockets keep items organized. Sew a vertical line through the center of a wide pocket to create two compartments. This simple addition helps separate keys from phones or pens from lip balm.
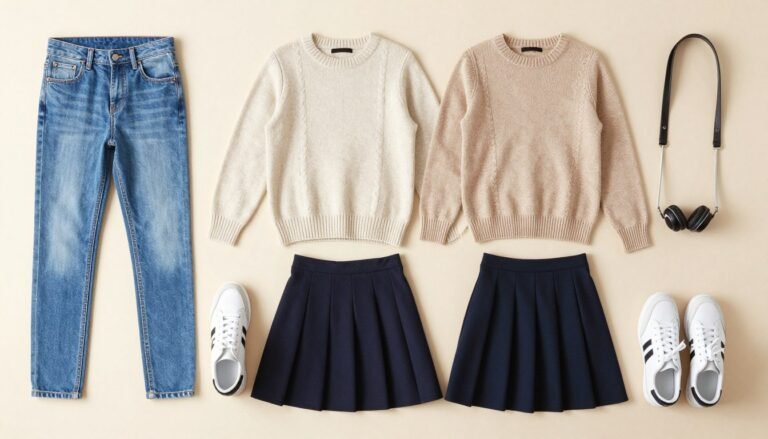
Experimenting with Fabric Combinations
Mix patterns and solids for visual interest. Use a bold print for the exterior and coordinating solid for straps. Or reverse this combination. Try contrasting colors for a modern look.
Consider fabric weight when combining materials. Pair similar-weight fabrics for easier sewing and better drape. Heavyweight canvas paired with lightweight cotton creates construction challenges for beginners.
Strap Variations
Different strap styles change your bag’s entire character and functionality.
Longer straps for shoulder carrying
Shorter handles for hand carrying
Single long strap for crossbody style
Wider straps for heavy loads
Size Adjustments
Scale your pattern up or down to create bags for different purposes.
Small tote for lunch or essentials
Large market bag for shopping
Wide shallow bag for books
Tall narrow bag for bottles
Closure Options
Add closures to secure your bag contents and enhance style.
Magnetic snap at center top
Zipper across opening
Button with loop closure
Drawstring through casing
Decorative Elements
Personalize your bag with embellishments that reflect your style.
Embroidered monogram
Appliqué designs
Fabric paint details
Ribbon or trim accents
Common Issues and Solutions
Every sewist encounters challenges while learning. Understanding common problems and their solutions builds confidence and improves results quickly.
Uneven Seams
Seams that wander from the seam allowance line create uneven bag dimensions. This happens when fabric shifts during sewing. Pin more frequently to prevent movement. Guide fabric gently without pulling.
Mark your seam line with fabric pen for visual guidance. Watch the fabric edge align with your machine’s seam guide rather than watching the needle. This keeps your focus where it matters most.
Puckered Seams
Puckering occurs when thread tension is too tight or you pull fabric while sewing. Adjust your machine’s tension settings. Let the feed dogs move the fabric naturally without assistance from you.
Test your tension on fabric scraps before sewing your actual project. This simple step prevents frustration and wasted time on incorrect settings.
Why do my corners bunch up?
Excess fabric at corners creates bunching. Trim seam allowance at corners to reduce bulk. Cut diagonally across the corner point, staying about 1/8 inch from your stitching. This allows corners to turn smoothly without extra fabric gathering inside.
How do I fix skipped stitches?
Skipped stitches usually indicate a dull or bent needle. Replace your needle regularly. Use the correct needle type for your fabric weight. Check that your machine is threaded properly with thread feeding smoothly from the spool.
What if my bag is lopsided?
Lopsided bags result from uneven seam allowances. Measure and mark your seam allowance on both sides before sewing. Cut fabric pieces to identical dimensions. Press seams consistently. Taking time with accuracy during cutting prevents this problem.
Caring for Your Handmade Tote Bags
Proper care extends the life of your handmade creations. Understanding fabric care and reinforcement techniques keeps your bags looking beautiful through regular use.
Washing Your Tote Bag
Most cotton tote bags handle machine washing well. Turn the bag inside out before washing to protect the exterior. Use cool water and gentle cycle to prevent excessive wear.
Air drying preserves fabric and stitching better than machine drying. Hang your bag by the straps or lay flat to dry. Press with an iron while slightly damp for easiest wrinkle removal.
Reinforcing High-Stress Areas
Strap attachment points and bottom corners receive the most stress. Add extra rows of stitching at these locations. Reinforce corners with bar tacks or triangle stitching for additional strength.
Check these areas periodically for wear. Small repairs made early prevent complete failure later. A few reinforcement stitches take minutes but add months to your bag’s lifespan.
Your Sewing Journey Continues
Completing your first tote bag marks the beginning of your sewing adventure. The techniques you’ve learned apply to countless future projects. Each bag you create improves your skills naturally.
Start simple and gradually add complexity. Try different fabrics, experiment with sizes, add pockets or closures. Each variation teaches something new while building your confidence and capabilities.
The sewing community welcomes beginners warmly. Share your creations, ask questions, and learn from others. Every expert sewist started exactly where you are now. Your journey deserves celebration at every step.
Take Your Sewing Skills to the Next Level
Master professional techniques, access 50+ beginner-friendly patterns, and join a supportive community of makers. Everything you need to create beautiful, functional projects with confidence.
Remember that mistakes are teachers in disguise. Each seam you sew, whether perfect or imperfect, builds muscle memory and understanding. Give yourself grace while learning. Progress matters more than perfection.
Your handmade tote bag represents more than fabric and thread. It demonstrates your willingness to learn, create, and develop new skills. Carry it proudly knowing you made something beautiful and useful with your own hands.