Hand sewing opens up a world of creativity and self-expression. You don’t need fancy equipment or years of experience to create beautiful handmade items. With just a needle, thread, and some fabric, you can craft personalized gifts, repair clothing, and bring your creative ideas to life.
This Website contains affiliate links. That means I may earn a small commission if you purchase through my links, at no extra cost to you.
This comprehensive tutorial will guide you through simple hand sewing projects perfect for complete beginners. Each project uses basic stitches and minimal materials. You’ll build confidence with every stitch while creating items you’ll actually use and love.
Whether you want to save money on alterations, develop a relaxing hobby, or make thoughtful handmade gifts, these beginner-friendly projects will get you started. And if you’re ready to explore even more creative possibilities, you can discover hundreds of additional patterns and techniques designed specifically for beginners.
Essential Supplies for Hand Sewing Projects
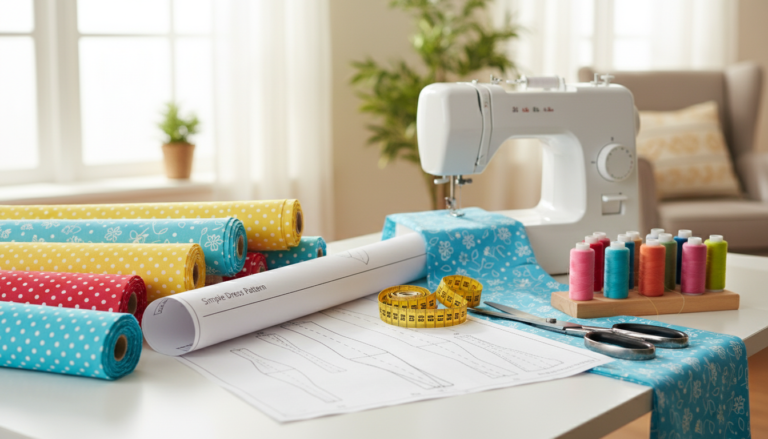
Before diving into your first project, gather a few basic supplies. You probably have many of these items already at home. The beauty of hand sewing is that you need very little to get started.
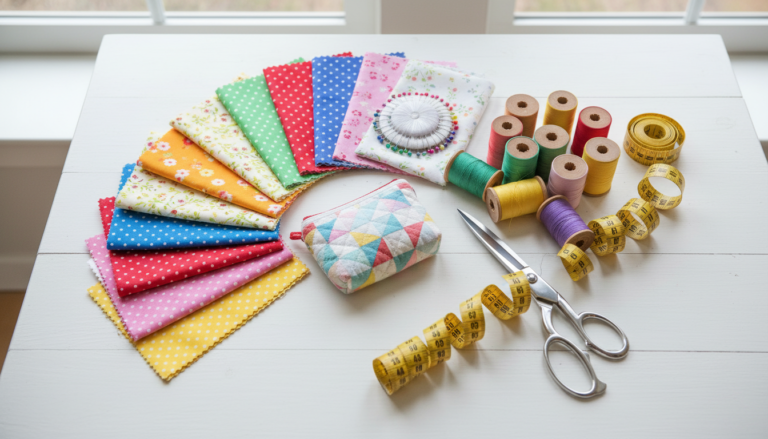
Basic Sewing Kit Essentials
Sharp hand sewing needles in various sizes
Quality thread in neutral colors (white, black, beige)
Fabric scissors dedicated only to cutting fabric
Straight pins and a pin cushion
Measuring tape or ruler
Fabric marking pen or tailor’s chalk
Seam ripper for fixing mistakes
Thimble to protect your finger while sewing
Choosing Fabric for Beginner Projects
Start with easy-to-handle fabrics that won’t slip or fray excessively. Cotton is the best fabric for beginners because it holds its shape well and doesn’t stretch. Avoid slippery materials like satin or stretchy knits until you’ve gained more experience.
You can use fabric scraps from old clothing, unused bed sheets, or inexpensive cotton from craft stores. This makes your sewing projects both budget-friendly and sustainable.
Master These Three Essential Hand Sewing Stitches
Every hand sewing project uses just a few fundamental stitches. Once you master these basic techniques, you’ll have the foundation for countless creative projects. Let’s learn the three most important stitches for beginners.
Running Stitch Tutorial
The running stitch is the simplest and most versatile stitch. You’ll use this basic technique for gathering fabric, creating seams, and decorative stitching. Thread your needle and tie a knot at the end of your thread.
Push the needle up through the fabric from the back. Then push it back down through the fabric a short distance away. Continue this up-and-down motion, creating evenly spaced stitches. Try to make your stitches the same size for a professional look.
Practice on scrap fabric until your stitches feel natural and consistent. The running stitch should be about one-eighth to one-quarter inch long for most projects.
Backstitch for Strong Seams
The backstitch creates the strongest hand-sewn seam. This stitch works perfectly for projects that need durability. It mimics the look of machine stitching when done carefully.
Start with a running stitch. Then, instead of moving forward, bring your needle back to the end of the previous stitch. Push the needle down where your last stitch ended. Bring it up ahead of your working thread. This creates a solid, continuous line of stitches.
Blanket Stitch for Finishing Edges
The blanket stitch adds a decorative finish to fabric edges. You’ll see this stitch on handmade towels, blankets, and appliqué projects. It prevents fraying while adding a personal touch to your work.
Bring your needle up through the fabric about a quarter inch from the edge. Loop the thread under the needle point before pulling it through. This creates the characteristic “L” shape of the blanket stitch. Continue along the edge, spacing stitches evenly.
Ready to Master More Advanced Stitching Techniques?
You’ve learned the basics! Now discover hundreds of hand sewing patterns, video tutorials, and expert tips designed specifically for beginners who want to take their skills to the next level.
Your first hand sewing project should be quick, useful, and build your confidence. This fabric bookmark takes less than 30 minutes to complete. It makes a great gift and helps you practice straight stitching.
Materials Needed for Fabric Bookmark
Two pieces of cotton fabric, 2 inches by 6 inches each
Matching thread
Hand sewing needle
Scissors
Pins
Optional: small ribbon for decoration
Step-by-Step Instructions to Make a Simple Fabric Bookmark
Place your two fabric pieces together with the right sides (the pretty sides) facing each other. Pin the edges to hold them in place while sewing. This prevents the fabric from shifting.
Thread your needle and tie a knot at the end. Using a backstitch, sew around three sides of the bookmark, leaving one short end open. Keep your stitches about one-eighth inch from the edge. This creates a seam allowance.
When you reach a corner, push your needle through to make one stitch right at the corner point. This helps create crisp corners when you turn the bookmark right side out. Continue sewing along the next edge.
After sewing three sides, remove the pins. Carefully turn the bookmark right side out through the opening you left. Use a pencil or chopstick to gently push out the corners. Press the bookmark flat with your fingers or an iron.
Fold the raw edges of the opening inside the bookmark. Pin them closed. Using a running stitch or backstitch, sew the opening closed. You can also add a decorative blanket stitch around all four edges for a finished look.
Your first hand sewing project is complete! This simple bookmark uses all the basic techniques you just learned. You practiced threading a needle, making a backstitch seam, turning fabric right side out, and closing an opening. These skills form the foundation for more complex projects.
Project Two: Easy Drawstring Bag
A drawstring bag is one of the most practical beginner sewing projects. You can use these small bags for storing crafting supplies, organizing your home, or creating personalized gift packaging. This project teaches you how to create a casing for drawstring closure.
What You’ll Need for a Drawstring Bag
One piece of fabric, 10 inches by 18 inches
Cord or ribbon, 24 inches long
Matching thread
Safety pin
Ruler and fabric marking pen
Creating Your Drawstring Bag Step by Step
Fold your fabric in half with right sides together, matching the 10-inch edges. This creates a tube shape. Pin the two long sides together, leaving the top open. You’ll create the drawstring casing at this open edge.
Using a backstitch, sew down one long side, across the bottom, and up the other long side. Start and end your stitching about two inches from the top edge. Leave these two-inch sections unsewn. This gap will become your drawstring opening.
At the top edge, fold the fabric over twice to create a hem. The first fold should be about half an inch. The second fold should be about one inch. This creates a tunnel or casing for your drawstring to go through. Pin this hem in place.
Sew along the bottom edge of this folded hem using a running stitch. Make sure you sew below the opening you left in the side seams. This connects the side seams to your hem casing. Your drawstring will thread through the tunnel you just created.
Turn your bag right side out. Attach a safety pin to one end of your cord or ribbon. Thread the safety pin through the casing all the way around until it comes out the same opening. Remove the safety pin and tie the two cord ends together in a knot. Pull the cord to cinch your bag closed.
You now have a functional drawstring bag made entirely by hand! This project introduced you to creating hems and casings. These techniques appear in many sewing projects. You can make these bags in different sizes for various uses around your home.
A simple pillowcase makes an excellent beginner hand sewing project. This tutorial shows you how to create functional home decor items using basic hand stitching. The pillowcase gives you practice sewing longer seams and working with larger pieces of fabric.
Pillowcase Materials List
Two pieces of fabric, each 20 inches by 30 inches
Matching thread
Pins
Scissors
Measuring tape
Instructions to Make a Simple Pillowcase by Hand
Place your two fabric pieces right sides together. The pretty sides should be touching each other, facing inward. Pin all four edges to hold the layers securely. Make sure the edges line up evenly.
Using a backstitch, sew around three sides of the pillowcase. Leave one short end completely open. This opening is where you’ll insert your pillow. Keep your stitches consistent and about half an inch from the fabric edge.
When you reach each corner, take an extra stitch directly at the corner point. This reinforces the corners and helps them hold their shape when you turn the pillowcase right side out. Continue sewing until you’ve completed all three sides.
Remove all the pins from your sewn seams. Carefully turn the pillowcase right side out through the open end. Push out the corners gently using a chopstick or pencil. Be careful not to poke through the fabric.
At the open end, fold the raw edges inside the pillowcase about half an inch. Press this fold flat with your fingers or an iron. Pin the folded edges together. This creates a clean hem at the opening.
Sew the hem closed using either a running stitch or backstitch. Try to keep your stitches straight and even. You can sew close to the folded edge for a subtle seam, or add a decorative blanket stitch for visual interest.
Your hand-sewn pillowcase is finished! Insert a pillow form or standard bed pillow. This project taught you how to work with larger fabric pieces and create strong seams that will hold up to regular use and washing.
Hand-sewn pillowcases add a personal touch to your home decor. You can create matching sets, use fabric scraps to make patchwork designs, or personalize them as gifts for friends and family.
Project Four: Reversible Fabric Coasters
Fabric coasters combine practicality with creativity. These small projects use up fabric scraps while protecting your furniture from water rings. Making coasters gives you excellent practice with precision cutting and sewing straight seams.
Supplies for Fabric Coasters
Two fabric squares per coaster, 5 inches by 5 inches
Thin batting or felt squares, 4 inches by 4 inches
Matching thread
Scissors
Pins
Step Tutorial for Making Fabric Coasters
Place one batting square in the center of one fabric square’s wrong side. Center it carefully, leaving equal fabric edges all around. This batting adds cushioning and absorbs moisture from cold drinks.
Place your second fabric square on top of the first, right sides together. The batting is now sandwiched between the wrong side of one fabric and the right side of the other. Pin all layers together around the edges.
Using a backstitch, sew around all four sides of the coaster, about one-quarter inch from the edge. Leave a two-inch opening on one side unsewn. You’ll use this opening to turn the coaster right side out.
Clip the corners at a diagonal, cutting close to but not through your stitching. This helps create crisp, flat corners when you turn the coaster right side out. Be very careful not to cut your stitches.
Turn the coaster right side out through the opening. Use a chopstick to gently push out the corners. Press the coaster flat, folding in the raw edges at the opening. Pin the opening closed.
Topstitch around the entire edge of the coaster using a running stitch or backstitch. This closes the opening and adds a decorative finish. Sew about one-eighth inch from the edge. Keep your stitches as straight as possible for a professional look.
Make a set of four to six coasters in coordinating fabrics. These make wonderful housewarming gifts or add a handmade touch to your own home. The reversible design means you get two looks in one coaster.
Project Five: Kitchen Hanging Towel Holder
A hanging towel holder keeps kitchen towels within easy reach. This beginner sewing project combines fabric with a practical button closure. You’ll learn how to attach buttons by hand and create a functional home accessory.
Materials for Hanging Towel Holder
Fabric strip, 3 inches by 10 inches
One large button
Matching thread
Kitchen towel
Scissors and pins
Creating a Hanging Towel Holder Step by Step
Fold your fabric strip in half lengthwise with right sides together. Pin along the long edge and one short end. Using a backstitch, sew these two edges together, leaving one short end open for turning.
Turn the fabric tube right side out through the open end. Use a pencil to push out the corners. Press the tube flat with the seam running down one edge rather than in the center.
Fold the raw edges of the open end inside the tube. Pin them closed. Sew the opening shut with small stitches. Your fabric strip should now be completely finished on all sides.
Fold the fabric strip to create a loop. One end should overlap the other by about two inches. On the back end (the one that will hang on the wall), sew your button securely. Use a doubled thread and sew through the button holes multiple times to make sure it’s firmly attached.
On the front end, create a small buttonhole slit. You can carefully cut a small horizontal slit just large enough for your button to pass through. Use a blanket stitch around the edges of this slit to prevent fraying.
Loop your kitchen towel through the fabric strip. Button the strip closed to secure the towel. Hang the entire assembly on a cabinet knob, drawer pull, or hook. You’ve created a practical kitchen accessory entirely by hand!
These hanging towel holders work great in kitchens, bathrooms, or anywhere you need quick access to towels. They make thoughtful homemade gifts and help keep towels neatly organized.
Join Thousands of Beginners Who’ve Transformed Their Homes with Hand Sewing
You’ve completed five beautiful projects! Ready to create even more? Access our complete library of beginner-friendly patterns, video tutorials, and expert guidance to continue your creative journey.
Every sewist makes mistakes, especially when learning. The good news is that most hand sewing errors are easy to fix. Understanding common problems helps you work through challenges without frustration.
When Your Thread Keeps Tangling
Thread tangles and knots frustrate many beginners. This usually happens when your thread is too long or twisted. Cut your thread no longer than 18 inches from needle to knot. Shorter thread tangles less and gives you better control.
Let your needle hang freely every few stitches. This allows the thread to untwist naturally. Some sewers run their thread through beeswax or thread conditioner to reduce tangling. These products smooth the thread and make it easier to work with.
Uneven or Crooked Stitches
Crooked stitches happen to everyone at first. Practice makes perfect, but you can improve immediately by marking guide lines on your fabric. Use a ruler and fabric marking pen to draw light lines where you want to sew.
Sew slowly and focus on each stitch. Don’t worry about speed. Accuracy matters more than finishing quickly. Your stitches will naturally become more even with practice and time.
Fixing Broken or Pulled Stitches
If a stitch breaks or pulls loose, don’t panic. Use a seam ripper or small scissors to carefully remove the broken stitches back to a secure point. Thread your needle with fresh thread and re-sew that section. Overlap your new stitches slightly with the old ones for a strong seam.
Pulled stitches often result from pulling thread too tight. Maintain gentle, even tension as you sew. Your stitches should lie flat against the fabric without puckering or distorting the material.
How to Care for Your Hand-Sewn Projects
Hand-sewn items deserve special care to maintain their beauty and durability. Proper washing and storage extend the life of your handmade creations. These simple steps protect your hard work.
Washing Hand-Sewn Items
Always wash hand-sewn projects gently. Turn items inside out before washing to protect visible stitches. Use cold or warm water on a delicate cycle. Hot water can cause fabric shrinkage and thread weakening.
Turn items inside out before washing
Use gentle or delicate washing cycle
Wash in cold or warm water, never hot
Use mild detergent without harsh chemicals
Air dry when possible to prevent shrinkage
Iron on appropriate heat setting for your fabric
Storing Handmade Projects
Store finished projects in a clean, dry place away from direct sunlight. Sunlight fades fabric colors over time. Fold items loosely to prevent permanent creases. For special pieces, wrap them in acid-free tissue paper.
Keep your hand-sewn items away from damp areas to prevent mold and mildew. Good air circulation helps maintain fabric freshness. Cedar blocks or lavender sachets naturally repel moths and add pleasant scent.
Taking Your Hand Sewing Skills to the Next Level
You’ve completed several beginner projects and learned essential hand sewing techniques. These foundational skills open doors to countless creative possibilities. Many sewers wonder what comes next on their crafting journey.
Building on Your Basic Skills
Once you’re comfortable with running stitch, backstitch, and blanket stitch, you can explore more decorative techniques. Embroidery stitches like chain stitch, French knots, and satin stitch add beautiful details to your projects. These decorative stitches transform simple items into artwork.
Consider learning how to make your own patterns. Start by tracing items you already own, like simple bags or pouches. Gradually work up to creating original designs based on your measurements and creative vision.
Quilting by hand offers another direction for skill development. Hand quilting creates heirloom pieces with a unique, personal character. The slow, meditative process of hand quilting appeals to many crafters.
Finding Inspiration for New Projects
Pinterest provides endless inspiration for hand sewing projects. Search for specific items you want to make or browse general crafting boards. Save ideas that match your skill level and gradually challenge yourself with more complex patterns.
Join online sewing communities to connect with other crafters. These groups offer support, answer questions, and share project ideas. Many experienced sewers enjoy helping beginners troubleshoot problems and celebrate successes.
Consider keeping a sewing journal to track your projects, techniques learned, and ideas for future creations. Document your progress with photos. Looking back at your early projects shows how much your skills have improved.
Ready to Create Professional-Quality Projects?
Transform your beginner skills into confident craftsmanship. Get access to comprehensive video tutorials, downloadable patterns, and expert techniques that take you from simple projects to stunning handmade creations.
Hand sewing offers more than just creating useful items. This traditional craft provides mental, emotional, and practical benefits that enhance your daily life. Understanding these advantages motivates continued practice and skill development.
Mental Health and Mindfulness Benefits
The repetitive motion of hand sewing creates a meditative state similar to yoga or meditation. This focused activity quiets mental chatter and reduces anxiety. Many people find hand sewing helps them relax after stressful days.
Completing hand sewing projects builds confidence and provides a sense of accomplishment. You create tangible results from your efforts. This concrete achievement boosts self-esteem and motivates further creative exploration.
Hand sewing improves fine motor skills and hand-eye coordination. These benefits extend beyond crafting, potentially improving other areas of daily life. The detailed work also helps maintain cognitive function as you age.
Practical and Financial Advantages
Hand sewing saves money on clothing repairs and alterations. You can fix torn seams, replace buttons, and hem pants yourself. These simple skills eliminate the need for expensive professional alterations.
Creating handmade gifts adds a personal touch that store-bought items can’t match. People appreciate the time and effort you invest in making something special for them. Hand-sewn gifts often become cherished keepsakes.
Environmental Impact
Hand sewing promotes sustainable living by extending the life of clothing and household items. Repairing instead of replacing reduces waste and environmental impact. Using fabric scraps and upcycling old materials further supports eco-friendly practices.
Making your own items reduces dependence on mass-produced goods. You control the quality of materials and construction. Hand-sewn items often last longer than cheaply manufactured alternatives because you invest care in every stitch.
Hand Sewing Projects That Make Perfect Gifts
Handmade gifts carry special meaning that purchased items simply cannot match. The time and care you invest in creating something by hand shows thoughtfulness and love. These beginner-friendly projects make excellent presents for various occasions.
Personalized Gift Ideas
Fabric bookmarks make wonderful gifts for book lovers. Customize them with fabric that reflects the recipient’s interests or favorite colors. Add a ribbon or charm for extra personal touch. These quick projects let you create multiple gifts efficiently.
Drawstring bags serve countless purposes and make versatile gifts. Create small ones for jewelry storage, medium sizes for travel toiletries, or large ones for laundry or shopping. Choose fabric patterns that suit the recipient’s style and intended use.
Hand-sewn coasters protect furniture while adding decorative flair. Make sets in colors matching the recipient’s home decor. Package them with coordinating napkins for a complete hostess gift.
Seasonal and Holiday Projects
Create fabric ornaments for holiday decorating. Simple shapes like stars, hearts, or trees work well for beginners. Stuff them lightly with batting and add a ribbon loop for hanging. These ornaments become treasured decorations used year after year.
Lavender sachets make lovely gifts that provide both beauty and function. Sew small fabric pouches using the techniques you learned for drawstring bags. Fill them with dried lavender and tie closed. These sachets freshen drawers, closets, or cars.
Kitchen towel holders combine practicality with personal style. Make them in fabric that matches the recipient’s kitchen decor. Pair them with quality kitchen towels for a complete, thoughtful gift set.
Building Confidence Through Hand Sewing Practice
Confidence in hand sewing develops gradually through consistent practice and patience with yourself. Every beginner feels uncertain at first. These strategies help you build skills and self-assurance as you progress in your sewing journey.
Setting Realistic Expectations
Your first projects won’t look perfect, and that’s completely normal. Professional-looking results come with time and practice. Focus on learning and enjoying the process rather than achieving perfection immediately.
Start with projects slightly below your current skill level. Success builds confidence faster than struggling with overly ambitious projects. Gradually increase difficulty as your comfort grows. This progressive approach prevents frustration and burnout.
Compare your work to your own previous projects, not to experienced sewers’ creations. Notice your improvement over time. Celebrate small victories like straighter stitches or neater corners.
Learning from Mistakes
Every mistake teaches valuable lessons. When something goes wrong, take time to understand why. Did you skip a step? Pull thread too tight? Cut fabric incorrectly? Identifying the cause prevents repeating the same error.
Keep your early projects even if they’re imperfect. Looking back at them later shows how far you’ve progressed. These pieces document your learning journey and remind you that everyone starts somewhere.
Join supportive crafting communities where beginners feel welcome. Share your projects and ask questions without fear of judgment. Most experienced sewers remember their own learning curve and enjoy helping newcomers. Many beginners find structured learning programs helpful for building confidence through guided instruction and community support.
Your Hand Sewing Journey Begins Now
You’ve learned essential hand sewing techniques and completed several beginner-friendly projects. These foundational skills open countless creative possibilities. From simple repairs to beautiful handmade gifts, your new abilities serve practical and artistic purposes.
Hand sewing requires only basic supplies and minimal space. This accessible craft fits into busy lives while providing relaxation and creative satisfaction. The projects you create add personal touches to your home and make meaningful gifts for loved ones.
Remember that every experienced sewer started exactly where you are now. Progress comes through practice, patience, and persistence. Don’t let mistakes discourage you. Each stitch improves your skills and builds muscle memory.
Continue exploring new techniques and projects that interest you. Your hand sewing skills will naturally develop as you create more items. The satisfaction of making something beautiful with your own hands never diminishes, no matter how experienced you become.
Start small, practice regularly, and enjoy the creative process. Your hand sewing journey has just begun, and the possibilities are limitless. For those ready to dive deeper into the world of hand sewing, comprehensive learning resources and advanced techniques await to help you master this rewarding craft.