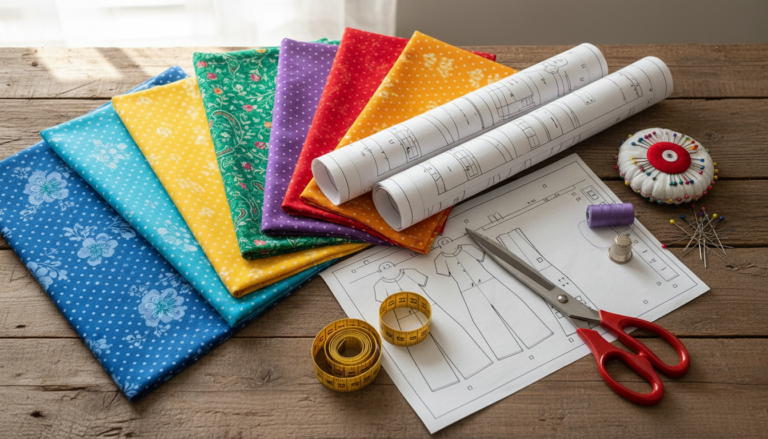
Starting your sewing adventure can feel overwhelming. You want to create something useful and beautiful. Bag projects offer the perfect way to build confidence while making practical items you will actually use.
This Website contains affiliate links. That means I may earn a small commission if you purchase through my links, at no extra cost to you.
These beginner-friendly tutorials will guide you through each step. You will learn basic techniques that form the foundation of sewing. Each project builds your skills gradually.
The right guidance makes all the difference in your learning journey. Many new sewers find success when they have clear instructions and helpful resources at their fingertips.
Ready to Master Bag Sewing?
Access over 200 step-by-step video tutorials designed specifically for beginners. Learn professional techniques at your own pace with lifetime access to comprehensive sewing courses.
The tote bag stands as the most popular choice for beginner sewing. This project teaches you fundamental skills without complex steps. You will work with straight seams and simple construction methods.
Start by cutting two pieces of fabric for the front and back. Each piece should measure around eighteen inches wide and fifteen inches tall. These dimensions create a practical size for everyday use.
Preparing Your Fabric Pieces
Place your fabric pieces with right sides together. This means the pretty side of each piece faces inward. Pin along the edges to hold everything in place while you work.
The side seams come first in your sewing process. Stitch down one side, across the bottom, and up the other side. Leave the top edge open for turning your bag right side out.
Adding Handles and Finishing Touches
Cut two strips of fabric for your straps. Each strap needs to be about twenty-four inches long and four inches wide. Fold each strap in half lengthwise with right sides facing.
Sew along the edge of each strap. Turn them right side out using a safety pin method. Press the straps flat with an iron for a professional look.
Pin your straps to the top edge of your bag. Make sure they align evenly on both the front and back. Sew around the top edge to secure everything in place.
A library bag serves as an excellent second project. This design includes pockets for library cards and bookmarks. The extra features teach you new skills while creating something useful for carrying books.
Choose a sturdy quilting cotton for this project. The fabric needs to support the weight of several books. Cut your main fabric pieces slightly larger than a standard tote bag pattern.
Creating Functional Front Pockets
Cut a pocket piece about six inches tall and eight inches wide. Fold the top edge down by one inch and press. Sew along this folded edge to create a finished top.
Place the pocket on the front of your bag before sewing the sides together. Pin it in position and stitch around the sides and bottom. This method ensures your pocket stays secure during use.
Pocket Placement Tips
Position pockets about two inches from the bottom edge. This placement keeps them accessible while maintaining bag structure. Test the size with actual library cards before final stitching.
Reinforce pocket corners with extra stitching. These spots receive the most stress during use. A small triangle of stitches at each top corner adds strength.
Reinforcing Seams for Heavy Use
Library bags carry more weight than regular totes. Add fusible fleece between your fabric layers. This extra layer provides structure and durability.
Cut fusible fleece to match your fabric pieces. Iron it onto the wrong side of your fabric before construction. The fleece bonds with the fabric when heated.
Use a slightly larger seam allowance on this project. A half-inch seam instead of a quarter-inch gives extra strength. Your bag will hold up better to regular use with books.
Unlock Professional Sewing Techniques
Download hundreds of professional patterns and access expert video instruction. Learn how to add pockets, zippers, and special features to any bag project with our comprehensive sewing library.
A project bag keeps your sewing supplies organized. This design works perfectly for quilting fabric and small projects. The zipper closure prevents items from falling out during transport.
This bag introduces you to zipper installation. Many beginners fear this technique. The step-by-step method makes it manageable and builds your confidence.
Choosing the Right Size and Fabric
Measure your typical project supplies before cutting fabric. Most crafters prefer a bag about twelve inches wide and ten inches tall. This size accommodates fabric pieces and tools comfortably.
Select medium-weight cotton fabric for durability. The bag needs to stand up to regular use. Consider adding a layer of fusible fleece for extra body and structure.
Installing Your First Zipper
Choose a zipper about two inches longer than your bag width. This extra length makes installation easier. You can trim the excess later if needed.
Place the zipper face down on the right side of your fabric. The zipper teeth should align with the top edge. Pin carefully to prevent shifting during sewing.
Attach a zipper foot to your sewing machine. This special foot allows you to stitch close to the zipper teeth. Sew along the edge with a straight stitch.
Flip the fabric over and press the seam. Top stitch along the folded edge for a professional finish. Repeat these steps on the other side of the zipper.
Open the zipper halfway before sewing the sides. This step is crucial for turning your bag right side out. Many beginners forget this part and need to unpick seams.
Pin the front and back pieces with right sides together. Sew around the sides and bottom using your standard seam allowance. Backstitch at the beginning and end for strength.
Trim the corners at an angle before turning. This technique reduces bulk and creates crisp corners. Turn the bag right side out through the open zipper.
Easy Drawstring Bag for Quick Projects
Drawstring bags offer the simplest construction method for beginners. These bags work great for gift giving and storage. You can complete one in under an hour once you learn the basic steps.
The drawstring method eliminates the need for handles or closures. A simple casing at the top holds the cord. This project teaches you how to create channels in fabric.
Creating the Casing for Drawstrings
Cut your fabric into a rectangle. The size depends on your intended use. A piece measuring twelve inches by sixteen inches creates a nice small bag.
Fold the top edge down two inches and press. Fold again by one inch to create a double-fold hem. This method hides the raw edge inside the casing.
Pin the casing in place and stitch close to the bottom fold. Leave a small opening to insert your drawstring cord. Backstitch at the start and end of your line of stitching.
Threading and Finishing
Cut two pieces of cord or ribbon about twenty inches long. Attach a safety pin to one end of each piece. Thread both cords through the casing in opposite directions.
Tie the ends of each cord together with a secure knot. Pull both cords to close the bag. The two-cord method distributes weight evenly and creates a balanced closure.
Cord Selection Tips
Choose cord width based on your casing size. Quarter-inch cord works well for most bags. Wider cord requires a larger casing to move smoothly.
Cotton rope, satin ribbon, or nylon cord all work well. Test your chosen material by pulling it through a fabric tube first. Smooth cords slide easier than textured ones.
Master Every Bag Style
Join thousands of successful beginners who learned to sew beautiful bags with confidence. Get instant access to our complete collection of bag tutorials, patterns, and technique videos.
Having the right tools makes every sewing project easier. You do not need expensive equipment to start. A few basic supplies will serve you well across many different bag projects.
Fabric Selection for Beginners
Quilting cotton works perfectly for your first few bags. This fabric type offers medium weight and easy handling. The material comes in countless colors and patterns at affordable prices.
Avoid stretchy fabrics when you start learning. Knit materials require different techniques that can frustrate beginners. Stick with stable woven fabrics until you build more experience.
Consider adding fusible fleece or interfacing to your projects. These materials give bags structure and professional appearance. Iron-on products make application simple for new sewers.
Machine Settings and Needle Choice
Use a universal needle size 80/12 for most bag projects. This size handles medium-weight cotton fabric well. Change your needle after every eight hours of sewing time for best results.
Set your stitch length to about two and a half millimeters. This creates strong seams that will not pull apart easily. Test your stitch on scrap fabric before starting each project.
Keep your machine clean and oiled according to manufacturer instructions. A well-maintained machine produces better stitches and causes fewer headaches. Brush out lint from the bobbin area regularly.
Pressing for Professional Results
An iron becomes your best friend in sewing. Press each seam as you sew for crisp, professional edges. This step makes a huge difference in your final product appearance.
Set your iron to cotton temperature for most projects. Use steam to help fabric lay flat and hold creases. A pressing cloth protects delicate fabrics from direct heat damage.
Press seams open whenever possible. This method distributes bulk evenly and creates flatter seams. Some tutorials recommend pressing to one side for specific techniques.
Every beginner makes mistakes while learning to sew. Understanding common problems helps you avoid frustration. Most issues have simple solutions once you know what to look for.
Seam Allowance Consistency
Uneven seam allowances create wonky bags. Use the markings on your machine throat plate as guides. Line your fabric edge with the appropriate line for consistent seams.
Practice sewing straight lines on paper before cutting fabric. This exercise builds muscle memory without wasting materials. Draw lines on the paper and follow them with your needle.
Consider adding a seam guide to your machine. These magnetic or adhesive guides attach to your machine bed. They create a physical barrier that helps maintain consistent seam width.
Thread Tension Troubles
Loops on top or bottom of your fabric indicate tension problems. Check your bobbin threading first as this causes most issues. Rethread both top and bobbin completely when you notice problems.
Test your tension on scrap fabric before starting. Adjust the tension dial in small increments. Most machines work best at their default middle setting.
Use matching thread weight in needle and bobbin. Different weights can cause tension imbalances. Quality thread also makes a significant difference in stitch appearance.
Fixing Crooked Seams
A seam ripper becomes essential when seams go wrong. Remove stitches carefully to avoid damaging fabric. Cut every few stitches on one side and pull thread from the other.
Slow down your sewing speed when learning. Control matters more than speed for beginners. You can increase pace naturally as your skills improve over time.
Stop with needle down when you need to pivot or adjust. This technique keeps fabric in place while you reposition. Most machines have a needle down setting you can activate.
Growing Your Bag Making Skills
After completing a few basic bags, you will want new challenges. Gradual skill building prevents overwhelm and maintains your enthusiasm. Each new technique opens doors to more creative projects.
Adding Special Features
Interior pockets transform simple bags into functional organizers. Start with patch pockets sewn directly to the lining. These require only basic straight stitching skills you already have.
Zippered pockets come next in your skill progression. Use the same zipper method you learned earlier. Practice on small test pieces before adding to important projects.
Magnetic snaps provide professional closures without complex installation. These hardware pieces require small slits in fabric. Follow package instructions carefully for best results.
Exploring Different Bag Styles
Messenger bags introduce you to flaps and adjustable straps. The construction uses familiar techniques in new combinations. Pattern instructions guide you through each step of assembly.
Clutch bags teach you to work with stiffer interfacing. These projects typically finish smaller than totes. The compact size means less fabric and quicker completion time.
Backpacks represent an advanced beginner project. They combine multiple construction methods in one piece. Start with simple drawstring backpack patterns before attempting complex designs.
Take Your Skills to the Next Level
Ready to create professional-quality bags with advanced features? Access our premium collection of intermediate and advanced tutorials. Learn to add zippers, hardware, structured bases, and designer details to your creations.
Document each completed bag with photos. This portfolio shows your progress over time. You will appreciate seeing how much your skills improve with practice.
Share your work on social media platforms like Pinterest. Connect with other sewers who share tips and encouragement. The sewing community welcomes beginners with helpful advice.
Consider making bags as gifts for friends and family. Practical presents showcase your new skills. Handmade items carry special meaning that store-bought products cannot match.
Start Your Bag Sewing Journey Today
You now have the knowledge to begin sewing beautiful, functional bags. Start with the simple tote bag pattern to build your foundation. Each project teaches valuable skills that apply to future creations.
Remember that every expert sewer started as a beginner. Mistakes are part of the learning process. Each seam you sew improves your technique and builds confidence.
The sewing projects for beginners bag tutorials in this guide provide clear direction. Follow the steps at your own pace. Take time to practice each technique until it feels comfortable.
Gather your supplies and choose your first project today. The satisfaction of completing a handmade bag motivates you to tackle more challenging designs. Your creative journey starts with that first stitch.
Begin Your Complete Sewing Education
Transform from beginner to confident bag maker with our comprehensive step-by-step training. Access lifetime membership to hundreds of video tutorials, downloadable patterns, and expert support. Start creating beautiful bags today with professional guidance every step of the way.