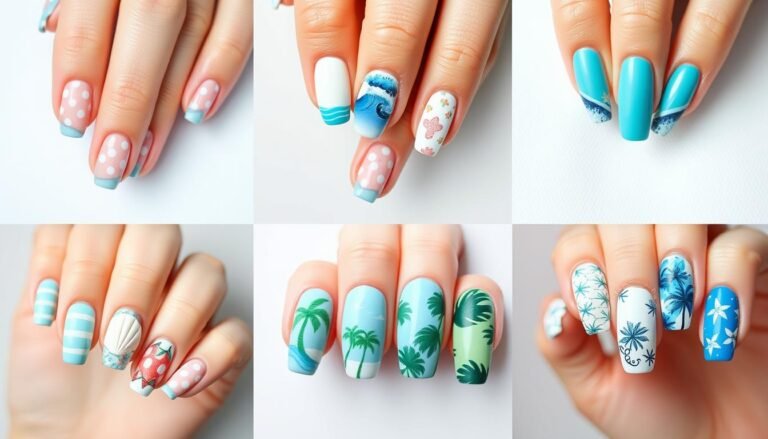
Creating beautiful clothes for Barbie dolls brings joy to crafters of all ages. This fun hobby lets you design unique outfits without spending much money. The best part is that sewing barbie clothes requires just basic skills and simple materials you probably already have at home.
This Website contains affiliate links. That means I may earn a small commission if you purchase through my links, at no extra cost to you.
Making doll clothes opens up endless creative possibilities. You can transform fabric scraps into fashionable dresses within minutes. This guide provides everything needed to start your barbie doll sewing journey today.
Whether you’re crafting for your own dolls or creating gifts, this tutorial makes the process simple. Let’s explore how easy it is to design adorable outfits for your favorite barbies.
Essential Materials for Making Barbie Doll Clothes
Gathering the right supplies makes sewing barbie clothes much easier. You don’t need expensive materials to create stunning outfits. Most items can be found around your house or purchased inexpensively at craft stores.
Fabric Options
Cotton pieces from old clothes work perfectly
Lightweight materials drape better on small dolls
Scraps as small as 6 inches create complete dresses
Stretchy fabrics help with fit and comfort
Pattern prints add visual interest to outfits
Sewing Tools
Sharp fabric scissors for clean cuts
Hand sewing needles in various sizes
Thread matching your fabric colors
Straight pins to hold pieces together
Measuring tape or ruler for accuracy
These basic things get you started immediately. As you gain experience, you might add more specialized tools. For now, keep it simple and focus on learning the fundamental techniques.
Ready to Master More Sewing Techniques?
Discover hundreds of professional patterns and advanced sewing tips that take your doll clothes from basic to boutique quality. Learn the secrets professional crafters use to create stunning outfits.
Knowing your doll’s measurements helps create clothes that fit properly. Standard barbie dolls have consistent proportions. This makes pattern drafting straightforward once you learn the basic shape.
The body of a typical fashion doll measures about 11.5 inches tall. The shoulder width spans approximately 1.5 inches. These measurements guide your pattern pieces.
Shoulder Section
Measure across both shoulders from edge to edge. This area determines neckline width. Most patterns use 1.5 to 1.75 inches for this section.
Body Width
The widest point at the bust measures roughly 3 inches around. This measurement affects how fabric drapes on the doll. Proper fit prevents bunching.
Dress Length
From shoulder to desired hem varies by style. Short dresses measure 2 to 3 inches. Longer gown styles can extend 4 to 5 inches down.
Taking time to understand these measurements pays off. Your finished dress will look professional and fit beautifully. Accuracy at this stage prevents frustration later in the sewing process.
Free Basic Dress Pattern for Barbie Clothes
This free pattern creates a classic dress shape that works for countless style variations. The design uses just two main pieces. Even beginners find success with this straightforward approach to sewing barbie clothes.
Pattern Piece Dimensions
Draw a rectangle measuring 3 inches wide by 4 inches tall on paper. This forms the foundation of your dress pattern. Mark the center top for the neckline.
Creating the Neckline
Measure down 0.5 inches from the top center. Draw a gentle curve from this point to each shoulder corner. This creates a natural-looking neckline shape.
Cut along the curved line carefully. The smoother your cut, the better your finished dress looks. Take your time with this step for best results.
Adding Armholes
Mark points 0.75 inches down from each top corner. Draw small curves inward about 0.5 inches. These armholes allow the doll’s arms to move freely.
The pattern is now complete and ready to transfer to fabric. This simple design serves as a foundation for many dress ideas. You can modify it endlessly to create different looks.
Want to create more advanced designs? Professional sewing patterns offer detailed instructions for complex outfits including gowns, skirts, and formal dresses.
Cutting Your Fabric Pieces
Transferring your pattern to fabric requires attention to detail. Careful cutting produces professional-looking doll clothes. Take time with this step to ensure accuracy.
Preparing Your Fabric
Iron your fabric pieces smooth before cutting. Wrinkles cause uneven cuts that affect the final fit. Lay fabric on a flat surface with the wrong side facing up.
Pro Tip: Place your pattern on fabric grain lines for best drape. This means pattern edges should align with fabric’s straight threads. Proper grain prevents twisting in the finished dress.
Pinning and Cutting
Pin your paper pattern securely to the fabric. Use several pins to prevent shifting during cutting. Position pins inside the pattern area to avoid cutting through them.
Cut slowly along pattern edges using sharp scissors. Smooth, continuous cuts work better than short choppy ones. Leave pins in place until completely finished cutting each piece.
Cut two identical pieces for front and back
Add 1/8 inch seam allowance around all edges
Mark shoulder points with small notches
Keep pieces organized as you work
Your fabric pieces are now ready for assembly. The next section covers sewing techniques that bring these pieces together beautifully.
Step-by-Step Sewing Instructions
Assembling your barbie doll dress brings all your preparation together. Hand sewing works perfectly for these small projects. The tiny size makes machine sewing challenging for beginners.
Joining Shoulder Seams
Place front and back pieces with right sides together. Match shoulder edges carefully. Pin at each end and in the middle.
Thread your needle with matching thread
Knot the end securely
Start at one shoulder edge
Use small running stitches along the shoulder line
Keep stitches even and close together
Repeat for the second shoulder
Creating Side Seams
Open the shoulder-joined piece flat. Fold it with right sides together, matching side edges from armhole to hem. This creates the dress body shape.
Sew down each side using the same running stitch technique. Start just below the armhole. Continue to the bottom edge of the dress. These seams should measure about 3 inches long.
Finishing the Hem
Turn the dress right side out. Fold the bottom edge up about 1/8 inch. Press with your fingers or a small iron if available.
Stitch around the hem using tiny stitches. This prevents fraying and gives a polished look. Take your time for the neatest finish.
Adding Closures
The back opening needs a closure to put the dress on your doll. Simple options include small snaps or hook-and-eye fasteners. You can also use a single stitch that gets cut each time for easy dressing.
Transform Your Sewing Skills
This basic dress is just the beginning. Learn professional techniques for adding zippers, buttons, and intricate details that make your doll clothes look store-bought. Access patterns for every season and style.
The basic pattern adapts to create numerous dress styles. Small changes produce completely different looks. This versatility makes one pattern incredibly valuable for your sewing projects.
Summer Dress Modifications
Shorten the skirt pattern to create a fun summer dress. Cut the pattern at 2.5 inches instead of 4 inches. Use bright, cheerful fabrics with small prints.
Sleeveless Style
Enlarge armholes by an extra 1/4 inch. This creates a breezy sleeveless look perfect for warm weather. Add bias tape around armholes for a polished finish.
Gathered Skirt
Cut the skirt section wider than the top. Gather the extra fabric at the waistline. This adds volume and movement to the dress design.
Sundress Version
Add thin ribbon straps instead of sleeves. Attach at front and back shoulder points. This creates an adorable sundress perfect for summer fun.
Formal Gown Ideas
Extend the pattern to floor length for elegant gowns. Use satin, velvet, or other luxurious fabrics. Add sparkly accessories to complete the formal look.
Layer sheer fabric over solid colors for dimension. This technique creates beautiful evening wear without complex sewing. The overlay adds sophistication to simple shapes.
Mix and Match Separates
Create a separate top and skirt using pattern pieces. Cut the pattern in half at waist level. This opens possibilities for countless outfit combinations.
Pair different tops with various skirt styles
Create coordinating sets in matching fabrics
Mix patterns and solids for visual interest
Build a complete wardrobe with fewer pattern pieces
These variations demonstrate the pattern’s flexibility. Experiment with different ideas to find your favorite styles. Each project builds your confidence and skills.
Adding Fun Details and Accessories
Small embellishments transform simple dresses into special outfits. These details add personality and style. Even beginners can master these easy decoration techniques.
Ribbon and Lace Additions
Narrow ribbon creates beautiful waist sashes. Tie a bow at the back for an elegant touch. Choose colors that complement or contrast with your dress fabric.
Lace trim adds vintage charm to any outfit. Stitch narrow lace along the hem or neckline. This simple addition elevates the overall design significantly.
Layer different ribbon widths for interesting effects. Start with wider ribbon as a base. Add narrower contrasting ribbon on top for dimension.
Button and Snap Decorations
Tiny buttons serve as functional closures or purely decorative elements. Sew them down the front of a dress for a classic look. Small craft buttons work perfectly for this scale.
Shopping Tip: Look for doll-sized buttons in craft stores’ miniature sections. These proportions work better than standard buttons. You can also use small beads as button alternatives.
Creating Matching Accessories
Use leftover fabric scraps to make coordinating accessories. Small pieces create hats, purses, or even tiny shoes. This completes the entire outfit beautifully.
Experiment with different trim types. Rickrack, sequins, and small appliques all work wonderfully. Keep embellishments proportional to the doll’s size for best results.
Common Problems and Solutions
Every sewer encounters challenges when creating barbie clothes. Understanding common issues helps solve them quickly. Most problems have simple solutions that improve your results immediately.
Fit Issues
Dresses that are too tight restrict movement. If this happens, check your seam allowances. You may be sewing too far from the edge. Reducing seam width by just 1/16 inch makes a significant difference.
Signs of Good Fit
Dress slides on and off easily
Fabric drapes smoothly without pulling
Armholes allow arm movement
Hem hangs evenly all around
Back closure aligns properly
Signs of Poor Fit
Fabric bunches or wrinkles when worn
Difficult to put on the doll
Armholes cut into arms
Hem rides up unevenly
Back gapes open or pulls tight
Fabric Fraying
Lightweight fabrics fray easily along cut edges. This problem worsens with handling. Several solutions prevent excessive fraying in your projects.
Use pinking shears to cut fabric edges
Apply clear nail polish along seam allowances
Choose tightly woven fabrics when possible
Finish seams with tiny zigzag stitches
Work gently to minimize fabric handling
Uneven Stitching
Hand stitching sometimes looks irregular, especially for beginners. Practice makes perfect, but some tips help immediately. Keep tension consistent throughout each seam.
Mark stitch lines lightly with washable fabric marker. This guideline helps maintain straight seams. Space stitches evenly using the previous stitch as reference.
Keeping supplies organized makes sewing barbie clothes more enjoyable. You’ll spend less time searching for materials. Good organization systems grow with your hobby.
Fabric Scrap Storage
Small plastic containers sort fabric pieces by color or type. Clear containers let you see contents at a glance. Label each container for even faster access during projects.
Storage Solutions
Small plastic drawers for sorted fabrics
Zippered bags for works in progress
Mason jars for buttons and trims
Magnetic strips for needle storage
Binder with plastic sleeves for patterns
Organization Tips
Sort fabrics by season or color
Keep matching threads with fabrics
Store completed outfits on dolls
Label all pattern pieces clearly
Maintain a project idea notebook
Dedicate a specific area to your doll sewing projects. Even a small section of a shelf works perfectly. Having everything in one place streamlines your creative time.
Pattern Management
Store paper patterns flat in folders or binders. Plastic sheet protectors keep them clean and prevent tears. Write notes on pattern pieces about modifications or fabric types used.
Create a digital backup by photographing patterns. Store images in a dedicated folder on your phone or computer. This ensures you never lose favorite designs.
Building Your Doll Wardrobe Skills
Starting with basic dress patterns builds a foundation for more complex projects. Each completed outfit teaches new techniques. Your skills improve naturally with every piece you create.
Progressing to New Patterns
Once comfortable with the basic dress, try variations that challenge you slightly. Add sleeves to create different silhouettes. Experiment with skirt patterns that use gathering or pleats.
Beginner Projects
Simple shift dresses
Basic skirts with elastic waist
Sleeveless tops
Wrap-style clothes
Intermediate Projects
Dresses with set-in sleeves
Pants with fitted waistbands
Jackets and coats
Lined garments
Advanced Projects
Tailored suits
Evening gowns with boning
Historical costume replicas
Miniature wedding dresses
Don’t rush progression. Master each skill level before moving forward. Solid fundamentals make advanced techniques much easier to learn.
Learning From Mistakes
Every project teaches valuable lessons. Outfits that don’t turn out perfectly still provide learning opportunities. Analyze what went wrong and adjust your approach next time.
Keep a simple sewing journal. Note what worked well and what needs improvement. Document fabric choices and their results. This reference becomes invaluable over time.
Take Your Doll Sewing to Professional Level
Why struggle with trial and error when you can learn proven techniques from experts? Access comprehensive tutorials, professional patterns, and insider tips that fast-track your progress. Join thousands of crafters creating boutique-quality doll clothes.
Inspiration for doll clothes comes from many sources. Real fashion trends translate beautifully to miniature scale. Keep your eyes open for ideas wherever you go.
Fashion and Style Resources
Browse fashion magazines for current trends. Simplify complex designs to work at doll scale. Colors, patterns, and general shapes adapt easily even when exact construction differs.
Creating themed sets adds fun to your sewing projects. Design complete wardrobes around specific ideas. This approach provides direction and purpose for your creative time.
Seasonal Themes
Craft outfits appropriate for each season. Summer brings sundresses and bikini sets. Winter calls for cozy coats and holiday gowns. Spring and fall offer transitional pieces.
Use seasonal fabrics to enhance themes. Lightweight cotton works for summer. Velvet and flannel suit winter projects perfectly.
Career and Hobby Outfits
Design clothes for different professions or activities. Doctor scrubs, chef uniforms, or sports outfits make playtime more engaging. These projects often use simple patterns with creative details.
Activity-specific clothes expand storytelling possibilities. Beach wear, hiking gear, or formal business attire each require different approaches. This variety keeps sewing interesting and challenging.
Start Your Barbie Clothes Sewing Journey Today
Creating beautiful barbie clothes combines creativity with practical sewing skills. This rewarding hobby costs little to start. You’ve learned everything needed to begin making adorable outfits right away.
The free pattern provided gives you a solid foundation. From this basic dress, countless variations emerge. Each project builds confidence and expands your abilities naturally.
Remember that practice improves results. Your first few attempts may not be perfect. That’s completely normal and expected. Every experienced sewer started exactly where you are now.
Your Next Steps: Gather your basic supplies today. Cut out the pattern pieces this week. Complete your first dress this weekend. You’ll be amazed at what you can create.
The world of doll clothes sewing offers endless possibilities. Simple techniques produce impressive results. Your barbies will soon have unique, handmade wardrobes that reflect your personal style.
Share your creations with friends and family. Their excitement fuels your motivation to keep creating. This enjoyable hobby brings satisfaction that grows with every finished piece.
Ready for Your Next Creative Challenge?
You’ve mastered the basics. Now discover the complete world of professional doll clothes design. Get instant access to hundreds of patterns, video tutorials, and expert guidance. Transform your hobby into an impressive skill that creates truly stunning outfits.
Start sewing your first barbie doll dress today. The satisfaction of completing handmade clothes never gets old. Your creative journey begins with that very first stitch.