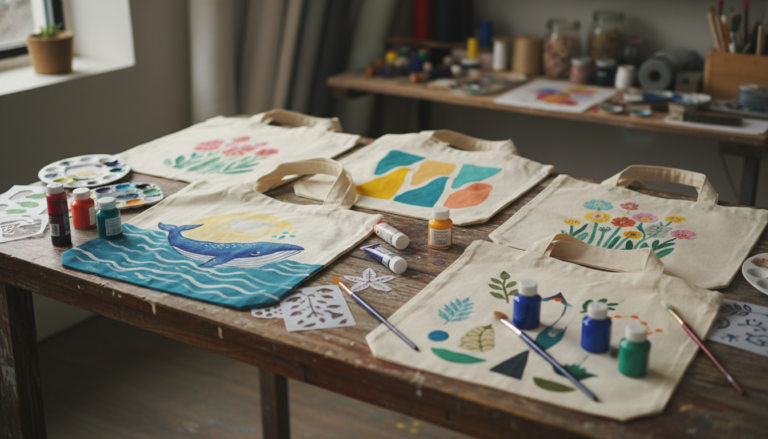
Creating handmade dolls brings joy to crafters and little girls everywhere. The world of doll patterns free sewing opens doors to endless creativity. Whether you want to make a simple rag doll or an elaborate dress-up companion, free patterns make this craft accessible to everyone.
This Website contains affiliate links. That means I may earn a small commission if you purchase through my links, at no extra cost to you.
Sewing your own doll offers rewards beyond the finished project. You choose fabrics that match your vision. You create something unique that cannot be purchased in stores. Most importantly, you develop skills that last a lifetime.
This guide walks you through everything about free doll sewing patterns. You will discover where to find quality patterns. You will learn essential techniques for beginners. You will explore different doll styles and project ideas that inspire your next creation.
Why Sewing Dolls Makes the Perfect Project
Doll making stands out as an ideal sewing project for multiple reasons. The small size means projects finish quickly. Most dolls require minimal fabric, making this an affordable craft. Even beginners can complete a simple rag doll in one afternoon.
These sewing projects teach fundamental skills. You practice cutting fabric accurately. You master basic stitching techniques. You learn how to stuff and shape three-dimensional forms. Each completed doll builds confidence for more complex projects.
Handmade dolls create treasured gifts. A little girl receiving a custom doll made just for her cherishes it for years. Parents appreciate the thought and effort behind handcrafted toys. Grandparents love creating heirloom pieces that families pass down through generations.
Ready to Start Your Doll-Making Journey?
Access hundreds of professional doll patterns designed for all skill levels. From simple beginner projects to advanced creations, find everything you need in one comprehensive collection.
The variety of doll patterns free sewing enthusiasts can find online is impressive. Understanding different types helps you choose projects that match your skill level and interests.
Rag Doll Patterns
The classic rag doll remains the most popular choice for beginners. These patterns feature simple shapes and minimal pattern pieces. Most rag doll patterns require basic straight stitching. The forgiving design hides minor mistakes easily.
Traditional rag dolls use cotton fabric for the body. Yarn creates the hair in various styles. Simple embroidery makes facial features. The construction process involves sewing flat pieces, turning them right side out, and stuffing with fiberfill.
Modern rag doll variations include different body proportions. Some feature bendable limbs with wire armatures. Others incorporate detailed clothing as part of the pattern. Each variation builds on the basic rag doll foundation while adding complexity.
Cloth Doll Patterns
Cloth dolls encompass a broader category than rag dolls. These patterns may include more detailed features and realistic proportions. Cloth doll patterns often specify particular fabrics for different results.
Some cloth doll patterns create lifelike faces with painted or sculpted features. Others maintain a folk art aesthetic with simplified designs. The pattern pieces for cloth dolls typically include separate arms, legs, body, and head components.
Advanced cloth doll patterns incorporate jointed limbs. Button joints allow arms and legs to move freely. This construction requires precise placement but creates highly poseable dolls. Many sewers find comprehensive pattern collections helpful for mastering these techniques.
Dress Patterns for Dolls
Once you complete the doll body, clothing patterns extend the creative possibilities. Dress patterns for dolls range from simple shifts to elaborate gowns. These patterns teach garment construction on a manageable scale.
Basic dress patterns include sleeveless designs with easy closures. Intermediate patterns add sleeves, collars, and buttons. Advanced patterns feature multiple layers, pleats, and miniature fastenings that challenge your skills.
Creating a wardrobe for your doll provides ongoing projects. Each new outfit builds sewing skills. Small garments use fabric scraps efficiently. Girls love having multiple outfit options for their handmade dolls.
Specialty Doll Patterns
Beyond basic dolls, specialty patterns create unique characters. Fairy dolls feature wings and magical details. Animal-inspired dolls combine creature features with humanoid forms. Holiday-themed dolls celebrate seasons and festivities.
These specialty patterns often include costume elements as integral design features. A mermaid doll pattern incorporates a tail instead of legs. An angel doll pattern includes wings attached to the body. These creative variations keep the sewing project interesting for experienced crafters.
Where to Find Quality Free Doll Patterns
Locating reliable free doll sewing patterns requires knowing where to look. Several online sources consistently provide quality patterns that work as described.
Craft Blogs and Websites
Many craft bloggers share free patterns as part of their content strategy. These bloggers often provide detailed photo tutorials alongside pattern pieces. The combination of written instructions and visual guides helps beginners succeed.
Look for established blogs with consistent posting schedules. Read comments to gauge pattern clarity and accuracy. Download patterns from multiple sources to compare quality and find your preferred instruction style.
PDF Pattern Libraries
Some websites curate collections of downloadable PDF patterns. These libraries organize patterns by difficulty level and doll type. PDF formats allow you to print patterns at home in the correct size.
Always verify the pattern scale before cutting fabric. Most PDF patterns include a test square to confirm proper printing. This simple step prevents wasting fabric on incorrectly sized pattern pieces.
While free patterns offer great value, serious crafters often benefit from organized premium collections that include professional grading and detailed instructions for multiple doll styles.
Social Media Pattern Shares
Crafting communities on social platforms regularly share free patterns. Pinterest boards collect hundreds of doll pattern links in one place. Facebook groups dedicated to doll making exchange patterns and tips.
Instagram crafters sometimes offer free patterns to grow their following. These patterns often showcase new techniques or seasonal designs. Following multiple doll-making accounts exposes you to diverse pattern styles and construction methods.
Free Pattern Benefits
Zero cost to try new techniques
Great for testing skill level
Wide variety of styles available
Easy to experiment without risk
Premium Pattern Advantages
Professional sizing and grading
Comprehensive step-by-step instructions
Multiple variations in one package
Tested designs with proven results
Organized collections save research time
Detailed diagrams and photos included
Essential Tips for Beginner Doll Sewing
Starting your first doll sewing project feels exciting and slightly intimidating. These practical tips help beginners avoid common mistakes and achieve satisfying results.
Start with Simple Patterns
Choose your first pattern wisely. A basic rag doll pattern with minimal pieces builds confidence. Simple shapes like circles and rectangles are easier to cut and sew accurately than complex curves.
Read through the entire pattern before starting. Understand each step before cutting fabric. Visualize how pieces connect. This preparation prevents mistakes and reduces frustration during construction.
Complete one simple doll before attempting complex patterns. Each finished project teaches lessons that apply to the next. Building skills gradually produces better results than jumping into advanced patterns prematurely.
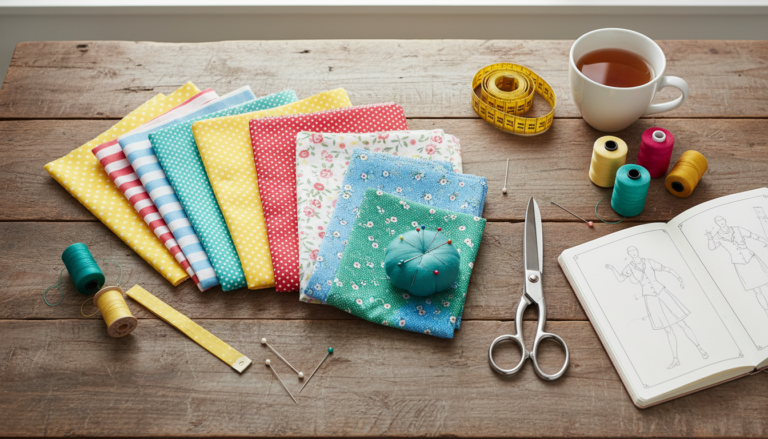
Fabric Selection Matters
The fabric you choose significantly impacts your final doll. Cotton quilting fabric works well for most doll bodies. This fabric has the right weight and stability for stuffing. It handles stitching well without stretching or puckering.
Prewash your fabric before cutting pattern pieces. Washing removes sizing and allows for any shrinkage. This step ensures your finished doll maintains its size and shape after cleaning.
Consider fabric print scale for small projects. Large prints overwhelm tiny doll clothes. Small prints, tone-on-tone patterns, and solids work best for miniature garments and doll features.
Master Basic Stitches First
Most doll patterns require only basic stitching skills. Practice straight stitching on scrap fabric. Learn to maintain consistent seam allowances. Master backstitching to secure seam ends.
Hand sewing works perfectly for doll making. The small size makes hand stitching manageable. A simple running stitch or backstitch creates secure seams. Many traditional rag doll patterns specify hand sewing techniques.
Machine sewing speeds up production but requires practice with small pieces. Use a shorter stitch length for doll-sized seams. This creates stronger seams that withstand stuffing pressure. Slow stitching speed helps navigate tight curves and small pattern pieces.
Stuffing Techniques
Proper stuffing makes the difference between a lumpy amateur doll and a professional-looking creation. Use high-quality polyester fiberfill designed for toy making. This stuffing maintains shape without clumping.
Stuff small areas first, then work toward larger sections. Use a chopstick or stuffing tool to push filling into arms, legs, and narrow spaces. Add stuffing gradually in small amounts rather than large clumps.
The firmness of your stuffing affects the final appearance. Firmly stuffed dolls hold their shape better and feel more substantial. Loosely stuffed dolls become floppy and shapeless over time. Find the balance that suits your pattern and preferences.
Take Your Doll Making to the Next Level
Skip the trial and error with professionally designed patterns that include detailed stuffing guides, fabric recommendations, and troubleshooting tips for perfect results every time.
Having the right tools makes doll sewing easier and more enjoyable. You do not need expensive equipment to start. A few essential items set you up for success.
Basic Sewing Supplies
Sharp fabric scissors cut cleanly through multiple fabric layers. Dedicated fabric scissors stay sharper longer than scissors used for paper. Small embroidery scissors help trim threads and cut tight curves.
Quality thread in neutral colors handles most projects. Cotton or polyester thread both work well for dolls. Match thread color to your fabric for invisible seams. Contrasting thread colors show stitching intentionally on some designs.
Pins hold pattern pieces in place during cutting and sewing. Fine pins with glass or metal heads work best for doll-making. These pins glide through fabric easily without leaving large holes.
Marking and Measuring Tools
Fabric marking pens or chalk transfer pattern markings to fabric. Choose removable marking tools that wash out or fade over time. Test markers on fabric scraps before marking pattern pieces.
A clear ruler helps measure seam allowances accurately. Small rulers designed for quilting work perfectly for doll-sized projects. Measuring tapes help when working with curved pieces or checking body proportions.
Specialty Doll-Making Supplies
Polyester fiberfill provides the primary stuffing material. Buy quality stuffing that fluffs easily and does not clump. Budget stuffing often contains hard lumps that create uneven surfaces in finished dolls.
Yarn creates doll hair in countless styles. Acrylic yarn works well and comes in every color imaginable. Wool yarn provides a more natural appearance. Cotton yarn creates neat, defined hairstyles.
Embroidery floss adds facial features and decorative details. A basic set of colors covers most needs. Black thread creates classic embroidered eyes. Pink or red thread makes smiling mouths. Brown thread defines noses and eyebrows.
Having all materials organized and ready saves time during sewing. Consider investing in complete pattern bundles that include supply lists and material calculations for multiple projects.
Optional but Helpful Tools
A seam ripper fixes mistakes without damaging fabric. Even experienced sewers use seam rippers regularly. This small tool saves projects when seams need adjusting.
Turning tools help reverse sewn pieces right-side-out. Narrow tubes and small limbs turn more easily with proper tools. Chopsticks or knitting needles work as improvised turning tools.
Iron and ironing board press seams flat for professional results. Crisp seams make final assembly easier and improve appearance. Small craft irons work well for doll-sized pieces.
Step-by-Step Process for Your First Doll
Creating your first doll follows a logical sequence. Understanding this process helps you work efficiently and achieve great results.
Preparation Phase
Select your pattern and read all instructions carefully. Gather all materials before starting. Check that you have sufficient fabric in the right colors. Verify you have thread, stuffing, and embellishments ready.
Print pattern pieces at the correct scale. Cut out paper patterns carefully along the lines. Label each piece if the pattern includes multiple components. Organization prevents confusion during construction.
Prewash and iron your fabric. Smooth fabric makes accurate cutting easier. Pin pattern pieces to fabric following grain line arrows. Efficient layout minimizes fabric waste.
Cutting and Marking
Cut fabric pieces carefully with sharp scissors. Follow pattern outlines precisely. Accuracy in cutting determines how well pieces fit together during sewing. Take your time with this critical step.
Transfer any pattern markings to fabric pieces. Mark dart locations, gathering lines, or placement indicators. These marks guide assembly and ensure correct construction.
Sewing Construction
Follow pattern instructions in order. Most patterns build from small components to larger assemblies. Sew arms and legs first, then attach them to the body. This sequence makes handling easier.
Leave openings for turning and stuffing where instructed. These openings typically appear in inconspicuous locations. Back seams and bottom edges are common placement spots for openings.
Press seams as you work for professional results. Flat seams reduce bulk and improve appearance. This extra step takes minimal time but significantly improves quality.
Stuffing and Finishing
Turn sewn pieces right-side-out through the openings. Use turning tools for narrow sections. Take care not to pull seams or distort shapes during turning.
Stuff pieces firmly and evenly. Check for lumps by feeling the outside. Redistribute stuffing as needed for smooth surfaces. Pay special attention to extremities like hands and feet.
Close openings with ladder stitch or whipstitch. These hand-sewing stitches create nearly invisible closures. Take small, even stitches for secure, neat seams.
Adding Details
Embroider facial features according to pattern guidelines. Practice on scrap fabric first if you are new to embroidery. Simple straight stitches and French knots create charming faces.
Attach yarn hair using the method specified in your pattern. Common techniques include sewing yarn directly to the head, creating a wig cap, or gluing yarn in place. Braid, curl, or style hair as desired.
Add any clothing, accessories, or embellishments. Dress your doll in sewn outfits or felt accessories. These finishing touches bring personality to your creation.
Save Time with Tested Patterns
Professional doll patterns eliminate guesswork with clear instructions, accurate sizing, and proven construction methods. Start your projects with confidence.
Multiple Styles in One Place
Access diverse doll designs from classic rag dolls to modern cloth dolls. One comprehensive resource covers all your creative needs.
Beginner to Advanced Options
Grow your skills with patterns designed for every level. Start simple and progress to complex designs as your confidence builds.
Popular Doll Pattern Categories to Explore
Different doll styles appeal to various tastes and skill levels. Exploring these categories helps you discover patterns that match your creative vision.
Traditional Rag Dolls
The timeless rag doll never goes out of style. These patterns create nostalgic toys that remind us of simpler times. Traditional rag dolls feature embroidered faces, yarn hair, and simple cotton dresses.
Modern interpretations of rag dolls maintain the basic structure while adding contemporary elements. Updated fabric choices create fresh looks. Modified proportions appeal to current aesthetic preferences. The essential simplicity remains constant.
Fashion Dolls
Fashion dolls emphasize wardrobe possibilities. These patterns create dolls with proportions suited to wearing clothes. Separate dress patterns expand outfit options infinitely.
Creating fashion dolls appeals to sewers who enjoy making miniature garments. Each outfit becomes its own sewing project. Girls love playing dress-up with dolls that have extensive wardrobes.
Baby Dolls
Baby doll patterns create infant-styled dolls with chubby limbs and sweet faces. These dolls often include onesies, bonnets, and blankets as part of the pattern. Baby dolls teach nurturing play for young children.
Weighted baby dolls provide realistic heft that appeals to children and collectors. Achieving proper weighting requires specific stuffing techniques. Patterns often include instructions for adding weight appropriately.
Character and Fantasy Dolls
Fantasy dolls bring imagination to life. Mermaid patterns include scaled tails and flowing hair. Fairy patterns incorporate delicate wings and flower-themed clothing. Superhero dolls feature capes and masks.
Seasonal character dolls celebrate holidays throughout the year. Christmas elves, Easter bunnies, and Halloween witches all have dedicated patterns. These themed projects become treasured seasonal decorations.
Educational Dolls
Some doll patterns serve educational purposes beyond basic play. Dress-me dolls teach children about buttons, zippers, and snaps. Multicultural dolls introduce diversity and cultural awareness.
Anatomy dolls help children understand body parts and development. These specialized patterns include removable organs or transparent panels. Educational applications make these projects particularly meaningful.
Common Mistakes to Avoid
Learning from common errors helps you achieve better results faster. These frequent mistakes trip up beginners but are easily avoided with awareness.
Skipping Pattern Instructions
Many beginners skip reading instructions thoroughly before starting. This leads to mistakes that require time-consuming corrections. Always read the complete pattern first.
Pattern designers include instructions for important reasons. Seam allowances, fabric requirements, and construction sequences affect final results. Following directions exactly produces better outcomes than improvising.
Incorrect Seam Allowances
Inconsistent seam allowances change the finished size. Too-narrow seams may not hold securely. Too-wide seams make pieces smaller than intended. Mark your seam allowance on your machine or use seam guides.
Quarter-inch seams work well for most doll patterns. Some patterns specify different allowances. Always check pattern requirements and maintain consistency throughout your project.
Poor Fabric Choices
Using inappropriate fabric causes problems. Stretchy knits distort during construction. Heavy fabrics overwhelm small projects. Loosely woven fabrics fray excessively.
Stick with recommended fabric types, especially when starting out. Quilting cotton provides ideal weight and stability for most doll bodies. Save experimental fabric choices for after you master basic techniques.
Insufficient Stuffing
Under-stuffed dolls look limp and sad. They do not hold their intended shape. Add more stuffing than you initially think necessary. Firmly stuffed dolls look professional and feel substantial.
Distribution matters as much as quantity. Lumpy stuffing creates uneven surfaces. Take time to smooth and distribute filling evenly throughout each section.
Creative Doll Sewing Project Ideas
Once you master basic doll construction, these project ideas provide inspiration for expanding your skills.
Matching Girl and Doll Outfits
Create matching outfits for a little girl and her doll. This project requires making the same dress pattern in two sizes. The result delights children who love coordinating with their toys.
Start with simple dress patterns for both sizes. As skills improve, try more complex matching sets. Pajamas, holiday dresses, and everyday outfits all work well for matching projects.
Doll Family Sets
Make an entire family of dolls in graduated sizes. Parent dolls, children dolls, and baby dolls create imaginative play opportunities. Use the same basic pattern scaled to different sizes.
Doll families can represent the child’s own family structure. Customize features and clothing to match family members. These personalized sets become treasured possessions.
Seasonal Doll Collections
Create themed dolls for different seasons and holidays. Spring dolls wear flower crowns and pastel dresses. Summer dolls sport swimsuits and sun hats. Fall dolls dress in warm colors. Winter dolls bundle up in coats and scarves.
Display seasonal dolls as home decor. Rotate them throughout the year for changing decorative accents. These projects provide year-round sewing opportunities.
Storybook Character Dolls
Bring favorite storybook characters to life through doll making. Classic fairy tales provide endless inspiration. Modern children’s books offer contemporary character options.
These character dolls enhance storytelling and reading time. Children connect more deeply with stories when they have physical representations of characters. Consider making complete sets of characters from favorite books.
For those serious about creating character dolls or building doll collections, comprehensive pattern libraries offer diverse designs that spark creativity and save countless hours of pattern searching.
Advanced Techniques to Try
After mastering basic doll construction, these advanced techniques add professional polish to your projects.
Needle Sculpting
Needle sculpting shapes facial features three-dimensionally. Thread pulled tight through stuffed heads creates eye sockets, nose definition, and facial contours. This technique requires practice but produces remarkably realistic faces.
Start with simple indentations for eye placement. Progress to more complex shaping as you gain confidence. Needle sculpting works best on firmly stuffed heads using strong thread.
Wig Making
Creating removable wigs allows hair style changes. Wig caps provide a base for attaching yarn or fiber hair. Different attachment methods create various hair textures and styles.
Mohair and wool roving create realistic hair textures. These materials accept styling with heat and hold shapes well. Yarn wigs provide durability and easy care for play dolls.
Joint Construction
Jointed dolls pose in multiple positions. Button joints, cotter pin joints, and disk joints each provide different movement ranges. Learning joint installation expands your doll-making capabilities significantly.
Button joints offer the simplest introduction to moveable limbs. Two buttons connected through the body allow arm and leg rotation. This beginner-friendly technique requires only basic supplies.
Clothing Construction Details
Advanced clothing techniques include working buttonholes, installing tiny zippers, and creating miniature collars. These details elevate simple doll dresses to heirloom quality garments.
Hand-sewing techniques like French seams and rolled hems create professional finishes on tiny garments. Though time-consuming, these details showcase craftsmanship and dedication to quality.
Start Your Doll-Making Journey Today
The world of doll patterns free sewing offers endless creative possibilities. From simple rag doll patterns perfect for beginners to complex cloth dolls that challenge advanced skills, every sewer finds projects that match their abilities.
Starting with basic patterns builds confidence and skills. Each completed doll teaches techniques that apply to the next project. The satisfaction of creating something beautiful with your own hands never gets old.
Remember that every expert started as a beginner. Do not let fear of mistakes prevent you from trying. Each imperfect stitch teaches a lesson. Every finished doll represents growth in your sewing journey.
Gather your supplies and choose your first pattern today. Whether you make a gift for a little girl or create an heirloom piece, the process brings joy. The recipient will treasure your handmade creation for years to come.
As your skills grow, you will discover favorite techniques and preferred doll styles. Your unique creative voice emerges through fabric choices, feature details, and finishing touches. This personal expression makes each doll special.
Transform Your Doll-Making Experience
Stop searching through scattered free patterns. Access a complete, professionally designed collection of doll patterns for all skill levels. Get clear instructions, accurate sizing, and beautiful results with every project. Start creating your dream dolls today.
The joy of doll making extends beyond the finished product. The process itself provides relaxation and creative expression. Working with fabrics, colors, and textures engages your artistic sense. Watching a flat piece of fabric transform into a three-dimensional figure never loses its magic.
Share your creations with the crafting community. Online groups provide support, inspiration, and feedback. Seeing others’ work sparks new ideas for your projects. The friendships formed through shared creative interests enrich your life.
Your doll-making journey begins with a single stitch. Choose a pattern, gather your materials, and start creating. The dolls you make today become tomorrow’s treasured memories. Happy sewing!