Creating the perfect sewing space transforms how you approach every project. Whether you have an entire room or just a small corner, smart organization makes all the difference. Your sewing area should inspire creativity while keeping everything you need within reach.
This Website contains affiliate links. That means I may earn a small commission if you purchase through my links, at no extra cost to you.
Many sewers struggle with limited space and storage challenges. Fabric piles up in closets. Patterns disappear when you need them most. The sewing machine stays hidden away because setting up takes too much time. These common frustrations prevent you from enjoying your craft.
The good news is that you can create an amazing sewing space regardless of size. Small apartments, spare bedrooms, basement corners, and attic nooks all have potential. With the right approach, any spot becomes your creative haven. This guide shares practical ideas that work in real homes for real people who love to sew.
Small spaces demand creative thinking. Every inch counts when you work in tight quarters. The key is making your sewing area work double duty. A guest room can host both visitors and your creative pursuits. The corner of a bedroom transforms into a productive sewing spot with the right setup.
Vertical storage becomes your best friend in compact areas. Wall-mounted shelves hold fabric without taking floor space. Pegboards organize tools where you can see them. Over-door organizers store patterns and notions. These solutions keep supplies accessible while maintaining a tidy room.
Essential Furniture for Compact Sewing Areas
The right furniture multiplies your space. A sewing cabinet with folding doors hides your machine when not in use. This keeps your guest room looking neat between projects. Some cabinets include built-in storage for thread, scissors, and other essentials.
Rolling storage carts move supplies where you need them. Tuck them under tables or into closets when finished. Clear plastic bins let you spot fabric colors at a glance. Stack them in a closet corner to maximize vertical space. Label each bin by color or fabric type for quick access.
Folding tables provide workspace without permanent commitment. Set up when you start a project. Fold away when you need the room for other things. Some sewers use their dining table as a cutting surface. Cover it with a large mat to protect the finish. This approach works well when you lack a dedicated sewing room.
Organizing Your Fabric Collection
Fabric storage challenges every sewer. Your fabric stash grows with each project and every sale at the craft store. Without a system, finding the perfect piece becomes frustrating. Time spent searching means less time sewing. Good organization makes your collection a joy instead of a burden.
Sort fabric by color for visual appeal. This method lets you spot exactly what you need. Fold pieces uniformly so they stack neatly. Store similar colors together on shelves. The rainbow effect looks beautiful and functions perfectly.
Ready to Organize Like a Pro?
Access proven fabric storage systems and organizational blueprints that transform chaotic stashes into inspiring, functional collections.
Clear bins work wonders for fabric storage. You see contents without opening every container. Stack bins in a closet or under a table. Label the outside with fabric type or project plans. This system keeps things tidy while remaining accessible.
Comic book boards help fold fabric to uniform size. Cut cardboard to your preferred dimensions. Wrap fabric around boards like you would wrap a gift. Stack the wrapped pieces on edge in a drawer or bin. This method prevents wrinkles and makes browsing easy.
Tension rods installed in closets create vertical fabric storage. Drape larger pieces over rods to prevent creasing. This approach works especially well for special fabrics. Velvet, silk, and other delicate materials hang without crushing. You can see your entire collection at once.
Dealing with Scraps and Small Pieces
Scraps multiply faster than full yardage. These small pieces prove useful for applique, patchwork, and small projects. Sort scraps by color into separate containers. Small plastic bins or baskets work perfectly. Keep them on a shelf within easy reach.
Some sewers save only pieces larger than a specific size. This limit prevents endless accumulation. A six-inch square makes a good minimum. Smaller bits go to quilters who need tiny pieces or into the trash. This rule keeps your scrap collection manageable.
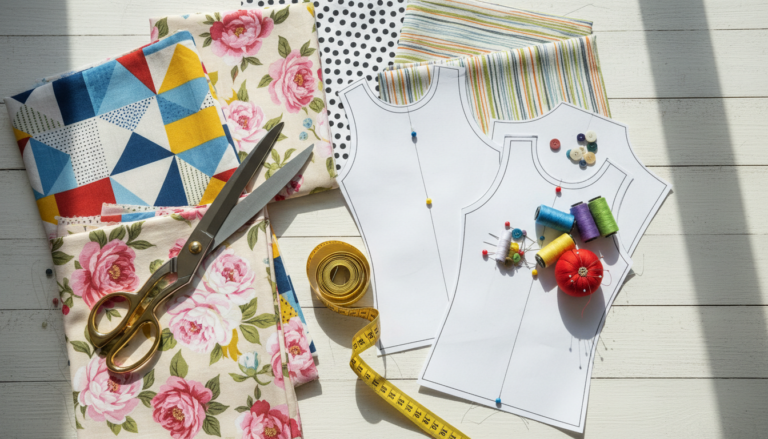
Pattern Storage and Organization
Patterns deserve their own organizational system. Original envelopes tear and wear out over time. Pattern pieces get mixed up between projects. A good filing system saves hours of frustration. You want to find the right pattern quickly when inspiration strikes.
Filing cabinets provide excellent pattern storage. Dedicate one drawer to patterns. Use hanging folders to separate by type or brand. Label each folder clearly. Garments in one section, accessories in another. This system works for sewers with large pattern collections.
Digital Pattern Management
Digital patterns need organization too. Create folders on your computer by pattern type. Name files clearly with brand and pattern number. Take photos of completed projects using each pattern. Store these photos with the pattern file. This visual reference helps you remember which patterns you love.
Some sewers scan paper pattern pieces. This creates a backup if originals get damaged. Store scanned patterns in cloud storage. You can access them from any device. Print new copies when needed. This approach works well for favorite patterns you use repeatedly.
Your sewing machine deserves the perfect spot. The right height prevents neck and shoulder pain. Standard desk height often positions machines too high. A sewing cabinet with drop-down platform brings the machine to ideal working level. Your arms rest comfortably while you sew for hours.
Lighting makes a huge difference at your sewing machine. Natural light from windows provides the best color accuracy. Position your machine perpendicular to windows to avoid glare. Add task lighting for evening sewing. LED lights reduce eye strain and help you see fine details.
Essential Sewing Machine Accessories Storage
Keep presser feet and accessories near your machine. Small drawer organizers separate different feet by type. Label each section so you grab the right one quickly. Bobbins need their own storage box. Wind several at a time in commonly used colors. This prevents stopping mid-project to wind thread.
Store your sewing machine manual in a page protector. Keep it in a binder near the machine. Add notes about tension settings for different fabrics. Record successful needle and thread combinations. This reference saves time troubleshooting problems. You build your own customized guide over the years.
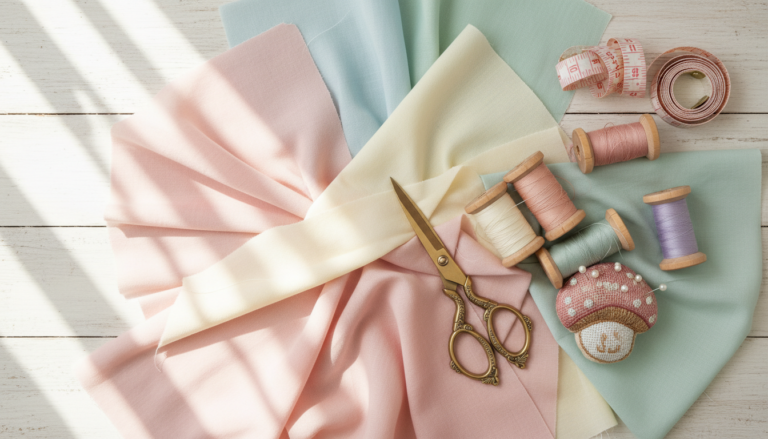
Thread Organization Ideas
Thread deserves display-worthy storage. Wall-mounted racks keep spools visible and organized. Arrange by color for easy selection. This method turns thread into room decor. The rainbow effect adds beauty to your sewing space while keeping supplies accessible.
Drawer storage works well for large thread collections. Use dividers to keep spools from rolling around. Lay them flat in shallow drawers. Group by color family or fiber type. Polyester in one section, cotton in another. This system protects thread from dust and sunlight.
Transform Your Sewing Space Today
Join thousands of organized sewers who’ve discovered the systems that make sewing more enjoyable and productive every single day.
Rotating thread racks maximize desktop space. These carousel-style organizers hold dozens of spools. Spin to find the color you need. They work perfectly on counters or shelves. Some sewers keep one rack for current project threads. A separate storage system holds the complete collection.
Pegboard thread storage offers flexibility. Move pegs to accommodate different spool sizes. Add or remove storage as your collection grows. Paint pegboard to match your room decor. This customizable option adapts to your changing needs over time.
Creating an Efficient Ironing Station
Every sewing room needs an ironing station. Pressing seams properly makes the difference between amateur and professional results. A dedicated ironing board stays ready for use. No more dragging it out from the closet every time you start a project. This convenience encourages better pressing habits.
Built-in ironing boards save space in small rooms. These fold out from cabinets or walls. Close them when finished. The board disappears until you need it next. Some fold down from the wall with one hand. Others hide inside sewing cabinets for a completely integrated workspace.
Ironing Board Alternatives
Padded ironing mats create pressing surfaces anywhere. Lay them on a table or countertop. Press seams without a full-size board. These mats fold for storage. They work great in small spaces where permanent boards take too much room. Keep one near your sewing machine for quick pressing between steps.
Tabletop ironing boards serve sewers who work in compact areas. These small boards sit on desks or tables. They handle most pressing tasks despite their size. Store them in a closet or under a bed. This solution works well in guest rooms that double as sewing spaces.
Designing Your Cutting and Work Area
A good cutting table saves your back. Counter height works better than standard table height. You lean over less when cutting fabric. This reduces strain during long cutting sessions. Some sewers use kitchen islands as cutting surfaces. The height naturally suits fabric work.
The table needs adequate size for large pattern pieces. A folding banquet table provides six feet of cutting space. These tables cost little and fold for storage. Place near a wall when in use. Fold and store when you need the room for other purposes. This flexibility serves sewers with limited dedicated space.
Utilize space beneath cutting tables. Rolling storage bins slide under easily. Keep frequently used fabrics there for quick access. Measure the height before buying bins. Ensure they fit comfortably underneath. This hidden storage keeps your room looking tidy while maximizing every bit of space.
Shelving units under tables organize supplies vertically. Install shelf brackets on table legs. Add boards between brackets. Create custom storage that fits your specific needs. This DIY approach costs little and uses otherwise wasted space. Store cutting mats, rulers, and rotary cutters within arm’s reach.
Proper Lighting for Your Sewing Space
Good lighting prevents eye strain and improves accuracy. Natural light provides the truest color representation. Position your sewing machine near windows when possible. North-facing windows offer consistent light throughout the day. Avoid direct sunlight that creates harsh shadows and fades fabric.
Supplement natural light with quality artificial lighting. LED bulbs last longer and stay cool. Choose daylight-balanced bulbs for accurate color matching. Install lighting above your sewing machine, cutting table, and ironing board. Each work area needs its own focused light source.
Task Lighting Solutions
Adjustable task lamps direct light exactly where needed. Clamp-on styles attach to tables and shelves. Move them as your work requires. LED task lamps produce bright, focused light without heat. This matters during long sewing sessions when you work close to the light source.
Under-cabinet lighting illuminates workspace without taking surface area. Install LED strips beneath shelves and cabinets. These create shadow-free work surfaces. Battery-operated versions install without wiring. This simple addition makes a dramatic difference in visibility and comfort.
Color-Coding Your Sewing Supplies
Color-coding simplifies organization. Assign colors to supply categories. Blue bins for patterns. Green for notions. Red for cutting tools. This visual system helps you grab what you need instantly. Over time, it becomes automatic. You know which color holds which supplies without thinking.
Apply the same principle to labeling. Use colored labels or tags. Match label colors to bin colors for reinforcement. Write contents clearly on each label. This dual system works even better than color alone. Family members can help return items to proper spots. Everything stays organized with minimal effort.
Discover the Complete Organization System
Access step-by-step guides, checklists, and proven methods used by professional sewers to create organized, inspiring spaces that fuel creativity.
Mobile setups suit renters and small-space dwellers. A rolling cart holds your sewing machine and essential supplies. Move it to any room when you want to sew. Roll it into a closet when done. This flexibility means you can sew anywhere in your home without permanent setup.
Portable sewing machines work perfectly for mobile stations. These lightweight machines move easily. They offer enough features for most projects. Store the machine in a case on your rolling cart. Everything stays together and protected between sewing sessions.
Creating Temporary Work Zones
Temporary setups let you sew without a dedicated room. Use your dining table as a cutting surface. Set up your machine on a desk or kitchen counter. Store supplies in portable containers you bring out when needed. This approach works for sewers who share space with family activities.
Establish a routine for setup and takedown. Keep all supplies in one closet or storage area. Bring them out together. Pack them away together. This system minimizes disruption to household routines. You can complete projects successfully even without a permanent sewing room.
Maximizing Vertical Storage Space
Walls offer tremendous storage potential. Floor-to-ceiling shelving uses vertical space efficiently. Install adjustable shelves to accommodate items of different heights. Higher shelves store seasonal fabrics or rarely used supplies. Lower shelves hold everyday essentials within easy reach.
Pegboards provide customizable wall storage. Hang scissors, rulers, and rotary cutters. Rearrange hooks as your needs change. Paint pegboard to match your room decor. This functional storage doubles as attractive wall art when you arrange tools by color or type.
Wall-Mounted Organization Ideas
Magnetic strips hold metal tools securely. Mount them on walls near work surfaces. Scissors, seam rippers, and small rulers attach magnetically. This keeps tools visible and accessible. No more digging through drawers searching for scissors. They hang right where you need them.
Floating shelves display finished projects and inspiration. Show off quilts, garments, and accessories you have made. These serve double duty as decor and motivation. Seeing completed work inspires you to start new projects. Rotate displays seasonally to keep your space fresh and interesting.
Small notions disappear easily. Buttons, snaps, and hooks need organized storage. Clear containers with multiple compartments work perfectly. Sort buttons by color or size. Keep zippers separated by length. This system helps you find exactly what you need quickly.
Tackle boxes designed for fishing work great for sewing notions. These have adjustable dividers. Customize compartments to fit your collection. Stack multiple boxes on shelves. Label the outside of each box with general contents. Open the right box immediately instead of searching through several.
Creative Notion Display Storage
Mason jars make attractive button storage. Display jars on shelves where you can see contents. This turns supplies into decor. Group jars by color for visual impact. The glass keeps buttons clean while letting you browse your collection. Plus, jars cost little and come in various sizes.
Hanging jewelry organizers store small notions efficiently. These clear pocket organizers hang on walls or doors. Separate pockets hold different items. One for elastic, another for bias tape, others for various trims. You see everything at once. This accessibility encourages you to use supplies instead of buying duplicates.
Creating an Inspiration Board
Inspiration boards keep ideas organized. Pin fabric swatches for future projects. Add photos of garments you want to make. Include color combinations that appeal to you. This visual collection sparks creativity when you need project ideas. Update it regularly as tastes change and new inspiration arrives.
Take photos of garments you see in stores or online. Pin these images to your board. Add notes about construction details that interest you. This builds a personal reference library. When you have sewing time, review your board. Projects practically plan themselves when you have collected ideas over time.
Digital Inspiration Collections
Pinterest boards organize digital inspiration. Create separate boards for different project types. One for dresses, another for quilts, others for home decor items. Save ideas as you find them. Add notes about why each pin appeals to you. Review boards before starting new projects. This digital approach complements physical inspiration boards.
Photograph your own completed projects. Store these photos in a dedicated folder. Review them occasionally to remember techniques you have learned. These photos serve as proof of progress. New sewers especially benefit from seeing how skills improve over the years. This documentation motivates you to keep sewing and learning.
Seasonal Storage and Rotation Systems
Rotate fabrics seasonally to keep your space manageable. Store summer fabrics during winter months. Swap them when seasons change. This rotation keeps current fabrics accessible. Out-of-season materials move to higher shelves or storage areas. You reduce clutter while maintaining your complete collection.
Works in progress need their own storage spot. Dedicate bins to active projects. Keep all materials for each project together. Pattern pieces, fabric, notions, and instructions stay in one place. This system lets you switch between projects without losing pieces. Label each bin with the project name and target completion date.
Long-Term Fabric Preservation
Special fabrics deserve proper storage. Wrap vintage or delicate materials in acid-free tissue paper. Store them flat in boxes away from light. This prevents fading and fiber damage. Label boxes clearly with contents and purchase date. Years later, you will find these treasures perfectly preserved and ready to use.
Climate control matters for long-term storage. Avoid attics and basements where temperature and humidity fluctuate. These conditions encourage mildew and insect damage. Store fabric in climate-controlled areas of your house. Closets in main living spaces work better than garage storage. Your investment in beautiful fabric stays protected.
Master Every Aspect of Sewing Room Organization
Get instant access to comprehensive organizational systems, storage solutions, and space-planning guides that professional sewers rely on every day.
Most sewers share their space with other household functions. A guest room that doubles as a sewing room serves both purposes well. Choose furniture that supports both uses. A daybed provides guest sleeping while looking attractive daily. Your sewing machine stays set up on a desk. Guests arrive to a welcoming room that serves you perfectly between visits.
Murphy beds create ultimate flexibility. Fold down the bed when guests arrive. Fold it up to reveal your complete sewing setup. This design maximizes limited square footage. One room truly serves two distinct purposes. The initial investment in a Murphy bed pays off in usable space and convenience.
Concealing Sewing Areas in Shared Spaces
Cabinets with doors hide sewing areas instantly. Close doors when you stop working. The space looks neat for other uses. This approach works in living rooms and family rooms. Your sewing equipment stays ready but invisible. You avoid the setup and takedown cycle while maintaining a tidy appearance.
Room dividers create visual separation in shared spaces. Position a decorative screen between your sewing area and the rest of the room. This defines your creative zone without permanent walls. Fold and move the screen when you need the full room. This flexible boundary helps you focus while sewing.
Ergonomic Considerations for Sewing Spaces
Proper ergonomics prevent pain and injury. Invest in a quality chair with good lumbar support. Adjust height so your feet rest flat on the floor. Your elbows should bend at ninety degrees when operating the sewing machine. These positions reduce strain during long sewing sessions.
Position your monitor or laptop at eye level if you reference digital patterns. This prevents neck strain from looking down constantly. Use a laptop stand or stack books to raise screens. Your sewing space should support healthy posture throughout extended projects. Comfort directly affects how much time you can spend sewing.
Preventing Sewing-Related Strain
Anti-fatigue mats cushion your feet at standing work surfaces. Place one at your cutting table and ironing board. These mats reduce stress on feet, legs, and back. You can stand longer without discomfort. This simple addition makes a noticeable difference in energy levels after a full day of sewing.
Take regular breaks to stretch and move. Set a timer to remind yourself. Stand up and walk around every hour. Stretch your neck, shoulders, and hands. These breaks prevent repetitive stress injuries. Your body performs better with regular movement throughout the day. Better physical condition means more enjoyable sewing sessions.
Budget-Friendly Organization Solutions
You do not need expensive furniture to create an organized sewing space. Repurpose items you already own. A dresser becomes fabric storage with drawer dividers. Bookshelves hold bins and baskets of supplies. An old desk transforms into your sewing machine station. Look at existing furniture with fresh eyes before buying new pieces.
Thrift stores offer amazing deals on organizational furniture. Look for filing cabinets, shelving units, and storage pieces. A bit of paint updates tired furniture. You save hundreds of dollars compared to buying new. Plus, older pieces often feature better construction than budget modern furniture. Hunt for bargains and transform them into perfect sewing room components.
Make your own storage containers from cardboard boxes. Cover them with pretty fabric or contact paper. These custom boxes cost almost nothing. Size them exactly to fit your shelves. This DIY approach creates cohesive storage that looks intentional. No one knows you made them from recycled boxes.
Build simple shelving from boards and brackets. Home improvement stores cut boards to length. Install brackets on walls at your preferred heights. Lay boards across brackets. This custom shelving costs a fraction of pre-made units. Adjust heights specifically for your supplies. Paint boards to match your room decor for a finished look.
Maintaining Your Organized Space
Organization requires ongoing maintenance. Spend fifteen minutes tidying after each sewing session. Put fabric back in bins. Return tools to their spots. This habit prevents chaos from building up. Your space stays ready for the next project. You walk in and start sewing immediately instead of cleaning first.
Schedule a deep organization session every few months. Assess what works and what does not. Adjust storage as your needs change. Purge supplies you will never use. This regular maintenance keeps your system functioning smoothly. An organized space stays organized with consistent attention.
Developing Good Sewing Room Habits
Establish a routine for starting and ending sewing sessions. Begin by clearing your work surface. End by putting away tools and materials. These bookend habits maintain organization automatically. They become second nature over time. Your sewing room stays functional with minimal conscious effort.
Resist the temptation to create temporary piles. That stack of fabric on the chair turns permanent quickly. Put things away immediately in designated spots. This discipline prevents the slow creep of clutter. Your organized room stays organized instead of gradually deteriorating into chaos.
Adding Personal Touches to Your Sewing Room
Your sewing room should reflect your personality. Display photos of loved ones wearing garments you made. Hang inspirational quotes about creativity. Choose colors that make you happy. This personal space should feel like your sanctuary. Surround yourself with things you love while you create.
Include comfortable seating for planning and hand-sewing. A cozy chair in the corner creates a spot for quiet work. Add good lighting and a side table for tea. This retreat within your sewing room offers a change of pace. Switch from machine work to hand stitching in your comfortable chair. The variety keeps sewing enjoyable for hours.
Create Your Dream Sewing Space
Everything you need to transform any space into an organized, inspiring sewing room is waiting for you. Join the community of sewers who sew more because their space works perfectly.
Creating an organized sewing space changes everything about your crafting experience. You spend more time sewing and less time searching for supplies. Projects flow smoothly when everything has its place. The investment in organization pays dividends every single time you sit down to sew.
Start small if a complete room makeover feels overwhelming. Tackle one area at a time. Organize your fabric this week. Sort patterns next week. Each improvement builds on the last. Before long, your entire space functions beautifully. The journey to organization happens one step at a time.
Remember that your perfect sewing room evolves over the years. Your needs change as skills develop and interests shift. Stay flexible and adjust your space accordingly. The goal is creating an environment that supports your creativity today and adapts for tomorrow.
An organized sewing room invites you to create. Walking into a tidy, well-planned space inspires new projects. You see possibilities instead of chaos. This transformation makes sewing more enjoyable and productive. Your creativity flourishes in a space designed to support it.
Ready to Transform Your Sewing Experience?
Access the complete collection of organization systems, space-planning guides, and creative solutions that make sewing rooms work beautifully. Join thousands who have already created their perfect sewing spaces.