The coveted glass skin look has taken the beauty world by storm. This translucent, dewy complexion that seems to glow from within isn’t just reserved for K-beauty influencers or expensive spa treatments. You can achieve that luminous, poreless skin right at home with the right approach and dedication to your routine.
Glass skin represents more than just a trend. It embodies healthy, well-hydrated skin that reflects light beautifully. The good news? This radiant complexion is achievable for all skin types with consistent care and the proper techniques.
Ready to Transform Your Skin?
Discover the proven system that helps thousands achieve radiant glass skin from home. Get access to expert formulations and step-by-step guidance tailored to your skin type.
Glass skin originated in South Korea and describes a complexion so smooth and luminous it resembles a piece of glass. This isn’t about looking oily or overly made-up. Instead, it’s about achieving skin that appears naturally flawless, hydrated, and radiant.
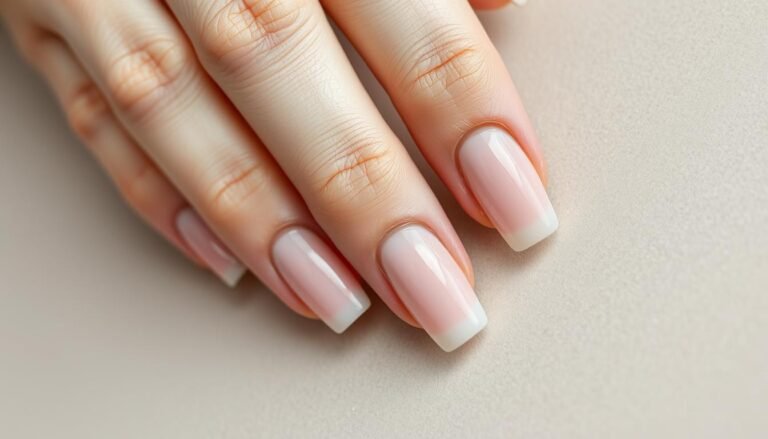
The hallmarks of glass skin include exceptional hydration levels, minimal visible pores, even skin tone without discoloration, and a natural glow that catches light beautifully. Your skin should feel plump and bouncy to the touch.
Key Characteristics
Ultra-hydrated and plump texture
Translucent, poreless appearance
Even complexion without redness
Natural dewy finish without shine
Smooth surface that reflects light
Common Misconceptions
Glass skin isn’t just for oily types
It doesn’t require expensive products
You don’t need professional treatments
Results take time and consistency
It’s achievable for mature skin too
Understanding your skin type helps you customize your approach. Whether you have dry, oily, combination, or sensitive skin, the principles remain the same. You’ll focus on deep hydration, gentle exfoliation, and protecting your moisture barrier.
The Foundation: Master the Double Cleanse
Your journey to glass skin begins with proper cleansing. The double cleanse method removes all impurities without stripping your skin. This Korean beauty staple ensures your face is perfectly clean so subsequent products can work effectively.
Start with an oil-based cleanser to dissolve makeup, sunscreen, and excess sebum. Oil binds to oil, making this step incredibly effective at removing stubborn products. Massage the cleansing oil onto dry skin for about one minute.
Follow with a water-based cleanser to remove any remaining residue and cleanse your pores deeply. Choose a gentle formula that won’t disrupt your skin barrier. This second step targets water-based impurities like sweat and dirt.
Step One: Oil Cleanser
Apply to completely dry skin
Massage gently for 60 seconds
Emulsify with water before rinsing
Removes makeup and sunscreen
Step Two: Water Cleanser
Use gentle, low-pH formula
Create soft lather with water
Cleanse for 30-45 seconds
Rinse with lukewarm water
The Result
Completely clean canvas
No residue or tightness
Balanced skin pH maintained
Ready to absorb treatments
The double cleanse should never leave your face feeling tight or stripped. If you experience dryness, switch to a more hydrating cleanser formula. Your skin should feel soft and prepared for the next steps.
Perform this ritual every evening without exception. Morning cleansing can be simplified to just a water-based cleanser unless you have particularly oily skin. Consistency with proper cleansing sets the foundation for every other step in your routine.
Gentle Exfoliation for Smooth, Refined Texture
Exfoliation removes dead skin cells that make your complexion look dull and prevent that glass-like smoothness. However, aggressive scrubbing is your enemy. Glass skin requires gentle chemical exfoliation rather than harsh physical scrubs.
Chemical exfoliants work by dissolving the bonds between dead skin cells. This reveals fresh, radiant skin underneath without causing micro-tears or irritation. Start slowly to let your skin build tolerance.
Important: Over-exfoliation is one of the biggest mistakes people make when pursuing glass skin. Your barrier needs to stay intact to maintain that plump, hydrated appearance. Listen to your skin and adjust frequency accordingly.
Choose Your Exfoliation Acid Wisely
AHAs like glycolic acid work on the skin surface to brighten and smooth texture. These water-soluble acids are excellent for dry skin types and addressing sun damage. They help with fine lines and uneven tone.
BHAs such as salicylic acid penetrate into pores, making them perfect for oily or acne-prone skin. This oil-soluble acid helps prevent breakouts while refining pore appearance. Use BHAs if you struggle with congestion.
PHAs are the gentlest option, ideal for sensitive skin types. These larger molecules work more slowly, reducing irritation risk while still providing exfoliation benefits. They also offer hydration alongside their exfoliating action.
Start with 1-2 times per week application
Apply to clean, dry skin in the evening
Wait 5-10 minutes before next step
Always follow with hydrating products
Increase frequency gradually if tolerated
Never exceed 3-4 times weekly for most acids
Niacinamide pairs beautifully with your exfoliation routine. This powerhouse ingredient helps minimize pores, regulates oil production, and strengthens your skin barrier. Many find it essential for achieving that refined glass skin texture.
Unlock Advanced Exfoliation Techniques
Learn professional methods to refine your skin texture without irritation. Get personalized acid recommendations and treatment schedules for your specific skin concerns.
Deep hydration creates that plump, translucent look characteristic of glass skin. This step separates mediocre results from truly transformative ones. You’ll build moisture through multiple lightweight layers rather than one heavy cream.
The Korean skincare philosophy emphasizes layering water-based products from thinnest to thickest consistency. Each layer adds hydration while preparing your skin to absorb the next step. This method delivers more moisture than any single product could provide.
The Essential Hydration Sequence
Start with a hydrating toner immediately after cleansing. Pat it into your skin while still slightly damp. This step replenishes moisture lost during cleansing and preps your face to receive subsequent products more effectively.
Toners for glass skin should be watery and packed with humectants. Avoid anything with alcohol or astringent properties. Your toner should add hydration, not strip it away. Apply multiple thin layers if your skin feels particularly thirsty.
Hydrating Toner Benefits
Balances skin pH after cleansing
Provides first hydration layer
Preps skin for better absorption
Soothes and calms irritation
Adds glow and plumpness
Key Toner Ingredients
Hyaluronic acid for moisture binding
Glycerin to attract water
Centella for soothing benefits
Green tea for antioxidants
Ceramides for barrier support
Essence: The Glass Skin Secret Weapon
Essence sits between toner and serum in your routine. This lightweight liquid delivers concentrated hydration and active ingredients deep into your skin. Many consider essence the cornerstone of achieving authentic glass skin.
Pat essence into your face with your palms. The warmth and gentle pressure help ingredients penetrate better. Wait about 30 seconds before moving to the next step. Your skin should feel noticeably more supple after this layer.
Hyaluronic acid is the star ingredient in most glass skin essences. This molecule holds up to 1000 times its weight in water, creating that characteristic plumpness. Multiple weights of hyaluronic acid work at different skin depths for comprehensive hydration.
Serums for Targeted Concerns
Layer one or two serums depending on your specific skin needs. These concentrated formulas address concerns like dark spots, fine lines, or redness. Choose serums that complement rather than conflict with each other.
Vitamin C brightens and evens out your complexion while protecting against environmental damage. Niacinamide refines pores and controls oil production without drying. Peptides support firmness and help maintain that youthful glass skin appearance.
Apply serums from thinnest to thickest consistency. Give each product about 30 seconds to absorb before adding the next layer. Your skin will feel increasingly hydrated and supple as you build these moisture layers.
Moisturizer: Sealing in All That Hydration
Choose a lightweight moisturizer that provides hydration without heaviness. Gel formulas work beautifully for oily skin, while gel-creams suit combination types. Dry skin may need a richer cream, but avoid anything that sits heavily on the surface.
Your moisturizer locks in all the previous hydrating layers while adding its own moisture. It should absorb within a few minutes, leaving skin bouncy and glowing rather than greasy. This is where you achieve that final glass skin finish.
Build Your Perfect Hydration Stack
The right combination of hydrating products makes all the difference. Your skin type and climate determine which formulas work best. Some need minimal layers while others thrive with extensive routines.
Pay attention to how your skin responds to different products. Adjust your routine seasonally, as your hydration needs change with weather and environment. The goal is plump, comfortable skin that glows naturally.
Facial Oils for Enhanced Glow and Nourishment
Facial oils can enhance your glass skin routine when used correctly. These concentrated formulas add nourishment and create that coveted dewy finish. Even oily skin types can benefit from the right oil formulation.
The trick is choosing oils that match your skin type and using them in the proper sequence. Lightweight oils like squalane or rosehip work for most people. Richer oils like marula suit very dry complexions.
When to Apply Facial Oil
You have two options for oil application. Mix a few drops into your moisturizer for lightweight hydration and glow. This method works well for daytime or combination skin.
Alternatively, apply oil as your final step to seal everything in and maximize that glass skin radiance. This approach suits dry skin or nighttime routines when you want intensive nourishment.
The oil creates a subtle sheen that mimics natural skin luminosity. It should enhance your glow without looking greasy. Start with 2-3 drops and adjust based on your skin’s absorption.
Best Oils for Glass Skin
Squalane – Lightweight, absorbs quickly, suits all skin types including oily
Rosehip – Rich in vitamins, brightens, helps with uneven tone and texture
Jojoba – Closest to skin’s natural sebum, balances oil production
Argan – Nourishing without heaviness, good for combination skin
Marula – Rich and protective, ideal for very dry or mature skin
Sea buckthorn – High in antioxidants, supports barrier health and radiance
Quality matters more than quantity with facial oils. A pure, well-formulated oil delivers better results than mixing multiple low-quality options. Store oils in dark bottles away from heat to maintain their effectiveness.
Sheet Masks: Intensive Hydration Treatments
Sheet masks provide an intensive hydration boost that accelerates your journey to glass skin. These serum-soaked fabrics deliver concentrated ingredients while preventing evaporation. The occlusive effect allows deeper penetration than simply applying serum alone.
Use sheet masks 2-3 times weekly for best results. They work particularly well before special events when you need that extra glow. The ritual also provides a relaxing moment of self-care in your beauty routine.
Maximizing Sheet Mask Benefits
Apply your sheet mask after cleansing and toning. Leave it on for 15-20 minutes, but don’t let it dry out completely on your face. Dried masks can actually pull moisture from your skin, defeating the purpose.
Pat in any remaining essence after removing the mask. Don’t rinse it off. Follow immediately with your regular serum and moisturizer to lock in the benefits. Your skin will look noticeably plumper and more radiant.
Pro Tip: Store sheet masks in the refrigerator for an extra soothing, de-puffing effect. The cooling sensation feels amazing and helps tighten pores temporarily for an enhanced glass skin appearance.
Best Sheet Mask Ingredients
Hyaluronic acid for intense hydration
Snail mucin for repair and glow
Centella for calming irritation
Vitamin C for brightening
Niacinamide for pore refinement
Ceramides for barrier support
Sheet Mask Application Tips
Always start with clean skin
Smooth out air bubbles carefully
Relax in comfortable position
Set timer for 15-20 minutes
Use excess serum on neck and hands
Follow with moisturizer immediately
Choose masks formulated for your specific concerns. Hydrating masks work for everyone pursuing glass skin, but you can alternate with brightening or soothing options. Pay attention to how different formulas affect your complexion.
Elevate Your Glass Skin Routine
Access professional treatment protocols that deliver spa-quality results at home. Learn advanced masking techniques and product combinations for maximum impact.
Sunscreen is absolutely essential for maintaining glass skin. UV damage causes dark spots, uneven texture, and premature aging – all things that work against that flawless appearance. Protection prevents damage rather than trying to repair it later.
Choose a sunscreen that layers well under makeup and doesn’t leave a white cast. Modern Korean and Japanese formulas absorb beautifully while providing excellent protection. SPF 30 is the minimum, though SPF 50 offers better defense.
Finding Your Perfect Sunscreen Formula
Chemical sunscreens absorb UV rays and work well under makeup. They tend to feel lighter and more cosmetically elegant. These formulas suit most skin types and don’t leave any visible residue.
Mineral sunscreens create a physical barrier that reflects UV rays. They work immediately upon application and suit sensitive skin beautifully. Modern formulas have improved significantly, with many leaving minimal white cast.
Hybrid formulas combine both types for broad-spectrum protection with elegant texture. These often provide the best of both worlds – effective protection without compromising your glass skin glow.
Remember: Sunscreen should be the last step in your morning routine, applied about 15 minutes before sun exposure. Reapply every 2 hours when outdoors, or every 4 hours for indoor activities near windows.
Application Technique Matters
Use about a quarter teaspoon of sunscreen for your face alone. Most people apply far too little, which drastically reduces protection. Don’t forget your neck, ears, and the backs of your hands.
Pat rather than rub sunscreen into your skin. This prevents disrupting the other layers you’ve carefully applied. Wait a few minutes for it to set before applying makeup or going outside.
Dispense proper amount into your palm
Dot sunscreen on forehead, cheeks, nose, and chin
Gently pat and spread evenly across face
Extend application down neck and décolletage
Allow 15 minutes to absorb before sun exposure
Reapply throughout the day as needed
Sun protection preserves all the work you’ve done to achieve glass skin. It prevents the hyperpigmentation, texture issues, and premature aging that UV exposure causes. Make this step automatic, regardless of weather or season.
Diet, Hydration, and Lifestyle for Radiant Skin
Glass skin starts from within. Your diet, hydration, and lifestyle choices dramatically impact your complexion. No amount of skincare can compensate for poor nutrition or inadequate water intake.
Focus on whole foods rich in antioxidants, healthy fats, and vitamins. These nutrients support skin health at the cellular level. Your face reflects what you put into your body just as much as what you put onto it.
Essential Nutrients for Glass Skin
Hydration Heroes
Drink 8-10 glasses of water daily
Eat water-rich fruits like watermelon
Include cucumbers and celery
Herbal teas count toward hydration
Coconut water provides electrolytes
Skin-Loving Foods
Fatty fish for omega-3s and glow
Berries packed with antioxidants
Avocados for healthy fats
Leafy greens for vitamins
Nuts and seeds for minerals
Water intake directly affects your skin’s plumpness and radiance. Dehydrated skin looks dull and emphasizes fine lines. Consistent hydration from within works synergistically with topical products to create that glass skin effect.
Sleep and Stress Management
Your skin repairs itself during sleep. Aim for 7-9 hours nightly to support this regeneration process. Poor sleep shows up quickly as dullness, puffiness, and increased inflammation. Quality rest is non-negotiable for glass skin.
Chronic stress wreaks havoc on your complexion through hormonal changes and inflammation. Practice stress-reduction techniques like meditation, yoga, or deep breathing. Your face will thank you with improved clarity and glow.
Exercise for Circulation and Glow
Regular exercise increases blood flow, delivering oxygen and nutrients to your skin cells. This natural circulation boost creates that healthy glow from within. Exercise also helps manage stress and supports better sleep.
You don’t need intense workouts. Even 30 minutes of walking daily makes a difference. The increased circulation during and after exercise gives your face a natural flush that contributes to that coveted radiance.
Important: Always cleanse after working out to prevent sweat and bacteria from clogging pores. Exercise is wonderful for your skin, but you must remove impurities promptly afterward to prevent breakouts.
Common Mistakes That Prevent Glass Skin
Many people unknowingly sabotage their glass skin goals through common errors. Recognizing and avoiding these mistakes accelerates your progress. Small adjustments often make a dramatic difference in your results.
Over-Exfoliation and Barrier Damage
The most common mistake is excessive exfoliation. Your barrier needs to stay intact to maintain that plump, healthy appearance. Over-exfoliated skin looks red, feels sensitive, and appears dull rather than glowing.
Signs of barrier damage include increased sensitivity, tightness, flaking, and persistent redness. If you experience these symptoms, stop all acids immediately. Focus solely on gentle cleansing and intensive hydration until your barrier recovers.
Healthy Exfoliation Practices
Start slowly with 1-2 times weekly
Use only one acid type at a time
Always follow with hydration
Listen to your skin’s response
Take breaks if needed
Protect with sunscreen daily
Signs You’re Over-Doing It
Persistent redness or flushing
Increased sensitivity to products
Tight, uncomfortable feeling
Excessive dryness or flaking
More breakouts than usual
Burning sensation from products
Using Too Many Active Ingredients
Layering multiple strong actives creates more problems than it solves. Your skin doesn’t need everything at once. Focus on a few well-chosen products that work together harmoniously rather than piling on every trending ingredient.
Retinol, vitamin C, and acids shouldn’t all happen simultaneously, especially when you’re starting out. Introduce new actives one at a time with several weeks between additions. This lets you identify what works and what causes problems.
Skipping Moisturizer on Oily Skin
Oily skin needs moisture just as much as dry skin. Skipping moisturizer often makes oil production worse as your skin compensates for dehydration. Choose lightweight formulas, but always complete your hydration layers.
Gel moisturizers work beautifully for oily types without adding heaviness. Your skin should feel balanced and comfortable, not tight or greasy. Proper hydration actually helps regulate sebum production over time.
Inconsistent Routine Application
Glass skin requires consistency. Sporadic application of products delivers sporadic results. Commit to your routine twice daily without exception. Skin improvements happen gradually with regular care, not overnight from occasional efforts.
Set realistic expectations for timing. Most people see noticeable improvements within 4-6 weeks of consistent routine practice. Significant transformation typically takes 3-4 months. Patience and persistence pay off with that coveted glass skin glow.
Optimizing Your Nighttime Routine
Your nighttime routine is when the real magic happens. Skin repairs itself while you sleep, making evening care particularly important. This is the time to use richer products and treatment ingredients.
Evening allows for more intensive care since you don’t need to worry about makeup application or sun exposure. Take your time with each step, allowing full absorption between layers. This mindful approach enhances both results and relaxation.
Night Cream and Sleeping Masks
Night creams tend to be richer than day moisturizers. They work with your skin’s natural repair processes. Choose formulas with ceramides, peptides, and nourishing ingredients that support overnight renewal.
Sleeping masks provide an extra hydration boost 2-3 times weekly. These occlusive treatments seal in all your previous layers while delivering their own benefits. Wake up to noticeably plumper, more radiant skin.
Apply sleeping masks as your absolute final step. They create a protective barrier that prevents moisture loss overnight. Your pillowcase might show some product transfer, but your skin will look incredible in the morning.
Treatment Products for Night
Retinol works best at night when there’s no UV exposure. This powerhouse ingredient addresses fine lines, uneven texture, and pore appearance. Start with low concentrations and gradually increase as your skin builds tolerance.
AHA treatments are also ideal for evening use. These acids make skin sun-sensitive, so nighttime application with morning sunscreen creates the safest protocol. Your skin will look smoother and more refined.
Double cleanse to remove all daytime buildup
Apply treatment toner or exfoliating acid
Wait 5-10 minutes for acid absorption
Layer hydrating essence and serums
Apply treatment ingredients like retinol
Seal with night cream or sleeping mask
Add facial oil for extra nourishment if needed
Your evening routine sets up success for the next day. Skin that’s properly cleansed and nourished overnight looks dramatically better come morning. This is when you’ll see that glass skin glow truly develop.
Master Your Complete Glass Skin System
Get comprehensive guidance on building the perfect morning and evening routines for your unique skin. Learn professional sequencing, product pairing, and timing for maximum results.
The right makeup enhances rather than covers your glass skin. Less is more with this aesthetic. Your skincare does the heavy lifting, while makeup adds subtle perfection and strategic glow.
Start with a luminous primer that adds radiance without sparkle. Skip heavy foundations in favor of lightweight tinted moisturizers or cushion compacts. Your natural skin should shine through the makeup.
Creating the Perfect Base
Use minimal foundation only where needed. Spot-conceal blemishes or dark circles rather than applying heavy coverage everywhere. This maintains that translucent quality essential to glass skin.
Cream products work better than powder for this look. Cream blush, cream highlighter, and liquid bronzer blend seamlessly into skin. They create natural dimension without disrupting your dewy finish.
Glass Skin Makeup Must-Haves
Illuminating primer for radiance
Lightweight cushion foundation
Creamy concealer for spots only
Cream blush in natural tones
Liquid or cream highlighter
Setting spray not powder
Application Techniques
Use damp beauty sponge for blending
Pat don’t rub foundation
Apply highlighter to high points
Skip powder except on T-zone
Layer products lightly
Finish with hydrating mist
Strategic Highlighting
Place highlighter on the high points of your face where light naturally hits. Focus on cheekbones, bridge of nose, cupid’s bow, and brow bone. This enhances your natural bone structure while adding dimension.
Choose highlighters that create subtle glow rather than obvious glitter. The goal is wet-looking luminosity, not sparkly shimmer. Cream or liquid formulas blend most naturally into skin.
Set your makeup with a hydrating mist rather than powder. Powder can make skin look flat and matte, killing that glass skin effect. A fine mist sets everything while maintaining the dewy finish.
Adjusting Your Routine for Different Seasons
Your skin’s needs change with the seasons. Temperature, humidity, and environmental factors all impact how your routine should adjust. Flexibility ensures consistent glass skin year-round.
Summer Skin Adjustments
Hot humid weather calls for lighter formulas. Switch to gel moisturizers and skip heavy creams. Your skin produces more oil naturally in summer, so you need less from products.
Increase your cleansing frequency if needed to manage extra sweat and sunscreen buildup. Consider adding a refreshing mist throughout the day to maintain hydration without adding heaviness.
Winter Weather Protection
Cold dry air strips moisture from your skin rapidly. Layer more intensively in winter, adding extra essence or serum steps. Switch to richer moisturizers and consider adding a facial oil every night.
Indoor heating creates additional dryness. Use a humidifier in your bedroom to maintain moisture levels. Your skin will look noticeably more plump and healthy with proper environmental humidity.
Summer Routine Adjustments
Switch to gel-based moisturizers
Use lightweight essences
Increase cleansing if needed
Choose oil-free sunscreen
Keep products in cool place
Use refreshing mist sprays
Winter Routine Adjustments
Add richer cream moisturizers
Layer more hydrating steps
Include facial oil nightly
Use creamy sunscreen formulas
Add sleeping masks often
Run bedroom humidifier
Spring and fall serve as transition periods. Pay attention to how your skin responds as weather changes. Adjust your product weights gradually rather than making sudden switches.
Tracking Your Progress and Making Adjustments
Document your glass skin journey with weekly photos in consistent lighting. This helps you see gradual improvements that might not be obvious day-to-day. Progress photos keep you motivated during the transformation process.
Take pictures in natural light from the same angle each time. Include close-ups of specific concerns you’re addressing. You’ll be amazed at the changes that accumulate over weeks and months.
When to Adjust Your Routine
Give new products at least 4 weeks before deciding if they work. Skin cell turnover takes about a month, so earlier judgment isn’t accurate. Some ingredients like retinol need even longer to show full benefits.
If you experience persistent irritation, breakouts, or increased sensitivity beyond an initial adjustment period, something isn’t working. Remove the newest addition and see if symptoms improve.
Remember: Glass skin is a journey, not a destination. Your routine will evolve as your skin improves and your needs change. Stay flexible and keep learning about what works best for your unique complexion.
Signs You’re on the Right Track
Skin feels comfortable and balanced throughout the day
Complexion looks more even and clear over time
Hydration levels improve visibly
Pores appear smaller and refined
Natural glow develops without makeup
Texture becomes smoother to touch
Products absorb better than before
Compliments increase on your skin’s appearance
Celebrate small victories along the way. Notice when a specific concern improves or when your skin feels particularly good. These positive reinforcements help you stay consistent with your routine.
Professional Treatments That Complement Home Care
While glass skin is achievable at home, professional treatments can accelerate results. These services address concerns that home care alone might not fully resolve. Think of them as periodic boosts to your regular routine.
Hydrafacial and Deep Cleansing
Hydrafacials provide deep cleansing and intensive hydration in one treatment. These services extract impurities while infusing beneficial serums. Your skin looks noticeably clearer and more radiant immediately afterward.
Schedule these treatments every 4-6 weeks for maintenance. They complement your home routine by providing deeper cleansing than you can achieve alone. The results enhance your daily glass skin efforts.
Chemical Peels for Texture
Professional peels use higher concentrations of acids than home products. They address stubborn texture issues, hyperpigmentation, and dullness more aggressively. Always work with licensed professionals for these treatments.
Start with gentle peels and space treatments appropriately. Your skin needs recovery time between sessions. Professional guidance ensures you get results without damaging your barrier.
Microneedling for Overall Improvement
Microneedling creates controlled micro-injuries that trigger collagen production. This improves texture, pore size, and overall skin quality. Results develop over several months as collagen rebuilds.
This treatment requires proper aftercare and sun protection. Follow your provider’s instructions carefully for best results and avoid complications. The improvements to your skin’s foundation make home care more effective.
Note: Professional treatments should enhance, not replace, your home routine. Consistent daily care provides the foundation while periodic professional services offer targeted improvements.
Your Glass Skin Journey Starts Today
Achieving glass skin at home is entirely possible with the right approach and consistent effort. This journey requires patience, but the results are worth every step. Your complexion will transform into that luminous, translucent beauty you’ve been admiring.
Remember that glass skin isn’t about perfection. It’s about healthy, well-cared-for skin that glows naturally. Focus on building sustainable habits rather than chasing quick fixes. The gradual improvements will compound into dramatic transformation.
Start with the basics – proper cleansing, consistent hydration, and daily sun protection. These three pillars form the foundation of any successful glass skin routine. Add other steps gradually as your skin adjusts and improves.
Listen to your skin throughout this process. What works for someone else might not suit you perfectly. Be willing to adjust and experiment until you find your ideal combination of products and techniques.
Stay consistent even when progress feels slow. Skin transformation happens in weeks and months, not days. Trust the process and maintain your routine with dedication. The compound effect of daily care creates lasting results.
Transform Your Skin Starting Now
Get instant access to the complete glass skin transformation system used by thousands to achieve radiant, luminous complexions. Personalized guidance, proven formulas, and expert support included.
Your commitment to this routine is an investment in yourself. Every time you properly cleanse, hydrate, and protect your skin, you’re moving closer to that glass skin glow. The journey itself becomes a form of self-care that extends beyond skincare.
Embrace this process with realistic expectations and genuine dedication. Your skin will respond to consistent care with improved texture, radiance, and overall health. That translucent, dewy complexion is waiting for you to claim it through committed daily action.