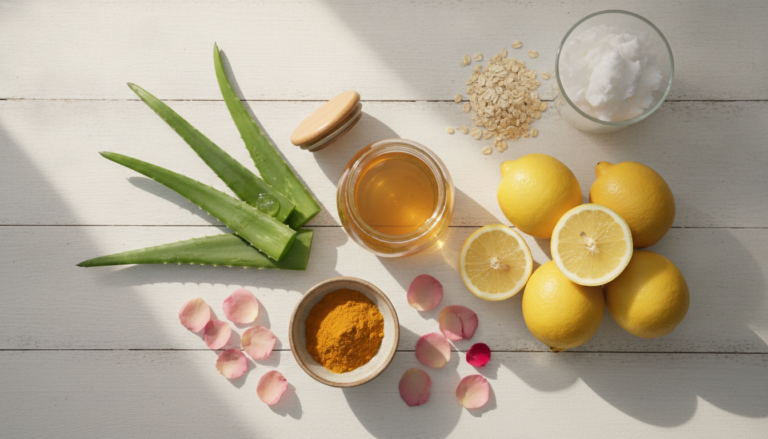
The coveted glass skin look has taken the beauty world by storm. This Korean skincare phenomenon promises a complexion so smooth and radiant it resembles polished glass. The good news? You don’t need expensive salon treatments to achieve this luminous glow.
Creating your own DIY glass skin routine at home is entirely possible with the right approach. The secret lies in understanding the specific steps that build upon each other. Each layer of your routine works to enhance skin hydration, refine texture, and create that signature translucent appearance.
This comprehensive guide walks you through every essential step. You’ll discover the exact ingredients, techniques, and products that deliver professional-level results. Whether you have dry skin, oily skin, or combination skin types, these adaptable methods work for everyone.
Ready to Transform Your Complexion?
Discover the complete glass skin transformation system that’s helping thousands achieve radiant, poreless perfection. Get access to professional-grade techniques and curated product recommendations.
Glass skin represents more than just a skincare trend. This beauty approach focuses on achieving maximum skin hydration while maintaining a healthy skin barrier. The result is a complexion that appears almost translucent with a natural, wet-look glow.
The foundation of glass skin lies in Korean beauty philosophy. This approach prioritizes skin health over makeup coverage. Rather than concealing imperfections, the goal is to create such healthy, radiant skin that makeup becomes optional.
Three key characteristics define true glass skin. First, exceptional hydration creates plumpness and bounce. Second, refined pores minimize texture irregularities. Third, even skin tone eliminates discoloration and dark spots.
What Makes Glass Skin Different from Regular Skincare
Traditional skincare often focuses on treating specific concerns. Glass skin takes a holistic approach instead. Every product and step works together to build moisture levels and strengthen the skin barrier.
The methodology emphasizes layering lightweight, hydrating products. This technique allows skin to absorb multiple moisture sources without feeling heavy. Each layer penetrates differently, creating depth of hydration that single products cannot achieve.
Consistency matters more than product price. A dedicated routine using affordable ingredients like hyaluronic acid and rice water often outperforms expensive sporadic treatments. The key is commitment to daily care.
The Science Behind Luminous Skin
Skin hydration works at multiple levels. The outermost layer needs humectants that draw water from the environment. Middle layers require emollients that smooth and soften. The deepest layers benefit from occlusives that seal everything in.
When your skin barrier functions optimally, it retains moisture naturally. Ingredients like ceramides and niacinamide support this protective barrier. A healthy barrier reflects light evenly, creating that signature glass-like appearance.
Cell turnover also plays a crucial role. Gentle exfoliation removes dead skin cells that create dullness. Fresh cells underneath catch and reflect light better, enhancing overall radiance and glow.
Step One: Master the Double Cleansing Method
Double cleansing forms the foundation of any effective glass skin routine. This two-step process ensures complete removal of everything that accumulates on skin throughout the day. Without proper cleansing, subsequent products cannot penetrate effectively.
The first cleanse uses an oil-based cleanser. Oil dissolves oil-based impurities like sebum, sunscreen, and makeup. This gentle method breaks down stubborn products without stripping your skin barrier.
Your second cleanse employs a water-based cleanser. This step addresses water-based debris like sweat and environmental pollutants. Together, these two cleansing types create the perfect clean canvas.
Choosing Your Oil Cleanser
Different skin types benefit from different oil formulations. Dry skin thrives with heavier oils like argan or marula. These oils provide extra nourishment while removing impurities.
Oily and acne-prone skin types should choose lighter oils. Jojoba oil closely mimics natural sebum without clogging pores. Grapeseed oil offers cleansing power while regulating oil production.
Application technique matters as much as product choice. Massage the oil onto dry skin for at least sixty seconds. This gives the oil time to break down all impurities thoroughly.
The Perfect Water-Based Cleanse
Your second cleanser should match your skin’s pH level. A low-pH cleanser (around 5.5) maintains your skin barrier integrity. High-pH cleansers can disrupt this delicate balance, leading to irritation and dryness.
Gel cleansers work beautifully for oily skin types. They remove excess oil without over-stripping. Cream cleansers suit dry skin better, providing gentle cleansing with added moisture.
Water temperature affects cleansing effectiveness. Lukewarm water opens pores gently without shocking skin. Hot water strips natural oils, while cold water may not remove cleanser completely.
Morning Cleanse Approach
Morning cleansing can be simpler than nighttime. Your skin hasn’t encountered makeup or sunscreen overnight. A single gentle water-based cleanse often suffices unless you have very oily skin.
Evening Deep Clean
Nighttime demands the full double cleanse. Your skin has accumulated sunscreen, makeup, pollutants, and excess sebum. This thorough two-step process prevents clogged pores and allows overnight repair.
DIY Oil Cleanser Recipe
Create your own effective oil cleanser at home using simple ingredients. This customizable formula works for various skin types.
Mix 2 tablespoons of carrier oil (jojoba for oily skin, sweet almond for dry skin)
Add 1 tablespoon of castor oil for deep cleansing power
Include 5 drops of vitamin E oil for antioxidant protection
Optional: Add 3 drops of tea tree essential oil for acne-prone skin
Store in a dark glass bottle to preserve freshness
Step Two: Implement Strategic Exfoliation
Exfoliation accelerates your path to glass skin by removing dead skin cells. This reveals the fresh, radiant cells underneath. However, the approach must be gentle to avoid damaging your skin barrier.
Chemical exfoliation offers superior results for glass skin goals. Alpha hydroxy acids (AHAs) like glycolic and lactic acid dissolve the bonds between dead skin cells. Beta hydroxy acids (BHAs) penetrate deeper into pores, clearing congestion.
Physical exfoliation requires extreme caution. Harsh scrubs can create micro-tears in skin. If you prefer physical methods, choose ultra-fine particles like rice powder or konjac sponges.
Understanding Exfoliation Acids
Different acids target different concerns. Glycolic acid features the smallest molecule size, penetrating deeply for dramatic results. Lactic acid offers gentler exfoliation while providing hydration benefits.
Mandelic acid suits sensitive skin types perfectly. Its larger molecular size works more slowly, reducing irritation risk. This ingredient also addresses hyperpigmentation effectively.
Salicylic acid (BHA) excels at clearing pores. Its oil-soluble nature allows it to penetrate sebum-filled pores. This makes it ideal for oily skin and acne-prone complexions.
Frequency and Timing
Start exfoliation slowly to build tolerance. Begin with once weekly application. Monitor how your skin responds before increasing frequency.
Most skin types benefit from two to three exfoliation sessions per week. Dry skin may prefer twice weekly. Oily skin can often handle three times without issues.
Always exfoliate in the evening. Acids increase sun sensitivity temporarily. Nighttime application allows your skin to recover before sun exposure. This timing also maximizes the benefits of overnight skin repair.
Discover Gentle Exfoliation Solutions
Find the perfect chemical exfoliants formulated specifically for achieving glass skin without irritation. Professional-strength formulas designed for home use.
Rice water serves as an excellent gentle exfoliant. Fermented rice water contains natural enzymes that dissolve dead skin cells. The process also delivers skin-brightening benefits through vitamin B and minerals.
Create rice water by soaking half a cup of rice in two cups of water for thirty minutes. Strain and use the cloudy water as a gentle exfoliating toner. Apply with cotton pads after cleansing.
Honey combined with finely ground oats makes another effective physical exfoliant. Mix one tablespoon of raw honey with one teaspoon of ground oatmeal. Massage gently onto damp skin for gentle exfoliation and hydration.
Signs You’re Over-Exfoliating
Recognize these warning signs to protect your skin barrier and adjust your routine accordingly.
Increased redness or persistent inflammation
Burning sensation when applying regular products
Excessive dryness that moisturizers cannot relieve
New breakouts appearing in unusual areas
Skin feeling tight or uncomfortable throughout the day
Visible flaking or peeling beyond normal exfoliation
Step Three: Layer Toners and Essences for Deep Hydration
Toners and essences represent the heart of the glass skin approach. These watery layers flood your skin with hydration. They prepare your complexion to absorb subsequent products more effectively.
Modern toners differ dramatically from old astringent formulas. Today’s hydrating toners contain humectants that attract moisture. Ingredients like hyaluronic acid can hold up to one thousand times their weight in water.
Essences occupy the space between toners and serums. These concentrated liquids deliver active ingredients in a lightweight format. The texture allows multiple layers without heaviness.
The Seven-Skin Method
This Korean technique involves applying toner seven times in succession. Each thin layer builds upon the previous one. The cumulative effect creates incredible skin hydration and that coveted glass-like bounce.
Pour a small amount of toner into your palms. Pat gently onto your face and neck. Wait thirty seconds for absorption, then repeat the process. By the fourth or fifth layer, you’ll notice visible plumping.
You don’t need to complete all seven layers daily. Even three to five layers deliver noticeable results. Save the full seven-layer treatment for times when your skin needs extra moisture.
Choosing Hydrating Ingredients
Hyaluronic acid stands as the gold standard for skin hydration. This ingredient exists naturally in our bodies but decreases with age. Topical application replenishes moisture levels and improves skin barrier function.
Glycerin works as another powerful humectant. This ingredient draws water from the environment into your skin. It also helps other ingredients penetrate more effectively.
Beta-glucan derived from oats or mushrooms offers deep hydration plus soothing properties. This ingredient calms irritation while delivering moisture. It particularly benefits sensitive skin types.
Green Tea Benefits
Green tea essence provides both hydration and antioxidant protection. The polyphenols combat free radical damage while soothing inflammation. This ingredient suits all skin types beautifully.
Rice Water Power
Rice water contains vitamins, minerals, and amino acids that brighten and hydrate. Regular use improves skin texture and promotes an even complexion. This ingredient has been used for centuries in Asian beauty.
DIY Hydrating Essence Recipe
Create a nourishing essence using ingredients from your kitchen that rivals expensive products.
Brew strong green tea and allow to cool completely
Add one teaspoon of vegetable glycerin per quarter cup of tea
Mix in half teaspoon of aloe vera gel for soothing benefits
Optional: Add 3 drops of rose water for additional hydration
Store in refrigerator for up to one week
Apply in multiple thin layers using the seven-skin method
Application Techniques for Maximum Absorption
The application method affects how well products absorb. Patting motions work better than rubbing. The gentle pressure stimulates blood circulation while encouraging product penetration.
Warm your toner slightly between your palms before applying. This warmth helps ingredients absorb faster. The heat also feels pleasant and turns skincare into a relaxing ritual.
Apply products to slightly damp skin whenever possible. Moisture attracts moisture. Damp skin pulls hydrating ingredients deeper into layers.
Step Four: Apply Targeted Serums for Specific Concerns
Serums deliver concentrated active ingredients directly to skin concerns. These potent formulas contain higher percentages of key ingredients than toners or moisturizers. The lightweight texture penetrates deeply without leaving residue.
For glass skin, focus on serums that boost hydration and radiance. Hyaluronic acid serums plump skin and smooth fine lines. Vitamin C serums brighten complexion and provide antioxidant protection.
Niacinamide serums offer multiple benefits for glass skin goals. This ingredient minimizes pore appearance, regulates oil production, and strengthens the skin barrier. It works synergistically with other hydrating ingredients.
Layering Multiple Serums
You can layer two or three serums for comprehensive benefits. Apply them from thinnest to thickest consistency. Water-based serums go first, followed by more viscous formulations.
Wait thirty to sixty seconds between serum applications. This pause allows each product to absorb properly. Rushing the process reduces effectiveness and can cause pilling.
Certain ingredients pair beautifully together. Hyaluronic acid and niacinamide work synergistically. Vitamin C and vitamin E enhance each other’s antioxidant effects. Research compatible combinations for maximum benefits.
Essential Serum Ingredients for Glass Skin
Peptides support collagen production and skin firmness. As we age, natural collagen decreases. Topical peptides signal skin to create more collagen, improving overall texture and bounce.
Centella asiatica (cica) soothes inflammation and strengthens the skin barrier. This botanical ingredient accelerates healing and reduces redness. It particularly benefits sensitive or irritated complexions.
Snail mucin might sound unusual, but it delivers remarkable hydration. This ingredient contains glycoproteins, hyaluronic acid, and glycolic acid naturally. Regular use improves skin texture and promotes glow.
Find Your Perfect Serum Match
Access a curated collection of professional-grade serums specifically formulated for glass skin achievement. Expert recommendations based on your unique skin concerns and goals.
Create a simple hyaluronic acid serum at home. Dissolve one gram of hyaluronic acid powder in one hundred milliliters of distilled water. Add two drops of preservative. Store in a dark glass bottle for up to three months.
A niacinamide serum requires just a few ingredients. Mix five grams of niacinamide powder with one hundred milliliters of distilled water. Add one teaspoon of vegetable glycerin for extra hydration. This formula rivals expensive store-bought versions.
Aloe vera gel makes an excellent serum base. Combine pure aloe gel with a few drops of rosehip oil and vitamin E. This simple mixture hydrates, soothes, and provides antioxidant protection.
Serum Application Order Guide
Apply your serums in the optimal sequence to maximize absorption and effectiveness.
pH-balancing serums (if using any with acids)
Water-based serums (hyaluronic acid, niacinamide)
Treatment serums (vitamin C, peptides)
Oil-based serums (facial oils, plant extracts)
Step Five: Boost Results with Strategic Sheet Mask Treatments
Sheet masks provide an intensive moisture surge that amplifies your glass skin routine. These single-use treatments deliver concentrated essences directly to skin. The occlusive sheet prevents evaporation, forcing ingredients deeper into layers.
Incorporate sheet masks two to three times weekly for best results. They work particularly well before special events when you want maximum radiance. The immediate plumping effect creates a perfect makeup base.
Look for masks saturated with hydrating ingredients. Hyaluronic acid masks deliver intense moisture. Ceramide masks strengthen the skin barrier while hydrating. Honey masks provide both hydration and antibacterial benefits.
Maximizing Sheet Mask Benefits
Prepare your skin properly before masking. Complete your cleansing and toning steps first. The mask works more effectively on prepped, hydrated skin.
Leave masks on for fifteen to twenty minutes maximum. Longer doesn’t mean better. Once the sheet starts drying, it actually pulls moisture from your skin. Remove at the right time for optimal results.
Don’t waste the remaining essence in the package. Apply excess serum to your neck, chest, and hands. These areas show aging quickly and benefit from extra hydration.
DIY Sheet Mask Recipes
Create custom sheet masks using compressed mask sheets. These dry tablets expand when soaked in liquid. Prepare your essence, soak the tablet, then apply the expanded mask.
Mix rice water with aloe vera gel for a brightening, hydrating mask essence. Add a few drops of rosehip oil for extra nourishment. This combination addresses multiple glass skin goals simultaneously.
Green tea and honey create another powerful mask essence. Brew strong green tea, let it cool, then mix with raw honey. The antioxidants and humectants work together for radiant results.
Hydrating Mask Formula
3 tablespoons cucumber juice
1 tablespoon aloe vera gel
1 teaspoon glycerin
3 drops hyaluronic acid serum
Brightening Mask Formula
2 tablespoons rice water
1 tablespoon lemon juice
1 teaspoon honey
2 drops vitamin E oil
Post-Mask Care
After removing your mask, pat the remaining essence into your skin. Don’t rinse it off. The ingredients continue working even after mask removal.
Follow immediately with your moisturizer while skin is still damp. This seals in all the hydration from the mask treatment. The combination creates lasting plumpness.
Consider refrigerating masks before use for extra benefits. The cooling sensation reduces puffiness and tightens pores. Cold masks feel particularly refreshing in summer or after workouts.
Step Six: Lock In Moisture with the Right Moisturizer
Moisturizers serve as the protective seal over all your hydrating layers. This crucial step prevents moisture loss throughout the day. Without proper occlusion, all the hydration you’ve applied will evaporate.
Glass skin requires lightweight moisturizers that hydrate without heaviness. Gel-creams work beautifully for most skin types. They provide sufficient moisture while maintaining that translucent, non-greasy appearance.
The right moisturizer balances three types of ingredients. Humectants draw water in, emollients smooth texture, and occlusives seal everything. This combination ensures lasting hydration and glow.
Selecting Moisturizers by Skin Type
Dry skin benefits from richer cream formulations. Look for ingredients like shea butter, squalane, and ceramides. These provide deep nourishment while supporting the skin barrier.
Oily skin thrives with oil-free gel moisturizers. Water-based formulas hydrate without adding shine. Ingredients like hyaluronic acid and aloe provide moisture without heaviness.
Combination skin requires strategic application. Use lighter gel formulas on the T-zone where oil accumulates. Apply slightly richer cream to dry areas like cheeks. This customized approach balances the complexion.
Key Moisturizing Ingredients
Ceramides strengthen the skin barrier while preventing water loss. These lipid molecules exist naturally in skin but decrease with age and environmental damage. Topical application replenishes these essential building blocks.
Squalane mimics skin’s natural oils without clogging pores. This lightweight oil absorbs quickly while providing lasting moisture. It suits all skin types, including acne-prone complexions.
Centella asiatica offers both moisturizing and healing properties. This botanical ingredient calms irritation while supporting hydration. It’s particularly beneficial for sensitive skin types.
DIY Glass Skin Moisturizer
Create an effective moisturizer at home using natural ingredients that rival commercial products.
Melt 2 tablespoons shea butter in double boiler
Add 1 tablespoon jojoba oil once melted
Mix in 1 tablespoon aloe vera gel
Add 1 teaspoon vegetable glycerin
Whip mixture until light and fluffy
Store in clean jar, use within 2 weeks
Application Techniques for Better Absorption
Apply moisturizer using upward and outward motions. This technique fights gravity and promotes lymphatic drainage. The massage also stimulates blood flow for enhanced radiance.
Don’t forget your neck and décolletage. These areas show aging prominently yet often get neglected. Extend your moisturizer application down to maintain consistent texture and tone.
Layer your moisturizer while previous products are still slightly damp. This moisture sandwich technique maximizes hydration retention. The dampness helps spread moisturizer more efficiently too.
Day Versus Night Moisturizers
Daytime moisturizers should be lightweight and play well with sunscreen. Many modern formulas combine moisturizer and SPF for convenience. This streamlines your morning routine while ensuring protection.
Night creams can be richer since you won’t layer makeup over them. Nighttime is when skin repairs itself most actively. Support this process with nourishing ingredients like peptides and retinol alternatives.
Consider using facial oils as your final nighttime step. A few drops of rosehip, argan, or marula oil seal in all previous layers. Wake up to plump, glowing skin that looks refreshed.
Step Seven: Protect Your Glass Skin with Proper Sun Defense
Sun protection represents the most critical step for maintaining glass skin. UV exposure causes damage that undermines all your hydration efforts. Without adequate protection, you cannot achieve or maintain that luminous complexion.
Choose a broad-spectrum sunscreen with minimum SPF 30. Broad-spectrum formulas protect against both UVA and UVB rays. UVA rays age skin prematurely, while UVB rays cause burning.
For glass skin aesthetics, select lightweight formulas that don’t leave white cast. Modern sunscreens absorb clear while providing excellent protection. Look for hydrating formulas that enhance rather than disrupt your glow.
Understanding SPF and Application
SPF numbers indicate how long the product extends your sun protection. SPF 30 filters approximately 97% of UVB rays. SPF 50 filters about 98%. The difference is minimal, but higher SPF provides slightly more protection.
Most people apply insufficient sunscreen. You need approximately one-quarter teaspoon for your face alone. Use the two-finger method: squeeze product along two fingers, then apply that amount to your face.
Reapplication matters as much as initial application. Reapply every two hours when outdoors. If you’re swimming or sweating, reapply more frequently. Indoor workers can reapply less often but shouldn’t skip this step.
Chemical Versus Physical Sunscreens
Chemical sunscreens absorb UV rays and convert them to heat. These formulas typically feel lighter and more cosmetically elegant. They work well under makeup and don’t leave residue.
Physical (mineral) sunscreens create a barrier that reflects UV rays. Zinc oxide and titanium dioxide are common ingredients. Modern formulations minimize the white cast associated with older mineral sunscreens.
Combination formulas offer benefits of both types. They provide reliable protection with pleasant textures. Many glass skin enthusiasts prefer these hybrid sunscreens for daily use.
Chemical Sunscreen Benefits
Lightweight, invisible finish
Works well under makeup
No white cast on deeper skin tones
Often includes hydrating ingredients
Physical Sunscreen Benefits
Gentler for sensitive skin
Provides immediate protection
Less likely to cause irritation
Reef-safe formulations available
Incorporating SPF Into Your Routine
Apply sunscreen as the final step of your morning skincare routine. Wait a few minutes after moisturizer to allow proper absorption. Then apply your SPF in a generous layer.
If you wear makeup, consider powder sunscreens for reapplication. These convenient formulas brush over makeup without disrupting it. They make midday reapplication practical and easy.
Don’t forget often-missed areas. Apply sunscreen to your ears, neck, chest, and hands. These areas receive significant sun exposure and show aging quickly without protection.
Complete Your Glass Skin Protection
Access comprehensive sun protection solutions specifically designed to complement glass skin routines. Lightweight formulas that enhance rather than hide your luminous glow.
Sunscreen alone doesn’t provide complete protection. Wear protective clothing when spending extended time outdoors. Wide-brimmed hats shield your face from direct rays.
Seek shade during peak sun hours between 10 AM and 4 PM. UV rays are strongest during this window. Even with sunscreen, limiting direct exposure reduces cumulative damage.
Consider antioxidant supplements for internal protection. Vitamins C and E provide additional defense against free radical damage. Green tea extract offers similar protective benefits.
Advanced Tips for Accelerating Your Glass Skin Results
Your external routine works best when supported by internal health. Hydration from within dramatically impacts skin appearance. Aim for eight glasses of water daily to maintain optimal skin hydration levels.
Diet affects skin quality more than most people realize. Foods rich in omega-3 fatty acids support the skin barrier. Antioxidant-rich fruits and vegetables fight free radical damage. Reduce sugar intake to prevent glycation that dulls complexion.
Sleep quality directly correlates with skin appearance. During deep sleep, skin repairs and regenerates most actively. Aim for seven to nine hours nightly for optimal skin health.
Facial Massage Techniques
Facial massage improves circulation and promotes lymphatic drainage. These benefits enhance product absorption while reducing puffiness. Dedicate five minutes daily to gentle facial massage.
Use your knuckles to massage along your jawline from chin to ears. This movement drains fluid and defines facial contours. Apply gentle pressure, never pulling or tugging skin.
Gua sha tools amplify massage benefits. These smooth stones glide across skin, stimulating blood flow. Use them with facial oil for best results. The cooling stone feels particularly pleasant.
Managing Stress for Better Skin
Stress triggers cortisol release that negatively impacts skin. High cortisol levels increase oil production and inflammation. Both factors work against glass skin goals.
Incorporate stress-reduction practices into your daily routine. Meditation, yoga, or simple breathing exercises help manage stress levels. Even ten minutes daily makes a measurable difference.
Quality sleep reduces stress naturally. Establish consistent sleep schedules and bedtime routines. Your skin will reflect the improvement in your overall stress levels.
Lifestyle Habits for Glass Skin Success
Drink water consistently throughout the day, not just when thirsty
Eat omega-3 rich foods like salmon, walnuts, and flaxseeds
Sleep on silk or satin pillowcases to reduce friction
Exercise regularly to improve circulation and skin health
Manage stress through meditation or relaxing activities
Avoid touching your face unnecessarily throughout the day
Change pillowcases twice weekly to prevent bacterial buildup
Use a humidifier in dry environments to maintain skin moisture
Seasonal Adjustments to Your Routine
Your skin’s needs change with seasons. Summer requires lighter products and higher SPF. The heat and humidity mean you can use gel-based formulas without sacrificing hydration.
Winter demands richer moisturizers and additional barrier protection. Cold air and indoor heating strip moisture aggressively. Layer more hydrating products and add facial oil during harsh weather.
Spring and fall transitions require balanced approaches. Monitor your skin’s response and adjust product weights accordingly. Flexibility ensures year-round glass skin maintenance.
Tracking Your Progress
Document your glass skin journey with weekly photos. Use consistent lighting and angles. Progress happens gradually, making it hard to notice daily. Photos reveal the transformation clearly.
Keep a skincare journal noting products used and skin observations. This helps identify what works specifically for your skin. You’ll recognize patterns that guide future product choices.
Be patient with your routine. Glass skin typically requires six to eight weeks of consistent effort. Results build cumulatively. Trust the process and maintain consistency.
Common Glass Skin Mistakes to Avoid
Many people sabotage their glass skin efforts through common mistakes. Over-exfoliation ranks among the most frequent errors. Excessive exfoliation damages the skin barrier, causing dryness, redness, and increased sensitivity.
Using too many actives simultaneously overwhelms skin. Just because ingredients work individually doesn’t mean they should be combined. Start with one or two actives, then slowly introduce others if needed.
Skipping sunscreen negates all other efforts. UV damage destroys collagen, creates hyperpigmentation, and dehydrates skin. No amount of hydrating products can overcome unprotected sun exposure.
Product Application Errors
Applying products in the wrong order reduces their effectiveness. Water-based products cannot penetrate oil-based ones. Always work from thinnest to thickest consistency.
Using dirty hands or tools introduces bacteria to your skin. Always wash hands before touching your face. Clean makeup brushes and skincare tools regularly to prevent contamination.
Rubbing products vigorously irritates skin unnecessarily. Gentle patting motions work better for absorption. Aggressive application can damage capillaries and worsen redness.
Unrealistic Expectations
Expecting overnight results leads to disappointment and routine abandonment. Skin cell turnover takes approximately twenty-eight days. Meaningful changes require consistent effort over weeks.
Comparing your progress to filtered social media images creates discouragement. Remember that most glass skin photos use professional lighting and editing. Real glass skin looks beautiful but differs from heavily edited images.
Changing products too frequently prevents accurate assessment. Give each product at least four weeks before deciding effectiveness. Constant switching makes it impossible to identify what actually works.
Glass Skin Do’s
Maintain consistent daily routine
Layer products properly from thin to thick
Apply sunscreen every single day
Stay hydrated internally and externally
Be patient with the process
Adjust routine seasonally as needed
Glass Skin Don’ts
Over-exfoliate or use too many acids
Skip essential steps to save time
Use products incompatible with each other
Change entire routine at once
Touch face with unwashed hands
Compare results to filtered images
Ingredient Incompatibilities
Some ingredients work against each other when combined. Vitamin C and niacinamide were once thought incompatible, though recent research suggests they’re fine together. However, retinol and vitamin C can increase irritation when used simultaneously.
Strong acids shouldn’t be combined in the same routine. Using both AHA and BHA together may over-exfoliate sensitive skin. If you use multiple acids, alternate days rather than layering.
Retinol and benzoyl peroxide deactivate each other. Use retinol at night and benzoyl peroxide in the morning if you need both. Timing separates these incompatible ingredients effectively.
When to Modify Your Routine
Persistent redness or burning signals that your routine is too aggressive. Scale back on actives and focus on barrier repair. Use gentle, soothing products until skin recovers.
Increased breakouts after starting new products might indicate purging or actual breakouts. Purging occurs with exfoliating ingredients and resolves within weeks. True breakouts from unsuitable products persist longer.
If your skin feels tight or uncomfortable, add more hydrating layers. You might need additional essence applications or a richer moisturizer. Listen to your skin’s signals.
Building Your Glass Skin Product Arsenal
Building an effective glass skin routine doesn’t require dozens of products. Start with essentials: cleanser, toner, moisturizer, and sunscreen. These four products form your foundation.
Add products gradually based on specific needs. If dullness concerns you, introduce a vitamin C serum. For dehydration, add hyaluronic acid essence. Targeted additions address your unique concerns.
Quality matters more than quantity. One excellent hydrating toner beats five mediocre ones. Invest in products with proven ingredients at effective concentrations.
Essential Product Categories
Your cleansing category needs just two products: oil cleanser and water-based cleanser. Choose formulas appropriate for your skin type. These remove impurities without stripping.
Hydration category includes toner and essence. Look for multiple humectants like hyaluronic acid, glycerin, and beta-glucan. These attract and retain moisture at different skin levels.
Treatment category addresses specific concerns. This might include vitamin C for brightness, niacinamide for pores, or peptides for firmness. Select based on your priority concerns.
Budget-Friendly Options
Glass skin doesn’t require luxury products. Many affordable brands formulate excellent products. Korean and Japanese drugstore brands often offer superior formulas at accessible prices.
The Ordinary provides high-quality actives at minimal cost. Their straightforward formulations contain effective ingredient concentrations. Build a complete routine for under fifty dollars.
CeraVe and Cetaphil offer dermatologist-recommended basics. These pharmacy brands focus on skin barrier health. Their simple formulations work beautifully for glass skin foundations.
Cleansing Essentials
Start with a gentle oil cleanser and low-pH water-based cleanser. These two products remove everything while maintaining skin balance.
Hydration Heroes
Invest in quality hydrating toner and essence. These products create the foundation of glass skin through multiple moisture layers.
Protection Priority
Never compromise on sunscreen quality. This product protects all your glass skin efforts from UV damage and premature aging.
When to Splurge Versus Save
Save money on basic hydrators and cleansers. These categories offer many excellent affordable options. Simple formulations work just as well as expensive alternatives.
Consider investing in targeted treatments with proven ingredients. Serums with stable vitamin C or effective peptides justify higher prices. The concentration and formulation quality matter here.
Sunscreen deserves investment if you find budget options unsuitable. The best sunscreen is one you’ll actually wear daily. If spending more means consistent use, it’s worth it.
Sample Glass Skin Routine Budget Breakdown
Build an effective routine at various price points to fit your budget.
Product Category
Budget Option
Mid-Range Option
Splurge Option
Oil Cleanser
$12-15
$20-25
$35-45
Water Cleanser
$8-12
$15-20
$28-35
Hydrating Toner
$10-15
$22-28
$40-50
Essence
$15-20
$30-38
$55-70
Serum
$8-12
$25-35
$60-85
Moisturizer
$10-15
$20-30
$45-60
Sunscreen
$10-15
$18-25
$35-45
Troubleshooting Your Glass Skin Journey
Not seeing expected results after weeks of consistent effort can be frustrating. Several factors might be hindering your glass skin progress. Identifying the specific issue helps you adjust your approach effectively.
Dehydrated skin often gets mistaken for oily skin. If your skin feels tight yet looks shiny, you likely have dehydration. Add more hydrating layers and reduce harsh treatments.
Breakouts during your glass skin journey might indicate purging or product incompatibility. Purging from exfoliating ingredients resolves within four to six weeks. Breakouts from unsuitable products persist and worsen.
Addressing Persistent Dullness
If dullness persists despite hydration, increase exfoliation frequency slightly. Dead skin cell buildup prevents light reflection. An extra exfoliation session weekly might solve the problem.
Vitamin C serums combat dullness effectively. Apply them in the morning for antioxidant protection and brightening benefits. Consistent use over eight weeks shows significant radiance improvement.
Facial massage stimulates circulation that enhances glow. Dedicate five minutes daily to gentle massage. The improved blood flow brings nutrients to skin surface.
Managing Unexpected Sensitivity
New sensitivity suggests a compromised skin barrier. Strip your routine back to basics: gentle cleanser, hydrating toner, moisturizer, and sunscreen. Eliminate all actives temporarily.
Focus on barrier-repair ingredients. Ceramides, centella asiatica, and panthenol all support healing. Continue this simplified routine until sensitivity resolves completely.
Reintroduce products one at a time after recovery. Wait one week between additions. This methodical approach identifies problematic products clearly.
Why is my skin still dehydrated despite using multiple hydrating products?
You might be missing an occlusive layer to seal in hydration. All the hydrating products in the world won’t help if moisture evaporates immediately. Apply a proper moisturizer or facial oil as your final step. Also verify that you’re drinking enough water and using a humidifier in dry environments. External hydration requires internal support.
How long does it actually take to see glass skin results?
Most people notice initial improvements within two to three weeks. However, achieving true glass skin typically requires six to eight weeks of consistent effort. Your skin cell turnover cycle is approximately twenty-eight days, so meaningful changes need at least one complete cycle. Patience and consistency matter more than any single product.
Can I achieve glass skin if I have acne-prone skin?
Absolutely. Acne-prone skin can achieve glass skin by choosing appropriate products. Use lightweight, non-comedogenic formulas. Focus on hydration and barrier support rather than harsh acne treatments. Often, acne improves when the skin barrier strengthens through proper hydration. Balance treatment with nourishment for best results.
Is the glass skin routine suitable for mature skin?
Yes, mature skin benefits tremendously from glass skin principles. The emphasis on hydration plumps fine lines and improves texture. Add anti-aging ingredients like peptides and retinol alternatives to your routine. The moisture focus of glass skin actually complements mature skin needs perfectly. Just adjust product richness to suit your skin’s requirements.
Dealing with Texture Issues
Rough texture requires consistent gentle exfoliation. Don’t increase frequency aggressively. Instead, ensure you’re exfoliating correctly with appropriate products for your skin type.
Clogged pores benefit from BHA exfoliants like salicylic acid. This oil-soluble ingredient penetrates pores to clear congestion. Use two to three times weekly for gradual improvement.
Large pores cannot shrink permanently, but proper care minimizes their appearance. Consistent exfoliation, hydration, and sun protection all contribute to refined-looking pores.
When to Seek Professional Help
Persistent issues despite routine adjustments warrant professional consultation. A dermatologist can identify underlying conditions affecting your skin. Some concerns require medical treatment beyond skincare.
Severe acne, rosacea, or eczema need professional management. These conditions affect skin barrier function significantly. Treating the underlying issue allows your glass skin routine to work effectively.
Professional treatments like chemical peels or laser therapy can accelerate glass skin results. These treatments work synergistically with your home routine. Discuss options with a qualified dermatologist or esthetician.
Maintaining Your Glass Skin Long-Term
Achieving glass skin is one accomplishment. Maintaining it requires ongoing commitment. Your routine becomes a sustainable lifestyle rather than a temporary project.
Consistency remains the cornerstone of maintenance. Don’t skip steps even when results look perfect. The moment you become lax, your skin begins reverting. Make your routine non-negotiable.
Adapt your routine to life changes. Pregnancy, menopause, medication changes, and stress all affect skin. Adjust products and techniques as your needs evolve.
Seasonal Maintenance Strategies
Summer requires adjustments to prevent excess oil and maintain protection. Switch to lighter gel moisturizers. Increase SPF to 50 for extended outdoor time. Add antioxidant serums for extra defense.
Winter demands richer products and increased hydration. Layer more essence applications. Use occlusive creams or oils to combat harsh weather. Consider overnight masks twice weekly.
Transitional seasons need balanced approaches. Mix lighter and richer products as needed. Monitor your skin’s response and adjust accordingly. Flexibility prevents seasonal skin stress.
Simplifying Without Sacrificing Results
After establishing your routine, you might simplify without losing benefits. Identify your most impactful products. These core items maintain results even if you skip occasional extras.
Morning routines can be streamlined more than evening ones. A quick cleanse, toner, serum, moisturizer, and sunscreen suffice. Save elaborate layering for nighttime when you have more time.
Travel requires minimalist modifications. Decant essential products into travel containers. Focus on basics: cleanser, hydrating product, moisturizer, and sunscreen. Your skin tolerates temporary simplification.
Morning Maintenance Routine
Gentle water-based cleanse
Hydrating toner (3-5 layers)
Vitamin C serum
Lightweight moisturizer
Broad-spectrum SPF 30+
Evening Maintenance Routine
Double cleanse thoroughly
Exfoliate (2-3x weekly)
Hydrating toner (5-7 layers)
Treatment serums
Rich moisturizer or facial oil
Avoiding Routine Fatigue
Skincare fatigue happens when routines feel burdensome. Combat this by making the process enjoyable. Play music, light candles, or use the time for meditation.
Occasionally skip non-essential steps without guilt. If you’re exhausted, do the bare minimum. Cleanser, moisturizer, and sleep matter more than a perfect routine when you’re drained.
Remember why you started this journey. Keep progress photos visible. Seeing your transformation motivates consistency during challenging periods.
Evolving Your Routine
Your skin’s needs change with age. Adjust ingredients and products accordingly. What worked at twenty-five needs modification at thirty-five. Stay informed about new ingredients and technologies.
Periodically reassess your routine’s effectiveness. Every six months, evaluate whether products still serve you. Replace underperforming items with better alternatives.
Stay curious about skincare advances. New ingredients and formulations emerge regularly. Integrate beneficial innovations while maintaining your successful foundation.
Your Glass Skin Journey Starts Now
Achieving glass skin through a DIY routine is completely within your reach. This comprehensive guide has provided every essential step, technique, and tip you need. The journey requires commitment, but the results justify every effort.
Remember that glass skin is not just about products. It encompasses your entire approach to skin care, including lifestyle habits, diet, stress management, and sleep. These elements work together to create that coveted luminous complexion.
Start implementing these steps today. Begin with the basics and build gradually. Consistency matters infinitely more than perfection. Even small daily efforts accumulate into dramatic transformation over time.
Your skin is unique, so adjust recommendations to suit your specific needs. Pay attention to how your skin responds and refine your approach accordingly. This personalized routine will serve you better than any one-size-fits-all solution.
The glass skin aesthetic celebrates healthy, radiant skin. It represents self-care, dedication, and the belief that you deserve to feel confident in your complexion. Embrace this journey not just for the destination, but for the self-love it cultivates along the way.