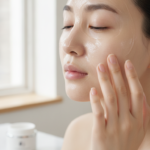
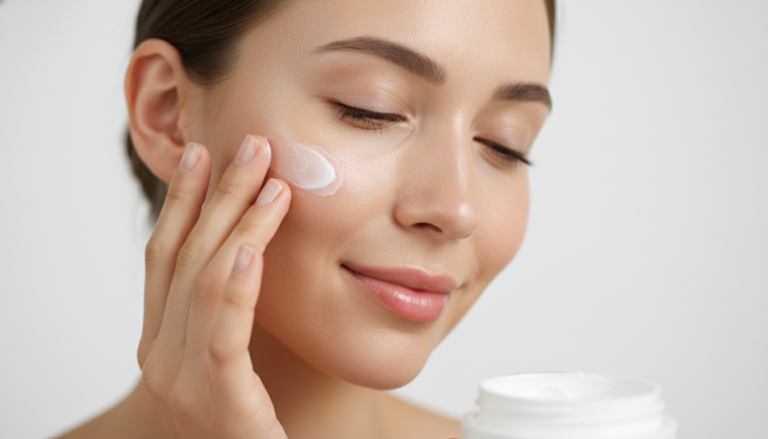
Glass skin originated from Korean skincare culture. The term describes skin that looks incredibly smooth and reflective.
This complexion appears poreless and translucent. Light bounces off the surface creating a natural glow.
The look isn’t about heavy makeup or filters. It’s about genuinely healthy skin that radiates from within.
Glass Skin Characteristics
Extremely smooth texture with minimal visible pores
Even skin tone without dark spots or redness
Intense hydration that creates natural luminosity
Translucent quality that reflects light beautifully
Healthy skin barrier that protects against damage
Benefits Beyond Appearance
Stronger protection against environmental damage
Better moisture retention throughout the day
Reduced inflammation and fewer breakouts
Slower visible signs of aging
Improved makeup application and longevity
Achieving glass skin takes consistent care. The routine focuses on hydration, gentle exfoliation, and skin barrier health.
Step 1: Master the Double Cleansing Method
Double cleansing forms the foundation of any glass skin skincare routine. This method removes all traces of makeup, oil, and debris.
The first cleanse uses an oil-based product. Oil dissolves makeup and sunscreen that water alone can’t remove.
The second cleanse uses a water-based cleanser. This step removes remaining impurities and dead skin cells.
How to Double Cleanse Properly
Apply oil cleanser to dry skin and massage gently for one minute
Add water to emulsify the oil into a milky texture
Rinse thoroughly with lukewarm water until skin feels clean
Apply water-based cleanser and create a light foam
Massage for 30 seconds focusing on areas with congestion
Rinse completely and pat skin dry with a clean towel
This cleansing approach prevents clogged pores. Clean skin absorbs products better in the following steps.
Pro Tip: Never skip the oil cleanse even if you don’t wear makeup. Sunscreen and excess sebum need oil-based removal for truly clean skin.
Essential Cleansing Tools for Glass Skin
Quality cleansing products make all the difference. The right formula removes impurities without stripping your skin barrier.
Look for gentle ingredients that respect your skin type. Proper cleansing sets the stage for maximum hydration.
Step 2: Gentle Exfoliation for Smooth Glass Skin
Exfoliation removes dead skin cells that dull your complexion. This step reveals the fresh, glowing skin underneath.
Chemical exfoliants work better than physical scrubs for glass skin. Acids dissolve the bonds between dead cells.
Choose between AHA and BHA based on your skin type. Both create smoother texture and improved radiance.
Understanding Exfoliation Types
AHA (Alpha Hydroxy Acid)
AHA products work on the skin surface. Glycolic acid and lactic acid brighten and smooth texture.
These ingredients address uneven tone and fine lines. They’re ideal for dry or normal skin types.
Start with lower concentrations around 5-8%. Use two to three times weekly at night.
BHA (Beta Hydroxy Acid)
BHA penetrates into pores to clear congestion. Salicylic acid reduces breakouts and blackheads.
This acid suits oily and combination skin. It also helps with enlarged pore appearance.
Begin with 1-2% formulas used every other day. Increase frequency as your skin adjusts.
Important: Never over-exfoliate chasing glass skin. Excessive exfoliation damages your skin barrier and causes irritation. Listen to your skin and reduce frequency if you notice redness or sensitivity.
Exfoliation preps skin for better product absorption. The following hydration steps work more effectively on smooth skin.
Moisturizer seals all previous layers of hydration. This step prevents moisture loss throughout the day and night.
Glass skin requires the right balance of moisture and oil. Your cream should hydrate without feeling heavy or greasy.
Choose formulas based on your skin type and climate. Different seasons may require different moisturizer weights.
Selecting Your Moisturizer Type
Gel Moisturizers
Lightweight texture perfect for oily skin
Quick absorption without residue
Ideal for humid climates and summer
Contains water-binding humectants
Won’t clog pores or cause breakouts
Cream Moisturizers
Richer texture for dry skin types
Contains nourishing oils and butters
Best for cold weather and night use
Provides lasting barrier protection
Prevents water loss during sleep
Lotion Moisturizers
Balanced option for normal skin
Medium weight and easy spreading
Works year-round for most people
Good for combination skin zones
Versatile for day and night care
Essential Moisturizer Ingredients
Ceramides rebuild and strengthen your skin barrier against damage
Squalane mimics natural oils without clogging pores or feeling heavy
Glycerin attracts moisture from air into skin cells for plumpness
Centella asiatica calms inflammation and supports barrier health
Shea butter provides rich moisture for very dry skin types
Apply moisturizer to slightly damp skin for better absorption. Press product into skin rather than rubbing.
Day Cream vs Night Cream
Day creams often contain SPF and lighter textures. They sit well under makeup and protect against environmental stress.
Night creams focus on repair and deep moisture. Richer formulas work while you sleep to restore your skin barrier.
Consider using both types for optimal glass skin results. Your skin has different needs at different times.
Application Tip: Warm moisturizer between your palms before applying. This improves spreadability and helps ingredients penetrate better into skin cells.
Step 6: Don’t Forget Eye Cream for Complete Care
The eye area needs special attention in your glass skin skincare routine. This delicate skin shows aging signs first.
Eye cream addresses dark circles, puffiness, and fine lines. The skin around eyes is thinner and more sensitive.
Use your ring finger to apply eye cream gently. This finger applies the least pressure on delicate tissue.
Eye Cream Benefits
Caffeine reduces puffiness and improves circulation around eyes
Peptides minimize fine lines and crow’s feet appearance
Vitamin K lightens dark circles and discoloration
Hyaluronic acid plumps and hydrates thin eye skin
Retinol alternatives improve texture without irritation
Apply eye cream before face moisturizer. Tap product gently along the orbital bone, avoiding direct eye contact.
Proper Eye Cream Application
Dispense a rice grain amount for both eyes
Dot product along the under-eye and brow bone
Use ring finger to tap gently until absorbed
Move from inner corner outward in gentle motions
Apply morning and night for consistent results
Wait 60 seconds before applying face cream
Consistency matters more than product amount. A small quantity applied daily works better than sporadic use.
Step 7: Protect with Sunscreen Every Single Day
Sunscreen is non-negotiable for maintaining glass skin. Sun damage destroys all your skincare efforts.
UV rays cause dark spots, wrinkles, and uneven texture. They break down collagen and damage your skin barrier.
Apply sunscreen as the final step every morning. Reapply every two hours when exposed to sun.
Understanding SPF Protection
SPF 30 blocks 97% of UVB rays. SPF 50 blocks 98% of harmful radiation.
Broad spectrum protection guards against both UVA and UVB. UVA penetrates deeper and causes aging damage.
The difference between SPF levels is minimal. Proper application matters more than high numbers.
Choosing Your Sunscreen Formula
Chemical Sunscreens
These absorb UV rays and convert them to heat. They feel lighter and blend invisibly into skin.
Chemical filters work well under makeup. They suit most skin types except very sensitive.
Look for avobenzone, octinoxate, or octocrylene. Apply 15 minutes before sun exposure.
Mineral Sunscreens
These sit on skin and reflect UV rays away. Zinc oxide and titanium dioxide are key ingredients.
Mineral formulas suit sensitive and acne-prone skin. They work immediately upon application.
Modern versions minimize white cast issues. Tinted options blend naturally with skin tone.
Application Guidelines
Use two fingers length of product for face and neck
Apply sunscreen 15 minutes before going outside for best protection
Don’t forget ears, hairline, and neck in your application
Reapply every two hours during extended sun exposure
Use sunscreen even on cloudy days and indoors near windows
Layer SPF products but count only the highest SPF number
Critical Warning: Sunscreen expires and loses effectiveness. Check expiration dates and replace yearly. Expired sunscreens won’t protect your glass skin properly.
Sun protection preserves all your glass skin routine results. Without it, you’ll see premature aging and damage.
Complete Your Glass Skin Defense
Professional sun protection systems guard your glass skin investment. Advanced formulas feel weightless while providing maximum defense.
Don’t let sun damage undo your hard work. Protect your luminous complexion with proven solutions.
Weekly Treatments to Boost Your Glass Skin Results
Weekly treatments enhance your daily glass skin skincare routine. These intensive steps accelerate your results.
Add these treatments one to three times per week. They address specific concerns while boosting overall radiance.
Face Masks for Glass Skin
Sheet Masks
These deliver concentrated serums in 15-20 minutes. Look for hyaluronic acid, niacinamide, or vitamin C formulas.
Use after cleansing and toning. Pat remaining essence into skin when removing mask.
Clay Masks
These draw out impurities from pores without over-drying. Choose gentle kaolin or bentonite clay.
Apply for 10 minutes maximum. Follow with hydrating toner to restore moisture balance.
Sleeping Masks
These intensive treatments work overnight. They seal in all your nighttime skincare layers.
Apply as the final step before bed. Wake up to plumper, more radiant skin.
Professional Treatment Options
Consider professional treatments for enhanced glass skin results. These complement your home routine.
Hydrafacials deep clean and hydrate in one treatment session
Chemical peels accelerate cell turnover for smoother texture
Microneedling boosts collagen production and product absorption
LED therapy reduces inflammation and improves skin health
Facial massage improves circulation and lymphatic drainage
Schedule treatments monthly for best results. Always inform your provider about your home skincare routine.
Lifestyle Habits That Support Glass Skin
Your glass skin skincare routine needs lifestyle support. External care combines with internal health for best results.
These habits enhance your complexion from within. They complement every product you apply to your skin.
Hydration and Nutrition
Water Intake
Drink eight glasses of water daily minimum. Hydrated cells create plumper, more luminous skin.
Herbal teas and water-rich foods count toward hydration. Avoid excessive caffeine that dehydrates skin.
Skin-Healthy Foods
Eat foods rich in omega-3 fatty acids like salmon and walnuts. These strengthen your skin barrier.
Antioxidant-rich berries fight free radical damage. Vitamin C foods support collagen production.
Sleep and Stress Management
Quality sleep allows skin cells to repair and regenerate. Aim for seven to nine hours nightly.
Use a silk pillowcase to reduce friction and moisture loss. Sleep on your back to prevent face compression.
Manage stress through meditation, exercise, or hobbies. Cortisol from stress damages skin barrier and triggers inflammation.
Exercise and Movement
Regular exercise increases blood flow to skin cells
Sweating helps flush toxins from pores naturally
Movement reduces stress hormones that damage skin
Improved circulation delivers nutrients to skin effectively
Always cleanse face after workouts to prevent breakouts
Combine these lifestyle factors with your routine. Internal and external care work together for true glass skin.
Common Glass Skin Routine Mistakes to Avoid
Many people sabotage their glass skin goals unknowingly. Avoiding these mistakes protects your progress.
Over-Exfoliation Damage
Too much exfoliation strips your skin barrier. This causes redness, sensitivity, and increased oil production.
Limit chemical exfoliants to 2-3 times weekly maximum. Your skin type determines the right frequency.
Healthy Exfoliation Signs
Skin feels smooth and looks brighter after treatment
No redness or irritation appears following application
Makeup applies more evenly on exfoliated skin
Products absorb better into clean, clear skin
Over-Exfoliation Warning Signs
Persistent redness that won’t fade between treatments
Increased sensitivity to regular skincare products
Tight, uncomfortable feeling even after moisturizer
More breakouts despite consistent exfoliation routine
Skipping Sunscreen
No glass skin routine works without daily sun protection. UV damage undoes all your skincare efforts.
Wear sunscreen indoors and on cloudy days. Windows don’t block aging UVA rays completely.
Using Too Many Products
More products don’t guarantee better results. Overloading skin causes irritation and breakouts.
Start with basic steps and add gradually. Give each new product two weeks before adding another.
Smart Approach: Focus on consistent use of proven basics rather than constantly trying new products. Your skin barrier needs stability to achieve glass skin.
Inconsistent Routine
Sporadic skincare won’t deliver glass skin results. Your skin needs daily care to transform.
Commit to morning and night routines for at least three months. Real changes take time and consistency.
Set phone reminders for morning and evening routines
Keep products visible on your bathroom counter
Prep skin even when tired or traveling away from home
Track progress with weekly photos to stay motivated
Adjusting the Glass Skin Routine for Your Skin Type
Every skin type can achieve glass skin with proper adjustments. Customize the routine to your specific needs.
Oily Skin Modifications
Oily skin still needs hydration for glass skin glow. Choose lightweight, oil-free formulations.
Use gel cleansers that remove excess oil without stripping skin
Apply BHA exfoliants to control pore congestion and breakouts
Choose water-based or gel moisturizers instead of heavy creams
Look for niacinamide to regulate sebum production naturally
Use mattifying sunscreens that control shine all day
Dry Skin Modifications
Dry skin needs extra moisture at every step. Layer hydrating products generously.
Use cream or oil cleansers that don’t strip natural oils
Apply AHA exfoliants gently only twice weekly maximum
Layer hydrating toner multiple times using seven skin method
Choose rich cream moisturizers with ceramides and oils
Add facial oil before cream to lock in moisture
Combination Skin Modifications
Combination skin requires zone-specific care. Different areas need different attention.
Use gentle gel cleanser for entire face uniformly
Apply lightweight moisturizer on oily T-zone areas
Use richer cream on dry cheek and jaw areas
Spot-treat oily zones with BHA exfoliant carefully
Maintain successful routine. Add professional treatments.
Factors Affecting Your Timeline
Several factors influence how quickly you achieve glass skin results. Be realistic about your starting point.
Current skin condition and existing damage levels affect speed
Age impacts cell turnover rate and healing capacity naturally
Product quality and ingredient effectiveness matter significantly
Consistency determines success more than any other factor
Lifestyle habits either accelerate or slow your progress
Environmental factors like climate and pollution play roles
Stay Motivated: Take weekly photos in identical lighting to track subtle progress. Changes happen gradually, and photos reveal improvements you might miss day-to-day.
Trust the process and remain consistent. Your glass skin transformation is worth the time investment.
Start Your Glass Skin Journey Today
You now have the complete glass skin skincare routine knowledge. Every step builds toward that luminous, translucent complexion.
Start with the basics and remain consistent. Your skin will transform with dedicated daily care.
Remember that glass skin is a journey, not a destination. Enjoy the process of caring for your skin.
The right products accelerate your results significantly. Quality formulations make every routine step more effective.
Invest in your skin health and confidence. Glass skin isn’t just about appearance—it’s about truly healthy, protected skin.
Transform Your Skin Starting Now
Access the complete glass skin system that delivers professional results at home. Join thousands who’ve already achieved the radiant complexion they deserve.