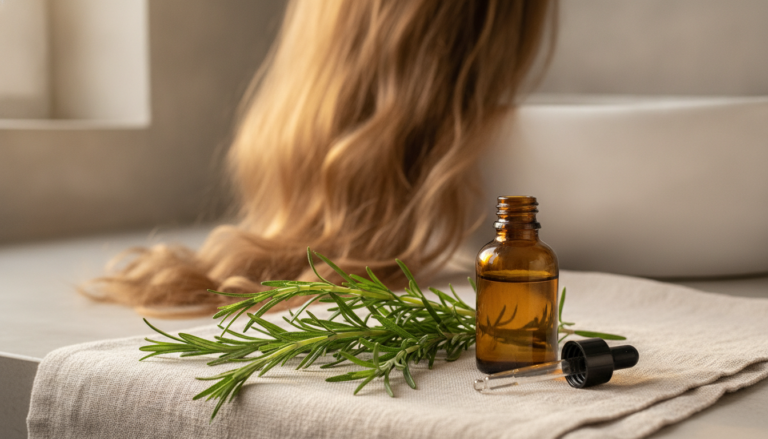
Making your own beauty products at home opens up a world of natural skincare possibilities. You control every ingredient that touches your skin. You save money compared to expensive store-bought products. You create customized formulations that work for your unique skin type.
The journey into Homemade Skin Care starts with understanding simple recipes and quality ingredients. Fresh, natural components deliver results without harsh chemicals. Your hands become your most trusted beauty laboratory.
Today marks the beginning of something new for your skincare routine. You will discover how oils, butters, and botanical ingredients transform into luxurious products. You will learn time-tested recipes that have worked for years.
Start Your Professional Skincare Journey
Ready to create professional-quality formulations from day one? Access proven recipes and expert techniques that take the guesswork out of DIY skincare.
Why Choose Homemade Skin Care Over Commercial Products
Commercial skincare products contain dozens of ingredients you cannot pronounce. Many include preservatives, synthetic fragrances, and fillers. Your skin absorbs these chemicals every single day.
Creating products at home gives you complete transparency. You know exactly what goes into each recipe. You choose organic ingredients when possible. You avoid allergens and irritants specific to your skin.
Commercial Products
Unknown ingredient sources
Synthetic preservatives required
One-size-fits-all formulations
Expensive markup for branding
Potential skin irritants
Environmental packaging waste
Homemade Solutions
Complete ingredient control
Fresh, preservative-free options
Customized for your skin type
Cost-effective production
Natural, gentle ingredients
Minimal, reusable containers
The cost difference becomes apparent quickly. A bottle of commercial face oil might cost fifty dollars. You can make the same quantity at home for less than ten dollars. The ingredients you purchase create multiple batches.
Quality matters more than quantity in skincare. Small batches ensure freshness. You use products at their peak effectiveness. Your skin notices the difference within weeks.
Essential Ingredients Every DIY Skincare Maker Needs
Building your natural skincare pantry starts with versatile base ingredients. These foundational items work across dozens of recipes. You will reach for them time and time again.
Carrier Oils: The Foundation of Natural Skincare
Carrier oils form the base of most skincare products. They deliver nutrients deep into your skin. Each oil offers unique benefits for different skin types and concerns.
Coconut oil works beautifully for body care. It melts at body temperature and absorbs quickly. Sweet almond oil suits sensitive facial skin. Jojoba oil closely mimics your skin’s natural sebum.
Rosehip oil addresses aging concerns. It contains vitamins and fatty acids. Grapeseed oil provides lightweight moisture for oily skin. Argan oil delivers intensive hydration without heaviness.
Coconut oil for body butters and lip balms
Sweet almond oil for gentle facial formulations
Jojoba oil for balancing all skin types
Rosehip oil for anti-aging treatments
Grapeseed oil for lightweight moisture
Argan oil for intensive hydration
Olive oil for rich, nourishing creams
Butters That Transform Your Skincare
Natural butters create rich, protective barriers on your skin. They lock in moisture and provide lasting nourishment. Shea butter stands as the most popular choice.
Shea butter comes from African shea trees. It contains vitamins A and E. The texture ranges from soft to firm depending on refining. Unrefined shea butter retains more nutrients.
Cocoa butter brings chocolate aroma to formulations. It works perfectly in body butters and lip balms. Mango butter offers a lighter alternative. It spreads easily and absorbs faster than shea butter.
Combining different butters creates unique textures. A blend of shea and cocoa butter produces ultra-rich body butter. Adding mango butter lightens the consistency. Your preferences guide the perfect mix.
Essential Oils and Botanical Extracts
Essential oils provide both fragrance and therapeutic benefits. These concentrated plant extracts require careful use. A little bit goes a long way in your formulations.
Lavender oil calms irritated skin and promotes relaxation. Tea tree oil fights acne-causing bacteria. Frankincense oil reduces the appearance of fine lines. Rose oil hydrates dry, mature skin.
Safety comes first with essential oils. Never apply them directly to skin undiluted. Most recipes use one to two percent concentration. Pregnant women should consult healthcare providers before use.
Aloe vera gel serves as a soothing base ingredient. It calms inflammation and hydrates without oil. Vitamin E oil acts as a natural preservative. It extends the shelf life of your homemade products.
Where to Source Quality Ingredients
Finding reliable ingredient suppliers makes or breaks your skincare results. Professional-grade ingredients produce professional-quality products. The difference between mediocre and exceptional formulations often comes down to ingredient purity and freshness.
Understanding where cosmetic formulators source their materials gives you access to the same quality. You deserve ingredients that match commercial-grade standards.
Homemade Facial Skin Care Recipes
Your face deserves gentle, effective care. Homemade facial products work with your skin’s natural processes. These recipes address common concerns without harsh treatments.
Nourishing Face Oil for All Skin Types
Face oils deliver concentrated nutrition. They balance oil production rather than adding excess oil. Even oily skin benefits from properly formulated face oil.
Mix two tablespoons jojoba oil with one tablespoon rosehip oil. Add five drops lavender essential oil. Include three drops frankincense oil. Store in a dark glass bottle.
Apply two to three drops to damp skin after cleansing. Press gently into your face and neck. Use morning and night for best results. Your skin will feel softer within days.
Combine carrier oils in clean glass bottle
Add essential oils drop by drop
Cap tightly and shake well
Label with date and ingredients
Store in cool, dark place
Use within three months for freshness
Gentle Cleansing Oil That Actually Works
Oil cleansing removes makeup and impurities effectively. The method sounds counterintuitive but works beautifully. Oil dissolves oil, lifting dirt from pores.
Combine equal parts castor oil and sweet almond oil. Castor oil draws out impurities. Sweet almond oil provides moisture. Adjust ratios based on your skin type.
Massage oil into dry skin for one minute. Add warm water to emulsify. The oil turns milky white. Rinse thoroughly with warm water. Pat dry gently.
Oily skin needs more castor oil in the blend. Try seventy percent castor to thirty percent sweet almond. Dry skin prefers the reverse ratio. Your skin will tell you the perfect balance.
Hydrating Face Serum With Aloe Vera
Serums penetrate deeper than face oils. They deliver active ingredients efficiently. This lightweight formula hydrates without heaviness.
Mix three tablespoons aloe vera gel with one tablespoon rosehip oil. Add half teaspoon vitamin E oil. Include five drops carrot seed essential oil. Blend until smooth.
Store in refrigerator for maximum freshness. Use within two weeks. Apply to clean, damp skin before face oil. A little product covers your entire face.
The gel texture feels cooling and refreshing. Your skin drinks in the hydration. Fine lines appear softer. Your complexion looks plumper and more radiant.
Anti-Aging Concerns? Natural Solutions Work
Many people worry that homemade products cannot address serious aging concerns. The truth surprises them. Natural ingredients contain potent compounds that support youthful skin.
Rosehip oil contains natural retinoids. Vitamin C from plant sources brightens and firms. Essential fatty acids rebuild skin structure. Time-tested formulations deliver real results.
Discover Proven Anti-Aging Formulations
Take your anti-aging skincare beyond basic recipes. Learn professional techniques for creating powerful serums, treatments, and systems that visibly reduce fine lines and restore youthful radiance.
Body care products use similar ingredients to facial formulations. You can create them in larger batches. The cost savings become even more dramatic.
Whipped Body Butter That Melts Into Skin
Whipped body butter feels like luxury. The texture resembles frosting. It spreads easily and absorbs completely.
Melt half cup shea butter with quarter cup coconut oil. Add two tablespoons sweet almond oil. Let cool until slightly solid. Whip with electric mixer for five minutes.
The mixture transforms into fluffy clouds. Add ten drops essential oil during whipping. Popular choices include lavender, vanilla, or citrus. Transfer to clean jars.
Melt butters and oils in double boiler
Remove from heat and cool thirty minutes
Refrigerate until edges start solidifying
Whip on high speed five to seven minutes
Add essential oils in final minute
Spoon into jars and let set overnight
This recipe makes about twelve ounces of body butter. It lasts several months when stored properly. Use after showers on damp skin. A little goes a long way.
Silky Body Oil for Daily Moisture
Body oils provide quick moisture without waiting for absorption. They work perfectly for busy mornings. The right blend leaves no greasy residue.
Combine half cup grapeseed oil with quarter cup jojoba oil. Add two tablespoons vitamin E oil. Include fifteen drops of your favorite essential oil blend.
Store in a pump bottle for easy application. Apply to wet skin immediately after showering. The water helps oil spread further. Pat dry gently with a towel.
Your skin feels soft but never slippery. The combination absorbs within minutes. You can dress immediately without worrying about oil transfer. This formula works year-round.
Sugar Scrub for Smooth, Glowing Skin
Body scrubs remove dead skin cells. They reveal fresh, glowing skin underneath. Sugar dissolves during use, making it gentler than salt.
Mix one cup organic sugar with half cup coconut oil. Add one tablespoon honey. Include ten drops sweet orange essential oil. Stir until well combined.
Use in shower on damp skin. Massage gently in circular motions. Focus on rough areas like elbows and knees. Rinse thoroughly with warm water.
The oil in the scrub moisturizes as you exfoliate. Your skin feels incredibly smooth afterward. Use once or twice weekly for best results. Store in bathroom for convenience.
Variation ideas include coffee grounds for cellulite. Brown sugar creates finer texture for sensitive skin. Himalayan salt draws out toxins. Let your creativity guide you.
Master Complete Body Care Systems
Individual recipes provide great results. But understanding how to create complete body care systems takes your skills further. Professional formulators know how products work together synergistically.
Learn to design coordinated routines that address your specific needs. Seasonal variations keep skin healthy year-round. Advanced techniques produce spa-quality results at home.
Specialized Care for Hands and Lips
Hands and lips need special attention. These areas face constant exposure to elements. They show aging and damage quickly without proper care.
Healing Hand Cream for Dry, Cracked Hands
Hand cream needs to absorb quickly. You use your hands constantly. Heavy formulas interfere with daily activities.
Melt quarter cup shea butter with two tablespoons beeswax. Add quarter cup sweet almond oil. Remove from heat and let cool slightly. Whip until creamy.
Add ten drops lavender oil for healing. Include five drops tea tree oil for protection. The beeswax creates a protective barrier. Your hands stay moisturized for hours.
Keep small containers in multiple locations. Place one by your kitchen sink. Keep another in your bag. Apply throughout the day as needed.
Nourishing Lip Balm That Actually Heals
Commercial lip balms often create dependency. They contain ingredients that dry lips over time. Homemade lip balm breaks this cycle.
Melt two tablespoons beeswax with two tablespoons coconut oil. Add one tablespoon shea butter. Stir in half teaspoon vitamin E oil. Pour into lip balm tubes.
The mixture solidifies as it cools. Wait ten minutes before capping. Label each tube with flavor or date. This recipe makes about ten lip balms.
Some situations call for intensive repair. Overnight hand treatments work while you sleep. You wake up with noticeably softer hands.
Mix equal parts shea butter, cocoa butter, and coconut oil. Melt together and let cool. Whip until fluffy. Add ten drops lavender oil.
Apply generously before bed. Wear cotton gloves overnight. The gloves prevent transfer to bedding. They also increase product penetration.
Your hands absorb the treatment while you rest. Morning reveals dramatically softer skin. Rough patches smooth out. Even stubborn calluses improve with regular use.
Understanding Natural Oils for Skin Care
Oils form the foundation of natural skincare. Each variety offers unique properties. Understanding these differences helps you create effective formulations.
Carrier Oil Profiles and Benefits
Carrier oils dilute essential oils for safe use. They also provide their own skincare benefits. Choosing the right carrier oil matters for your desired results.
Lightweight Oils
These oils absorb quickly without residue. They suit oily and combination skin types. They work well in facial serums.
Jojoba oil balances sebum production
Grapeseed oil tightens and tones
Rosehip oil repairs and regenerates
Hemp seed oil reduces inflammation
Rich, Nourishing Oils
These oils provide intensive moisture. They benefit dry and mature skin. They create luxurious body products.
Avocado oil deeply penetrates skin layers
Olive oil delivers antioxidant protection
Argan oil restores elasticity
Sweet almond oil soothes sensitivity
Essential Oil Safety and Usage
Essential oils pack powerful plant compounds. They require respect and proper dilution. Safety guidelines protect your skin and health.
Most skincare recipes use one to two percent essential oil concentration. This equals roughly six to twelve drops per ounce of carrier oil. More does not mean better with essential oils.
Essential Oil Cautions
Never apply undiluted to skin
Perform patch tests before full use
Avoid sun exposure after citrus oils
Research safety during pregnancy
Keep away from eyes and mucous membranes
Store in dark glass bottles away from heat
Some essential oils cause photosensitivity. Citrus oils in particular react with sunlight. Apply these formulations at night only. Wait twelve hours before sun exposure.
Blending Oils for Custom Formulations
The magic happens when you blend different oils. Combinations create unique properties. Your custom blends address multiple concerns simultaneously.
Start with a primary carrier oil as your base. Add secondary oils for specific benefits. Include essential oils for therapeutic properties and scent. Keep detailed notes of your experiments.
A typical face oil blend might combine sixty percent jojoba oil, thirty percent rosehip oil, and ten percent argan oil. Add essential oils at one percent concentration. This creates approximately six drops per ounce.
Master Essential Oils for Skincare
Essential oils offer incredible skincare benefits when used correctly. But navigating safety, dilution ratios, and therapeutic properties takes knowledge. Professional training accelerates your learning curve dramatically.
Understanding which oils work synergistically creates more powerful formulations. Learn to blend like an aromatherapist while maintaining skincare effectiveness.
Preserving and Storing Homemade Skincare Products
Preservation determines product safety and shelf life. Natural products lack synthetic preservatives. Understanding storage methods prevents spoilage and contamination.
Water-Free vs. Water-Based Products
Water-free products last longer naturally. Oils and butters resist bacterial growth. They need minimal preservation when stored properly.
Anhydrous formulations include pure oils, balms, and butters. Store these in dark glass containers. Keep away from heat and moisture. They typically last three to six months.
Water-based products require more attention. Anything containing water, aloe vera gel, or hydrosols needs preservation. Bacteria and mold thrive in water. Contamination happens quickly without preservatives.
Natural Preservation Methods
Vitamin E oil extends oil-based product life. It prevents rancidity through antioxidant action. Add half teaspoon per cup of oil. This method works only for anhydrous products.
Refrigeration preserves water-based formulations. Cold temperatures slow bacterial growth. Many fresh products last two weeks when refrigerated. Make small batches you will use quickly.
Shelf Life Guidelines
Pure oils and butters: six to twelve months
Balms and salves: six to nine months
Whipped body butters: three to six months
Water-based creams: one to two weeks refrigerated
Fresh masks and scrubs: use immediately
Alcohol-based toners: three to six months
Contamination Prevention
Clean containers prevent contamination. Sterilize all jars and bottles before use. Boil glass containers for ten minutes. Let air dry completely.
Avoid introducing water into products. Never dip wet fingers into jars. Use clean spatulas or cosmetic scoops. This single habit extends product life significantly.
Label everything with creation date. Note key ingredients for reference. Track which formulations you love. This organizational system helps you recreate favorites.
Watch for signs of spoilage. Off smells indicate problems. Color changes suggest oxidation. Mold appears as fuzzy spots. Discard anything questionable immediately.
Professional Preservation for Serious Makers
Some people want to make larger batches. Others plan to gift products. Professional preservation systems become necessary for these situations.
Natural preservatives exist for water-based products. Options include leucidal, geogard, and optiphen. These require precise measurement and pH testing. The learning curve steepens considerably.
When to Consider Professional Training
Making fresh products for personal use remains simple. Scaling up production requires different knowledge. Preservation, stability testing, and safety assessments become critical.
Professional cosmetic formulation training covers these advanced topics. You learn to create products that last months safely. Gift-giving and small business opportunities open up.
Learn Professional Cosmetic Formulation
Ready to create products with extended shelf life? Master preservation techniques, stability testing, and professional formulation methods used by commercial skincare makers.
Generic recipes provide starting points. True success comes from customization. Your unique skin needs specific ingredient combinations.
Understanding Your Skin Type
Skin type determines which ingredients work best. Accurate assessment guides product selection. Most people fall into one of five categories.
Normal skin shows balanced oil and moisture. It rarely breaks out or feels tight. Lucky individuals with this type need gentle maintenance only. Most standard recipes work well.
Oily skin produces excess sebum. Pores appear larger and may clog easily. Shine develops quickly after cleansing. This skin type needs lightweight, balancing formulations.
Dry skin feels tight and flaky. It may show fine lines more prominently. Environmental factors worsen the condition. Rich, nourishing ingredients help tremendously.
Combination skin behaves differently in various zones. The T-zone tends oily while cheeks stay dry. This type requires targeted treatments. Use different products for different areas.
Sensitive skin reacts easily to ingredients. Redness, itching, or burning signal problems. This type needs simple formulations. Avoid potential irritants and fragrances.
Ingredient Selection by Skin Type
Best for Oily Skin
Jojoba oil balances sebum
Grapeseed oil provides lightweight moisture
Tea tree oil fights acne
Witch hazel tones and tightens
Clay masks absorb excess oil
Light lotions instead of heavy creams
Best for Dry Skin
Avocado oil deeply nourishes
Shea butter provides intensive moisture
Rosehip oil repairs and hydrates
Hyaluronic acid holds water
Rich creams and body butters
Gentle, non-stripping cleansers
Best for Sensitive Skin
Chamomile calms inflammation
Calendula soothes irritation
Oat extract reduces redness
Simple formulations with few ingredients
Fragrance-free options preferred
Patch test everything first
Adjusting Recipes for Better Results
Start with basic recipes then modify gradually. Change one ingredient at a time. This way you identify what works specifically for you.
Oily skin benefits from reduced oil percentages. Replace half the carrier oil with aloe vera gel. Add clay powder to face masks. Choose lighter oils like grapeseed or hemp seed.
Dry skin needs extra richness. Increase butter percentages in balms. Add avocado or olive oil to blends. Layer products for maximum hydration. Apply serums under face oils.
Sensitive skin requires minimal ingredients. Start with single-ingredient tests. Chamomile tea makes gentle toner. Pure aloe vera gel soothes inflammation. Add new ingredients slowly.
Keep a skincare journal to track results. Note which recipes work best. Document any reactions or sensitivities. This record becomes invaluable over time. Your perfect formulations emerge through experimentation.
Seasonal Skincare Adjustments
Your skin needs change with seasons. Summer humidity differs from winter dryness. Adjusting formulations maintains optimal skin health year-round.
Winter Skincare Strategies
Cold weather depletes skin moisture. Indoor heating worsens dehydration. Your winter routine needs extra protection and nourishment.
Switch to richer face oils in winter. Add more shea butter to body products. Create protective barrier balms for exposed skin. Hands and lips especially need extra care.
Layer products for maximum effect. Apply serum first on damp skin. Follow with face oil while still moist. Seal everything with a thin layer of balm. This sandwich method locks in hydration.
Increase shea butter percentages in recipes
Add beeswax for protective barriers
Use overnight intensive treatments weekly
Apply products to damp skin for better absorption
Keep lip balm accessible at all times
Humidify indoor spaces when possible
Summer Skincare Modifications
Hot weather and humidity change skin behavior. Products need to feel lighter. Sun protection becomes paramount.
Lighten your formulations for summer. Reduce butter percentages. Choose lightweight oils like jojoba or grapeseed. Add aloe vera gel for cooling hydration.
Some carrier oils offer natural sun protection. Raspberry seed oil provides SPF protection. Carrot seed oil contains beneficial compounds. These additions supplement but never replace proper sunscreen.
Antioxidant ingredients help repair sun damage. Vitamin C brightens and protects. Green tea extract fights free radicals. Add these to summer formulations for extra benefits.
Transitional Season Care
Spring and fall bring unpredictable weather. Your skin may feel confused. Flexible routines adapt to daily conditions.
Keep both lightweight and rich options available. Choose based on daily weather and skin feel. Mix formulations to create custom blends. Half winter cream plus half summer lotion works perfectly.
Pay attention to skin signals. Tightness means you need more moisture. Excess shine suggests lighter products. Your skin tells you exactly what it needs. Learn to listen and respond accordingly.
Troubleshooting Common DIY Skincare Problems
Even experienced makers encounter issues. Understanding common problems helps you solve them quickly. Most fixes require simple adjustments.
Texture and Consistency Issues
Products sometimes separate or become grainy. Temperature fluctuations cause these problems. Solutions exist for most texture troubles.
Grainy body butter happens when products cool too quickly. Shea butter crystallizes unevenly. Fix this by remelting and cooling slowly. Some makers use controlled cooling methods.
Separated products indicate improper emulsification. Oil and water naturally separate. You need emulsifying wax for stable creams. Simple mixing will not keep them combined long-term.
Too-hard balms contain excess beeswax. Reduce wax percentage slightly. Add more liquid oil for softer consistency. Keep notes so you remember successful ratios.
Too-soft products need more solid ingredients. Add extra butter or wax. Small adjustments make big differences. Change amounts by teaspoons rather than tablespoons.
Absorption and Performance Problems
Some homemade products feel greasy or take forever absorbing. Ingredient selection and ratios cause these issues. Adjustments improve performance dramatically.
Greasy feeling indicates too much oil or wrong oil type. Switch to lighter carriers like jojoba or grapeseed. Reduce overall oil percentage. Apply to damp skin for better absorption.
Products that pill or ball up contain incompatible ingredients. Silicones and oils sometimes conflict. Certain gelling agents create problems. Test ingredient combinations in small batches first.
Lack of results suggests inactive ingredients or insufficient concentration. Quality matters enormously. Old oils lose effectiveness. Essential oils degrade over time. Buy from reputable suppliers and use fresh ingredients.
Safety and Sensitivity Concerns
Skin reactions require immediate attention. Stop using any product causing irritation. Identify the problematic ingredient to avoid it in future recipes.
Introduce new ingredients one at a time. This isolation method identifies sensitivities clearly. Wait several days between adding new components. Your skin reveals what works and what does not.
When to Seek Professional Help
Most DIY skincare reactions resolve quickly when you stop using the product. However, severe reactions need medical attention. Seek help for persistent rashes, severe itching, swelling, or breathing difficulties. These symptoms indicate serious allergic reactions requiring professional care.
Patch testing prevents most problems. Apply new formulations to inner arm or behind ear. Wait twenty-four hours. No reaction means the product is likely safe for broader use.
Advanced Homemade Skincare Techniques
Basic recipes build confidence and skills. Advanced techniques expand your capabilities. These methods create sophisticated products comparable to commercial offerings.
Creating Stable Emulsions
Emulsions combine oil and water into creams and lotions. This process requires emulsifying wax and proper technique. Stable emulsions last longer and feel more luxurious.
Heat oil phase and water phase separately to same temperature. Slowly pour water into oil while blending continuously. The mixture transforms from separated to unified. Continue blending until cool.
Emulsifying wax percentage matters. Too little creates unstable products. Too much makes heavy creams. Start with five to seven percent of total recipe weight.
Temperature control ensures success. Both phases should reach about seventy degrees Celsius. Use a thermometer for accuracy. Consistency comes from precise temperature matching.
Working With Active Ingredients
Active ingredients provide specific therapeutic benefits. They include vitamins, acids, and botanical extracts. These powerful additions require knowledge and caution.
Vitamin C brightens and fights aging. It oxidizes easily when exposed to air and light. Use L-ascorbic acid in powder form. Mix just before application for maximum potency.
Hyaluronic acid holds incredible amounts of water. It plumps skin and reduces fine lines. Use low molecular weight for deeper penetration. Add to water phase before heating.
Alpha hydroxy acids exfoliate gently. Lactic acid suits beginners best. Start with low concentrations around five percent. Work up gradually as skin builds tolerance.
pH matters enormously with active ingredients. Many work only in specific pH ranges. Invest in pH test strips. Adjust formulations with citric acid or baking soda as needed.
Preservative Systems for Water-Based Products
Water-based formulations need preservation. Bacteria multiply rapidly in creams and lotions. Natural preservatives exist but require careful use.
Broad-spectrum preservatives protect against bacteria, yeast, and mold. Popular natural options include leucidal and geogard. Each has specific usage rates and pH requirements.
Preservation Basics
Add preservatives to cool products after heating
Never exceed recommended usage rates
Test pH before adding preservation
Keep detailed records of preservation methods
Challenge test products for safety verification
Never skip preservation in water-containing formulas
Challenge testing verifies preservation effectiveness. Send products to laboratories for microbial testing. They inoculate samples with bacteria and monitor growth. This step becomes essential for gifting or selling products.
Creating Beautiful Skincare Gifts
Homemade skincare products make thoughtful, personal gifts. Recipients appreciate the time and care involved. Beautiful packaging elevates handmade items to gift-worthy status.
Gift-Worthy Product Selection
Choose products with good shelf life for gifts. Anhydrous formulations work best. Balms, oils, and whipped butters travel well and last months.
Create themed gift sets for cohesive presentation. A relaxation set might include lavender body oil, bath salts, and sleep balm. A hand care set combines hand cream, cuticle oil, and sugar scrub.
Consider recipient preferences and needs. Customize scents to their favorites. Address their specific skin concerns. This personalization makes gifts extra special.
Whipped body butter in decorative jars
Solid perfume in vintage tins
Lip balm sets in various flavors
Bath and body oil combinations
Hand care kits with cream and scrub
Face oil blends in amber bottles
Professional Packaging Ideas
Presentation transforms homemade products into impressive gifts. Clean, attractive packaging signals quality and care. Small details create big impact.
Choose consistent containers for polished look. Clear or amber glass works beautifully. Small metal tins suit balms and salves. Ensure all containers seal properly.
Labels add professional finish. Include product name and key ingredients. List usage instructions and storage recommendations. Add creation date for transparency.
Natural decorative elements enhance presentation. Tie jars with twine or ribbon. Attach small dried flower sprigs. Use kraft paper tags for rustic charm. These touches show extra effort.
Gift boxes or baskets complete the presentation. Line with tissue paper or shredded kraft paper. Arrange products attractively. Include a handwritten note explaining each item.
Safety and Legal Considerations for Gifts
Gifting homemade products requires responsibility. Inform recipients about ingredients clearly. Discuss any potential allergens or sensitivities.
Never make medical claims about homemade products. Avoid terms like “heals,” “cures,” or “treats.” Stick to describing intended use and benefits accurately.
Important Gift Safety Notes
Always include full ingredient lists with gifts. Provide usage instructions and storage recommendations. Mention shelf life clearly. Advise patch testing before full use. These precautions protect both you and recipients.
Selling homemade products involves regulations. Check local laws before accepting money. Many regions require business licenses and insurance. Liability concerns increase dramatically when selling rather than gifting.
Where ingredients come from matters. Ethical sourcing protects communities and environments. Research suppliers committed to sustainability.
Look for certified organic ingredients when possible. Organic farming protects soil and water. It eliminates harmful pesticides. Your skin and planet both benefit.
Fair trade certification ensures ethical labor practices. Workers receive fair wages and safe conditions. This matters especially for ingredients like shea butter and cocoa butter.
Buy ingredients in bulk when practical. This reduces packaging waste significantly. Share large quantities with friends who also make skincare. Cooperative buying reduces costs and environmental impact.
Zero-Waste Packaging Strategies
Conventional skincare generates enormous plastic waste. Homemade products allow plastic-free alternatives. Glass, metal, and paper containers work beautifully.
Reuse containers whenever possible. Sterilize old jars instead of buying new ones. Save attractive commercial containers for repurposing. This approach costs nothing and helps environment.
Avoid single-use plastics completely. Choose aluminum tins over plastic jars. Select glass bottles with metal caps. Paper labels replace plastic stickers.
Make solid products to eliminate packaging. Solid cleansing bars, lotion bars, and shampoo bars need minimal wrapping. Wrap in beeswax cloth or simple paper. These products travel well too.
Reducing Waste in Your Skincare Routine
Making products at home naturally reduces waste. Small adjustments create even greater impact. Mindful practices accumulate significant benefits.
Use every last bit of product. Scrape jar sides with small spatulas. Cut tubes open to access remaining product. This habit prevents waste and saves money.
Buy ingredients in glass jars for reuse
Compost natural ingredients when possible
Use reusable application tools instead of disposables
Make small batches to prevent spoilage
Share excess ingredients with community
Choose concentrated ingredients requiring less packaging
Some ingredients serve multiple purposes. Coconut oil works for cooking and skincare. Olive oil has similar versatility. Multipurpose ingredients reduce total products needed.
Frequently Asked Questions About Homemade Skin Care
How long do homemade skincare products last?
Shelf life varies by product type and ingredients. Anhydrous products like pure oils and balms last six to twelve months when stored properly. Water-based formulations need refrigeration and typically last one to two weeks without preservatives. Adding natural preservatives extends water-based product life to three to six months. Always label products with creation dates and watch for signs of spoilage including off smells, color changes, or mold growth.
Are homemade skincare products actually safe?
Homemade products are safe when made with proper hygiene and quality ingredients. Follow recipes carefully and use clean, sterilized containers. Patch test new formulations before full use. Research ingredient safety and proper usage rates, especially for essential oils and active ingredients. Water-based products require appropriate preservation to prevent bacterial growth. When made responsibly, homemade products often prove safer than commercial alternatives containing harsh chemicals.
Can homemade products really compete with expensive commercial skincare?
High-quality homemade products absolutely compete with commercial options. You control ingredient quality and can choose premium components. Many expensive commercial products contain mostly water and fillers. Homemade formulations pack more active ingredients. The freshness of small-batch products provides advantages. Users often report better results from homemade versions once they find formulations suited to their skin type.
Where should I buy ingredients for DIY skincare?
Quality ingredients come from specialized suppliers focused on cosmetic-grade materials. Online retailers offer better selection than local stores. Look for suppliers providing certificates of analysis and safety data sheets. Organic certification matters for natural ingredients. Avoid food-grade substitutes for cosmetic ingredients when possible. Buying from reputable suppliers ensures purity, potency, and safety of your homemade products.
Do I need special equipment to make skincare at home?
Basic skincare making requires minimal equipment. Essential items include measuring spoons and cups, a double boiler or heat-safe bowl, a hand mixer or blender, clean containers, and a thermometer. Many people start with kitchen equipment they already own. As you advance, specialized tools like stick blenders and digital scales improve precision. Most recipes work perfectly fine with simple household items.
How much money can I save making my own skincare?
Savings vary but typically reach seventy to eighty percent compared to commercial products. A fifty-dollar commercial face oil costs approximately ten dollars to make at home. Initial ingredient investment seems high but creates multiple batches. Body butter costing sixty dollars commercially might cost twelve dollars homemade. Over time, savings become substantial, especially for families or people with extensive skincare routines.
Your First Steps in Homemade Skincare
Beginning your DIY skincare journey feels exciting and perhaps overwhelming. Start small with simple recipes. Build confidence and skills gradually.
Beginner-Friendly Starting Projects
Some recipes prove more forgiving than others. These beginner projects teach basic skills without complicated techniques.
Start with a simple body oil. Combine carrier oils you like. Add a few drops essential oil for scent. Pour into bottle. This project teaches measuring and blending basics.
Try whipped body butter next. The transformation from solid to fluffy amazes everyone. You learn about temperature and texture. Success builds confidence quickly.
Lip balm makes an excellent third project. Small quantities reduce waste if something goes wrong. The recipe teaches working with beeswax. You create practical products within thirty minutes.
Choose one simple recipe to start
Buy only ingredients needed for that recipe
Read recipe completely before beginning
Prepare workspace and sterilize containers
Measure ingredients carefully and precisely
Follow instructions exactly as written
Label finished product with date and ingredients
Test product and note results in journal
Building Your Ingredient Collection
Resist buying everything at once. Start with versatile basics that work across multiple recipes. Expand gradually as skills develop.
Essential first purchases include coconut oil, shea butter, and jojoba oil. These three ingredients create dozens of products. Add beeswax and vitamin E oil. This minimal collection covers most beginner recipes.
Add ingredients one at a time as you try new recipes. This controlled approach prevents waste. You learn each ingredient thoroughly. Your collection grows naturally with your skills.
Essential oils expand variety without major investment. Start with lavender for its versatility. Add tea tree for problem skin. Choose one citrus oil you enjoy. These three cover most scent preferences.
Learning Resources and Community
Learning continues beyond basic recipes. Resources and communities support your growing skills. Connection with other makers accelerates progress.
Online communities share recipes and troubleshooting advice. Social media groups connect DIY enthusiasts worldwide. You find inspiration and solutions. Experienced makers help beginners generously.
Books provide structured learning. They explain principles behind recipes. Understanding why ingredients work together makes you better formulator. Knowledge creates freedom to experiment confidently.
Take Your Skills to Professional Level
Basic recipes provide excellent starting point. But comprehensive training accelerates your journey tremendously. Professional courses teach formulation principles rather than just individual recipes. You learn to create any product you envision.
Understanding ingredient chemistry opens unlimited possibilities. Advanced preservation techniques ensure product safety. Professional knowledge transforms hobby into potential business opportunity.
Transform Your Skincare Routine Starting Today
You now understand the fundamentals of Homemade Skin Care. The recipes, techniques, and knowledge shared here provide solid foundation. Your journey into natural beauty begins with a single batch.
The benefits extend beyond skincare results. You gain creative satisfaction from making products yourself. You control every ingredient touching your skin. You reduce environmental impact and save substantial money.
Start simple and build gradually. Master basic recipes before advancing. Keep detailed notes of successes and adjustments. Your perfect formulations emerge through experimentation.
Quality ingredients make quality products. Source from reputable suppliers. Choose organic when possible. Fresh components deliver best results for your skin.
The community of DIY skincare makers welcomes you. Share your creations and learn from others. This journey becomes more enjoyable when shared. Your hands hold the power to create something new for your skin today.
Natural beauty starts in your own kitchen. The oils, butters, and botanical ingredients await your creative touch. Transform them into luxurious products tailored perfectly for you. Your skin will thank you for years to come.
Master Natural Skincare from Beginner to Expert
Ready to transform your skincare journey completely? Access comprehensive training covering everything from basic recipes to professional formulation techniques. Learn the complete system used by successful natural skincare creators.
The time you invest in learning creates benefits lasting a lifetime. Your skin deserves this natural, gentle care. Begin today with confidence knowing you hold all the knowledge needed for success.