Starting your sewing journey feels exciting yet overwhelming. You want to create beautiful projects but don’t know where to begin. The good news is that sewing easy DIY pattern free sewing projects can transform you from a complete novice into a confident creator.
This Website contains affiliate links. That means I may earn a small commission if you purchase through my links, at no extra cost to you.
This comprehensive guide walks you through everything you need to know. You’ll discover beginner-friendly patterns, essential techniques, and practical tips. Whether you dream of making your own clothes or crafting handmade gifts, you’re in the right place.
Learning to sew opens up endless creative possibilities. With the right guidance and resources, you can master sewing skills step by step and build confidence with every stitch.
Why Sewing Easy DIY Patterns Are Perfect for Beginners
Free sewing patterns provide the perfect starting point for new sewers. They eliminate financial risk while you learn basic skills. You can practice techniques without worrying about wasting money on expensive patterns.
Beginner sewing projects typically feature straight lines and simple construction. These projects build your confidence gradually. Each completed item proves you can create something functional and beautiful.
The sewing community thrives on sharing knowledge and patterns. Experienced sewers understand the challenges beginners face. They design free patterns specifically to help newcomers succeed.
Benefits of Free Sewing Patterns
Zero financial commitment while learning
Wide variety of project options available
Ability to test different pattern designers
Practice reading pattern instructions
Build skills before investing in premium patterns
What Makes Patterns Beginner-Friendly
Clear step-by-step instructions included
Minimal pattern pieces to cut
Straight seams and simple shapes
Forgiving fabric recommendations
Quick completion times for motivation
Many beginners worry they lack the natural talent for sewing. This misconception stops countless people from trying. The truth is that sewing is a learned skill. With practice and proper instruction, anyone can learn to sew beautifully.
Ready to Master Sewing From Scratch?
Stop feeling overwhelmed by scattered tutorials. Get access to a complete beginner-to-advanced sewing system with step-by-step video lessons, downloadable patterns, and expert guidance that takes you from your first stitch to creating professional-quality projects.
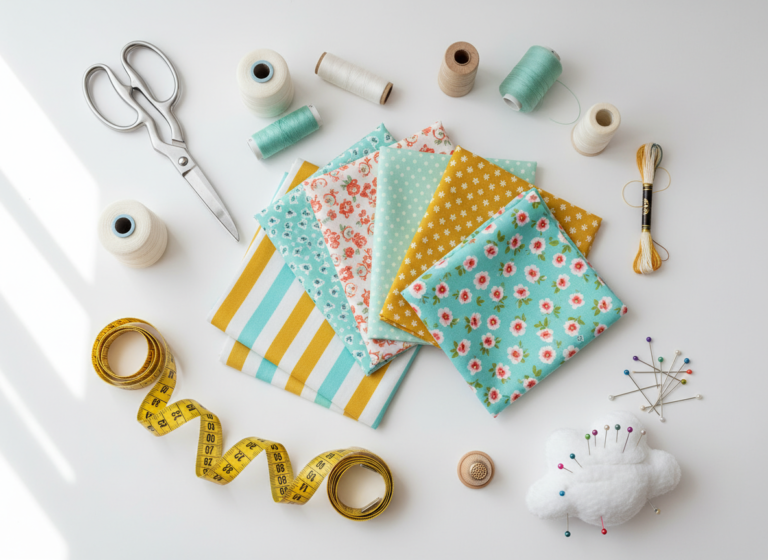
Setting up your sewing space doesn’t require a huge investment. You need just a few basic tools to get started. Quality matters more than quantity when selecting your first supplies.
Must-Have Tools for New Sewers
Every beginner needs sharp fabric scissors dedicated exclusively to cutting fabric. Never use these scissors on paper. Paper dulls the blades quickly and ruins their effectiveness on fabric.
A seam ripper becomes your best friend as you learn. Mistakes happen to everyone. This small tool helps you remove stitches cleanly without damaging fabric. Keep it within reach at all times.
Measuring tools ensure accuracy in your projects. A flexible measuring tape works for body measurements and fabric. A clear ruler helps with marking straight lines and measuring seam allowances.
Cutting Tools
Fabric scissors or shears
Small embroidery scissors for detail work
Rotary cutter and mat for straight edges
Pattern weights to hold pieces in place
Marking Tools
Fabric marking pens or pencils
Tailor’s chalk for temporary marks
Tracing paper for pattern transfer
Clear ruler for straight lines
Fastening Tools
Straight pins with large heads
Pin cushion for safe storage
Hand sewing needles in various sizes
Needle threader for easier threading
Choosing Your First Sewing Machine
A basic mechanical sewing machine serves beginners perfectly well. Look for a model with straight stitch and zigzag stitch capabilities. These two stitches handle most beginner projects successfully.
Computerized machines offer more features but can overwhelm new sewers. Start simple and upgrade later if needed. Many sewers use basic machines for years with excellent results.
Test the machine before purchasing if possible. The controls should feel intuitive. The machine should run smoothly without excessive noise. Check that threading the machine makes sense to you.
For those ready to take their skills to the next level, comprehensive sewing courses provide detailed machine tutorials and maintenance guidance that keep your equipment running perfectly for years.
Understanding Fabric Types for Beginner Projects
Fabric selection dramatically impacts your project success. Beginners should start with cotton or cotton blend fabrics. These materials cut cleanly, sew smoothly, and forgive minor mistakes.
Cotton quilting fabric works wonderfully for beginner sewing projects. It comes in countless colors and patterns. The medium weight handles easily without excessive stretching or slipping.
Best Fabric Choices for New Sewers
Woven fabrics prove easier to work with than knits. They maintain their shape during cutting and sewing. Save stretchy knit fabrics for later when you’ve built more skills.
Medium-weight fabrics offer the best learning experience. Very lightweight fabrics shift and slip too much. Heavy fabrics require more machine power and can be difficult to manipulate.
Beginner-Friendly Fabric Types
Cotton quilting fabric for most projects
Linen for natural texture and durability
Cotton canvas for bags and sturdy items
Flannel for soft blankets and cozy items
Muslin for practice and pattern testing
Fabrics to Avoid Initially
Slippery satins and silks
Stretchy jersey knits
Heavy upholstery fabrics
Delicate sheers and chiffons
Faux fur and pile fabrics
Understanding fabric grain becomes important as you progress. The grain refers to the direction of the threads. Cutting along the grain ensures your projects hang and wear correctly.
Pre-washing fabric prevents unwelcome surprises later. Many fabrics shrink when first washed. Pre-washing also removes excess dyes and chemicals that might affect sewing.
Easy Beginner Sewing Projects You Can Start Today
Starting with the right beginner sewing projects builds confidence quickly. These simple projects teach essential skills without overwhelming complexity. Each one uses basic techniques that form the foundation for more advanced work.
Simple Tote Bag Pattern
The tote bag makes a perfect first project. This practical item uses straight lines exclusively. You’ll practice cutting fabric accurately, sewing straight seams, and finishing edges neatly.
A basic tote bag pattern features two main fabric pieces and two handles. The construction involves sewing side seams, creating a bottom, and attaching handles. Most beginners complete this project in one afternoon.
Choose a sturdy cotton canvas or heavy quilting cotton for your first tote bag. These fabrics hold their shape well. Add interior pockets once you master the basic construction.
Drawstring bag patterns teach you to create casings and work with cording. These versatile bags work great for storage, gifts, or organizing small items. The simple construction requires only basic skills.
Cut two rectangles of fabric in your desired size. Sew the sides, create a casing at the top, and thread cord through. You can customize the size for any storage need from tiny pouches to large laundry bags.
Easy Pillowcase with French Seams
Pillowcases introduce you to French seams, which enclose raw edges beautifully. This technique creates professional-looking results. The rectangular shape keeps the project simple while teaching valuable finishing skills.
Standard pillowcases measure approximately 20 by 30 inches. Add extra fabric for seam allowances and the decorative cuff. French seams take slightly longer but create a polished interior.
Simple Zippered Pouch
Adding a zipper might seem intimidating but becomes manageable with the right pattern. Start with a basic rectangular pouch. This project teaches zipper installation in the easiest possible format.
Pouch sewing patterns come in countless sizes. Make small versions for cosmetics or large ones for travel gear. The zipper keeps contents secure while looking professional.
No-Sew Fleece Blanket
Sometimes the best beginner project involves no sewing machine at all. No-sew fleece blankets teach fabric handling and finishing techniques. You’ll create a cozy blanket using simple knotting or braiding methods.
These blankets make great gifts and take just a couple hours. The process helps you understand fabric grain, cutting accuracy, and finishing edges. Perfect for absolute beginners who want immediate results.
Free Sewing Patterns: Where to Find Quality Resources
The internet offers thousands of free sewing patterns. Quality varies significantly between sources. Learning to identify well-designed patterns saves frustration and failed projects.
Trusted Sources for Free Patterns
Established sewing blogs often provide free patterns as a service to their readers. These designers typically include detailed instructions and helpful photos. Read reviews or comments to gauge pattern quality before starting.
Fabric manufacturer websites frequently offer free patterns designed for their products. These patterns showcase what you can create with their fabrics. The instructions usually target beginners and include clear illustrations.
Pattern Quality Indicators
Clear instruction layout with numbered steps
Photos or illustrations for each major step
Complete materials list with specific measurements
Positive reviews from other sewers
Professional pattern designer or established blog
Red Flags to Watch For
Missing seam allowances in measurements
Vague or incomplete instructions
No photos or visual guides included
Unusual construction methods without explanation
Multiple negative reviews or complaints
Pattern Features for Beginners
Minimal pattern pieces to manage
Mostly straight seams and simple shapes
Beginner skill level clearly marked
Estimated time to completion provided
Common fabric suggestions included
Reading Pattern Instructions Successfully
Pattern instructions follow a standard format once you understand the basics. Read through all instructions before cutting fabric. This overview helps you understand the construction sequence and spot potential challenges.
Pay attention to seam allowances specified in the pattern. Some patterns include seam allowances in the measurements. Others require you to add them when cutting. This distinction matters significantly for proper fit.
Pattern terminology becomes familiar with practice. Terms like “right sides together,” “press seams open,” and “topstitch” appear frequently. Comprehensive sewing education includes a complete glossary and video demonstrations of every technique mentioned in patterns.
Mastering Basic Sewing Techniques for Success
Solid technique makes the difference between frustrating struggles and enjoyable sewing. Focus on mastering a few fundamental skills first. These basics apply to virtually every sewing project you’ll attempt.
Sewing Straight Lines Consistently
Straight seams form the backbone of beginner sewing projects. Practice sewing on paper first if needed. This exercise builds muscle memory without wasting fabric. Follow the marked lines to develop consistent seam allowances.
Guide the fabric gently without pulling or pushing. The machine’s feed dogs move the fabric forward automatically. Your hands simply steer the fabric in the right direction. Pulling causes uneven stitches and fabric distortion.
Tips for Perfect Straight Seams
Use the seam guide markings on your machine
Sew at a consistent moderate speed
Keep your eyes on the guide, not the needle
Practice on scrap fabric before each project
Press seams after sewing for crisp results
Understanding Seam Allowances
Seam allowances determine how much fabric extends beyond your stitching line. Standard seam allowances measure 5/8 inch in garment sewing. Craft projects often use 1/4 or 1/2 inch allowances instead.
Consistent seam allowances ensure pieces fit together correctly. Marking your seam allowances before sewing helps maintain accuracy. Use your machine’s seam guide or place tape as a visual reference.
Pressing Makes Perfect
Pressing differs from ironing in important ways. Pressing involves lifting the iron and setting it down. Ironing means sliding the iron across fabric. Pressing prevents stretching and distortion in your projects.
Press seams after sewing them but before crossing them with another seam. This step creates crisp, professional results. Many sewing mistakes become invisible with proper pressing techniques.
Finishing Raw Edges Properly
Raw fabric edges fray over time without proper finishing. Several methods prevent fraying in beginner projects. Choose the technique that works best for your fabric and project type.
Pinking shears create a zigzag edge that resists fraying. This quick method works well for fabrics that don’t fray heavily. Zigzag stitching along raw edges provides more security for fabrics that fray easily.
Common Beginner Sewing Mistakes and How to Avoid Them
Every sewer makes mistakes, especially when learning. Understanding common errors helps you avoid them. More importantly, you’ll know how to fix problems when they occur.
Skipping the Test Swatch
Testing your machine settings on scrap fabric saves countless headaches. Stitch length, tension, and thread type all affect results. A two-minute test prevents hours of seam ripping later.
Use the same fabric you’ll use for your project. Different fabrics behave differently under the presser foot. Test any special techniques before attempting them on your actual project pieces.
Mistakes to Avoid
Skipping pattern instructions to save time
Using dull needles or wrong needle type
Failing to press seams as you sew
Pulling fabric through the machine
Not securing thread ends properly
Cutting without double-checking measurements
Best Practices Instead
Read all instructions completely before starting
Change needles regularly, match to fabric
Press after every seam for professional results
Let feed dogs move fabric naturally
Backstitch at seam beginnings and ends
Measure twice, cut once every time
Choosing the Wrong Needle
Sewing machine needles come in various sizes and types for good reason. Universal needles work for many fabrics but not all. Ballpoint needles prevent runs in knits. Sharp needles penetrate woven fabrics cleanly.
Replace needles regularly even when they seem fine. Dull needles cause skipped stitches, puckering, and fabric damage. Many experts recommend changing needles after every project or eight hours of sewing time.
Ignoring Grain Lines
Cutting fabric off-grain leads to twisted seams and poor drape. Pattern pieces include grain line arrows for this reason. Align these arrows with the fabric’s lengthwise grain before cutting.
The lengthwise grain runs parallel to the selvage edges. This grain has the least stretch and provides stability. Cross grain runs perpendicular and has slight stretch. Bias runs diagonal and has maximum stretch.
When challenges arise, having expert guidance makes all the difference. Structured sewing courses provide troubleshooting help and demonstrate solutions to common problems through detailed video instruction.
Building Your Sewing Skills Progressively
Skill development happens gradually through consistent practice. Start with simple projects and add complexity slowly. Each new technique builds on previously mastered skills.
Skill Progression Path for Beginners
Your first projects should focus on straight seams and basic construction. Master cutting accurately, sewing straight, and finishing edges. These fundamentals support everything else you’ll learn.
Add one new skill per project initially. If you’re learning to install a zipper, choose a familiar project style. This approach prevents overwhelming yourself with multiple new challenges simultaneously.
Level 1: Foundation Skills
Cutting fabric accurately
Sewing straight seams
Understanding seam allowances
Basic edge finishing
Simple pressing techniques
Level 2: Expanding Abilities
Installing basic zippers
Creating buttonholes
Sewing curved seams
Adding pockets
Working with patterns
Level 3: Intermediate Techniques
Garment construction basics
Fitting adjustments
Multiple fabric layers
Decorative stitching
Specialty fabrics
Setting Realistic Learning Goals
Establish specific, achievable goals for your sewing journey. Vague goals like “get better at sewing” provide no clear direction. Instead, aim to “complete three beginner sewing projects this month” or “master zipper installation.”
Track your progress through a sewing journal or project log. Document what worked well and what challenged you. These notes help you see improvement over time and identify areas needing more practice.
Learning from Sewing Communities
Online sewing communities provide incredible support and inspiration. Join groups where members share projects, ask questions, and offer encouragement. Seeing others’ work motivates your own creativity.
Don’t hesitate to ask questions when stuck. Experienced sewers remember their own learning challenges. Most people happily share tips and solutions. Your question might help others facing the same issue.
Transform Your Hobby Into True Mastery
Join thousands of beginners who have successfully transformed their sewing skills through comprehensive, step-by-step instruction. Get lifetime access to video tutorials, downloadable patterns, community support, and expert guidance that takes you from uncertain beginner to confident creator. Stop struggling with confusing tutorials and start following a proven system.
An organized sewing space makes projects more enjoyable and efficient. You don’t need a dedicated room. Even a small corner works well with smart organization strategies.
Creating a Functional Workspace
Your sewing machine needs a stable surface at comfortable height. Standard desk or table height works for most people. Position your machine near electrical outlets to avoid extension cord tangles.
Good lighting prevents eye strain and improves accuracy. Natural light works beautifully during daytime. Add task lighting for evening sewing or detailed work. Position lights to eliminate shadows on your work surface.
Space-Saving Organization Ideas
Wall-mounted thread racks save counter space
Clear containers make supplies visible
Rolling carts tuck away when not needed
Pegboards utilize vertical wall space
Folding tables create temporary work surfaces
Drawer dividers organize small notions
Storing Fabric Effectively
Fabric storage challenges every sewer eventually. Organize fabric by type, color, or project to find pieces quickly. Clear bins let you see contents at a glance. Avoid storing fabric in direct sunlight, which causes fading.
Fold fabrics neatly around cardboard or comic boards. This method prevents permanent creases while keeping pieces organized. Label bins with fabric type, yardage, and width for easy reference.
Maintaining Your Sewing Tools
Regular maintenance keeps tools working properly for years. Clean your sewing machine after every few projects. Remove lint from the bobbin area and under the feed dogs. Oil your machine according to manufacturer recommendations.
Store scissors in protective covers to maintain sharp edges. Keep pins and needles in cushions or magnetic holders. Replace damaged or bent pins promptly to avoid fabric snags.
Free Sewing Patterns for Specific Project Categories
Different project categories teach distinct skills while creating useful items. Exploring various types keeps sewing interesting and expands your capabilities naturally.
Clothing and Garment Patterns
Simple garment sewing starts with basic shapes. Elastic-waist skirts require minimal fitting and simple construction. The straight lines and gathered waist forgive fitting imperfections while teaching essential garment-making concepts.
Dress patterns designed for beginners typically feature loose fits and minimal pattern pieces. A-line dresses and shift dresses eliminate complex fitting challenges. These styles create wearable garments while building confidence in clothing construction.
Start with knit fabrics only after mastering wovens. Knits require different techniques and often specialized needles. The stretch factor adds complexity that beginners find frustrating initially.
Home Decor Sewing Projects
Home decor items offer large, forgiving surfaces perfect for practicing skills. Table runners use straight seams and simple finishing. Pillow covers teach envelope closures or zipper installation depending on the style chosen.
Curtain panels provide excellent straight-line sewing practice. The repetitive seams build consistency and speed. Simple rod pocket or tab-top styles eliminate complex construction while creating functional home accessories.
Kitchen and Dining
Simple apron with ties
Pot holders and oven mitts
Napkins and placemats
Dish towels with decorative borders
Bedroom Projects
Pillowcases with French seams
Throw pillow covers with zippers
Simple duvet covers
Fleece or flannel blankets
Living Space Decor
Curtain panels with rod pockets
Table runners for seasonal decor
Floor cushion covers
Wall hangings and fabric art
Accessories and Small Gifts
Small accessories make perfect practice projects and thoughtful handmade gifts. Fabric bookmarks take just minutes but teach precision. Eyeglass cases protect valuable items while showcasing your growing skills.
Tote bag patterns scale easily from small to large. Make tiny gift bags or full-size shopping totes using the same basic pattern. This versatility lets you practice the same construction repeatedly while creating different sized items.
Zippered cosmetic bags make excellent gifts and teach valuable zipper skills. Start with simple rectangular pouches. Progress to shaped bags with gussets as your confidence grows. These practical items always find appreciative recipients.
Summer Sewing Projects for Seasonal Inspiration
Seasonal projects keep sewing relevant and exciting year-round. Summer sewing focuses on lightweight fabrics and outdoor-ready items. These projects prepare you for warm-weather activities while building practical skills.
Beach and Pool Accessories
Beach bags need sturdy construction to handle wet towels and sandy toys. Heavy cotton canvas or outdoor fabric works perfectly. These materials sew easily while providing durability for summer adventures.
Drawstring backpacks create waterproof storage for pool gear. Use water-resistant fabric or line cotton bags with waterproof material. The simple construction teaches casing and drawstring techniques useful in many projects.
Lightweight Summer Clothing
Summer clothes use breathable fabrics like cotton lawn, linen, and rayon. These lightweight materials keep you cool while looking stylish. Simple shift dresses and elastic-waist shorts provide comfortable warm-weather wardrobes.
Tank tops and sleeveless shells eliminate the complexity of setting sleeves. These beginner-friendly garments use less fabric and feature straightforward construction. Perfect for building confidence in garment sewing during comfortable weather.
Outdoor Entertainment Items
Picnic blankets combine form and function beautifully. Quilted versions teach simple quilting techniques. Backed with waterproof material, they protect from damp ground during outdoor concerts and park gatherings.
Fabric bunting adds festive flair to summer parties and barbecues. The triangle shapes cut quickly and sew together easily. String multiple pennants together for customizable decoration in any length needed.
Problems arise during sewing projects despite careful planning. Knowing how to diagnose and fix issues quickly minimizes frustration. Most problems have simple solutions once you understand the cause.
Thread Tension Issues
Incorrect tension creates loose or tight stitches that compromise seam strength and appearance. Upper thread tension that’s too tight pulls the fabric and creates puckered seams. Too loose creates loops on the fabric underside.
Check bobbin threading first when tension seems wrong. Incorrectly threaded bobbins cause most tension problems. Rethread both upper and lower threads following your machine manual exactly.
Signs of Tension Problems
Loops of thread on fabric underside
Puckered seams that won’t press flat
Thread breaking frequently during sewing
Uneven stitch appearance on fabric surface
Difficulty achieving balanced stitches
Tension Solutions
Rethread machine completely, both upper and bobbin
Clean lint from tension discs and bobbin area
Use same thread weight in bobbin and upper
Test stitches on scrap fabric after adjustments
Adjust tension in small increments only
Skipped Stitches
Skipped stitches create weak seams with visible gaps. Dull or damaged needles cause most skipped stitches. The needle fails to penetrate fabric cleanly, preventing proper loop formation.
Wrong needle type for your fabric also causes skipping. Ballpoint needles work for knits. Sharp needles suit woven fabrics. Universal needles handle many fabrics but don’t work optimally for all materials.
Fabric Not Feeding Properly
Fabric should move smoothly under the presser foot without pulling or bunching. Feed dogs grip and move fabric forward automatically. Lowered or dirty feed dogs prevent proper fabric movement.
Check that feed dogs are raised and clean. Remove lint buildup that prevents teeth from gripping fabric. Adjust presser foot pressure if your machine allows it. Different fabrics require different pressure levels.
When technical problems persist despite basic troubleshooting, comprehensive guidance helps identify and solve issues efficiently. Professional instruction covers every aspect of machine maintenance and problem-solving to keep your equipment running smoothly.
Taking Your Sewing Skills to the Next Level
After mastering beginner projects, you’ll naturally want new challenges. Advancing your skills opens doors to more complex and rewarding projects. The progression from beginner to intermediate happens through deliberate practice and learning.
Expanding Your Technique Repertoire
Intermediate sewers master techniques like installing invisible zippers, creating bound buttonholes, and sewing set-in sleeves. Each skill expands your project possibilities significantly. Take time to perfect each technique before moving forward.
Working with specialty fabrics like silk, velvet, or leather requires adapted techniques. These materials challenge even experienced sewers. Start with small projects when trying new fabric types. This approach limits waste while building confidence.
Next-Level Skills to Master
Construction Techniques
Installing invisible zippers professionally
Creating bound buttonholes that look perfect
Setting sleeves smoothly without puckers
Making welt pockets with clean finishes
Sewing princess seams for fitted garments
Finishing Methods
Hand-stitching invisible hems
Creating professional-looking topstitching
Binding edges with bias tape neatly
Adding decorative embellishments tastefully
Mastering different seam finishes
Understanding Pattern Fitting and Alterations
Standard patterns fit a theoretical average body. Most people need some adjustments for proper fit. Learning basic fitting skills transforms okay garments into perfectly fitted ones.
Start by taking accurate body measurements. Compare these to pattern measurements to identify needed adjustments. Common alterations include lengthening or shortening pieces, adjusting for bust or hip size, and modifying shoulder width.
Make a muslin test garment before cutting expensive fabric. This practice garment reveals fitting issues you can correct before final construction. The time invested in muslins prevents wasted materials and disappointing results.
Exploring Different Sewing Disciplines
Sewing encompasses many specialized areas beyond basic construction. Quilting combines fabric pieces into functional art. Embroidery adds decorative elements to plain fabrics. Tailoring creates structured, professional garments.
Try different disciplines to discover what excites you most. You might love the precision of quilting or prefer the creativity of garment design. Many sewers combine multiple interests in their projects.
Continuing education keeps skills sharp and introduces new techniques. Structured courses provide systematic learning that scattered tutorials can’t match. Comprehensive sewing education programs offer progressive learning paths from foundation to advanced professional techniques.
Start Your Sewing Journey Today
Learning sewing easy diy pattern free sewing opens a world of creative possibilities. You’ve discovered the essential tools, fundamental techniques, and beginner-friendly projects that build confidence. Every expert sewer started exactly where you are now.
Begin with simple projects that teach core skills. Practice consistently and celebrate each completed item. Mistakes provide valuable learning opportunities rather than reasons to quit. Your skills improve with every stitch you take.
The sewing community welcomes beginners enthusiastically. Don’t hesitate to ask questions, share projects, or seek advice. Other sewers remember their own learning challenges and genuinely want to help you succeed.
Free sewing patterns provide endless practice opportunities without financial investment. Combine these resources with quality instruction for fastest skill development. The right guidance prevents frustrating struggles and accelerates your progress significantly.
Ready to Transform From Beginner to Confident Creator?
Stop piecing together random tutorials and start following a proven system. Get instant access to comprehensive video lessons, professional patterns, expert troubleshooting, and supportive community that guides you from your very first stitch to creating professional-quality projects you’ll be proud to wear and share. Join thousands of successful students who turned their sewing dreams into reality.
Your sewing journey begins with a single project. Choose something that excites you. Gather your materials and start creating. The satisfaction of completing handmade items never fades, no matter how many years you sew.
Remember that perfect beginners don’t exist. Everyone starts with uncertainty and develops confidence through practice. Be patient with yourself. Give yourself permission to learn at your own pace. Your unique creative voice emerges naturally as your skills grow.
The time you invest in learning to sew pays dividends for life. You’ll create custom items that reflect your personal style. You’ll repair and alter clothing rather than replacing it. Most importantly, you’ll join a global community of makers who find joy in creating beautiful, functional items with their own hands.