Natural acrylic nails offer the perfect balance between durability and subtle beauty. When done right, they enhance your natural nails while maintaining an effortless, understated elegance that works for any occasion. This comprehensive guide will walk you through everything you need to know about achieving that coveted natural look with acrylics – from preparation to application, maintenance, and inspiring design ideas that will have everyone asking if you were simply blessed with perfect natural nails.
This Website contains affiliate links. That means I may earn a small commission if you purchase through my links, at no extra cost to you.
What Makes Acrylic Nails Look Natural?
The secret to natural-looking acrylic nails lies in three key elements: thickness, shape, and color. Unlike bold, statement acrylics, natural styles aim to enhance rather than transform your hands. The goal is an effortless appearance that doesn’t scream “salon visit” – even though achieving this look often requires more skill and attention to detail.
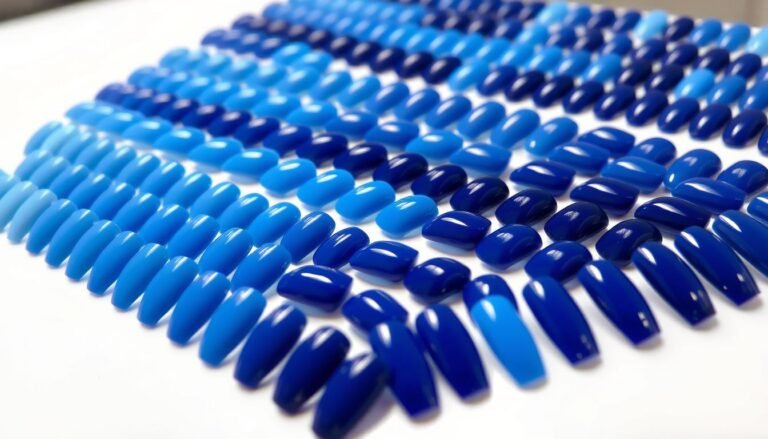
Natural acrylic nails (left) versus dramatic acrylic nails (right) – notice the difference in thickness, length, and color palette
Thickness Matters
Natural acrylic nails should flow seamlessly from your nail bed without noticeable bumps or excessive thickness. When viewed from the side, there shouldn’t be an obvious lump where the acrylic begins. Proper filing and shaping create this illusion of your natural nail simply extending beautifully.
Shape Selection
Certain nail shapes instantly read as more natural than others. While stiletto or long coffin shapes are obviously enhanced, shapes like oval, almond, squoval, and short square follow the natural growth pattern of nails, making them ideal choices for a natural look.
Color Choices
The color palette for natural acrylic nails typically includes nude shades that complement your skin tone, light pinks, French manicure styles, and subtle ombre effects. These colors mimic and enhance the natural coloration of nails rather than creating stark contrast.
Benefits of Choosing Natural Acrylic Nails
Natural acrylic nails are perfect for professional environments while still looking polished
Professional Versatility
Natural acrylic nails are appropriate for conservative work environments where dramatic nail art might be considered unprofessional. They enhance your hands without becoming a distraction during meetings or client interactions.
Everyday Practicality
The moderate length and durable finish of natural acrylic nails make them practical for everyday tasks. Unlike extremely long styles, they won’t interfere with typing, cooking, or other daily activities while still providing the strength benefits of acrylics.
Timeless Elegance
While nail trends come and go, natural-looking acrylics never go out of style. They complement any outfit, occasion, or season, making them a versatile choice that won’t clash with your wardrobe or look dated in photos.
Ready to Try Natural Acrylic Nails?
Browse quality acrylic nail kits that will help you achieve the perfect natural look at home.
Best Shapes for Natural-Looking Acrylic Nails
The shape of your acrylic nails plays a crucial role in achieving a natural appearance. Some shapes naturally mimic the way nails grow, while others immediately signal enhancement. Here are the most flattering shapes for natural-looking acrylic nails:
Oval
Oval nails follow the natural curve of your fingertips while extending slightly. This shape is ideal for shorter acrylic extensions and mimics the natural angle of fingertips. It’s perfect for those who work with their hands frequently but still want the polish of acrylic nails.
Almond
The almond shape gradually tapers as it extends from the nail bed, with a softly rounded tip. This feminine shape works beautifully for medium-length natural acrylic nails, creating an elegant elongated look for fingers without appearing obviously fake.
Square
For a classic look, square nails provide durability and a clean appearance. For longer natural acrylics, the square should taper slightly to avoid a fan effect that looks unnatural. Short square acrylics can maintain sharper edges while still appearing natural.
Squoval
This hybrid between square and oval offers the flat edge many people prefer without the sharp corners. The nail is filed straight across with gently rounded corners, creating a versatile shape that works well for natural-looking acrylic nails of any length.
Step-by-Step Guide to Achieving Natural Acrylic Nails

Proper application technique is crucial for achieving natural-looking acrylic nails
Preparation: The Foundation for Natural Results
Essential Prep Tools
Having the right preparation tools makes all the difference in achieving natural-looking acrylic nails.
Application: Creating the Perfect Structure
Shaping and Finishing: The Key to Natural Appearance

Before and after: Natural acrylic nails create a polished look while maintaining a natural appearance
Color Selection for Natural Acrylic Nails
The right color choice is crucial for maintaining the natural appearance of your acrylic nails. While bright colors and bold designs have their place, natural acrylic nails rely on subtle shades that enhance rather than transform.

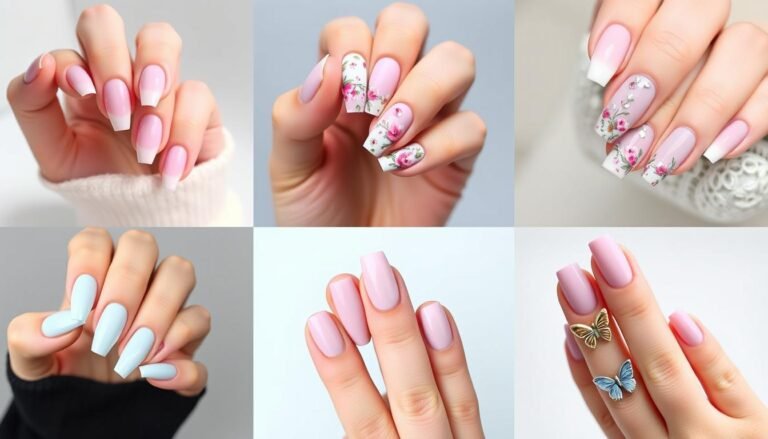
Natural nail polish colors complement different skin tones for a seamless look
Skin-Tone Matched Nudes
The most natural-looking option is to choose a nude shade that closely matches or complements your skin tone. For lighter skin, soft beiges and pale pinks work well. Medium skin tones look beautiful with rosy or peachy nudes. Deeper skin tones are enhanced by rich taupes, caramels, and chocolate hues.
Classic French
The French manicure remains popular because it mimics the natural appearance of nails with their white tips. For a modern take, try a soft pink or nude base with a subtle white tip rather than stark white. This creates a more seamless, natural look.
Subtle Ombre
Natural ombre nails blend from a pink or nude base to white tips without a harsh line. This creates a soft gradient that mimics how natural nails lighten at the tips but with a more polished, perfected appearance. The blended effect appears more natural than a traditional French tip.
Find Your Perfect Natural Shade
Browse collections of nude nail polishes to find the perfect match for your skin tone.
Maintaining Your Natural Acrylic Nails
Proper maintenance is essential for keeping your natural acrylic nails looking their best. Without regular care, even the most perfectly applied acrylics can start to look obviously fake as they grow out.

Regular cuticle oil application helps maintain the health of both your natural nails and acrylic overlay
Daily Care
- Apply cuticle oil daily to keep the skin around your nails hydrated and prevent lifting.
- Wear gloves when doing household chores, especially those involving water or chemicals.
- Avoid using your nails as tools to open packages or scratch surfaces.
- Apply hand cream regularly to keep your hands looking as polished as your nails.
Fill Schedule
- Schedule fills every 2-3 weeks to maintain the seamless appearance of your natural acrylic nails.
- As your natural nails grow, a gap will form between the cuticle and the acrylic overlay.
- This gap is a clear sign your nails are artificial and should be filled promptly.
- Regular fills also help prevent lifting and potential water damage to your natural nails.
Protecting Your Investment
To keep your natural acrylic nails looking their best, avoid exposure to harsh chemicals like acetone-based removers or self-tanner, which can stain the acrylic. When applying lotions or oils, be careful not to get too much around the cuticle area, as this can cause lifting. If you notice any lifting or cracking, have it repaired immediately to prevent water from getting trapped between the acrylic and your natural nail.
Essential Maintenance Tools
Keep your natural acrylic nails looking their best with these maintenance essentials.
DIY vs. Salon: Pros and Cons for Natural Acrylic Nails

Salon application offers expertise while DIY provides convenience and cost savings
Salon Application Pros
- Professional expertise ensures proper application technique
- Access to high-quality professional products
- Proper filing and shaping by experienced technicians
- Less risk of damage to your natural nails
- Perfect finish that truly looks natural
Salon Application Cons
- Higher cost, especially with regular fills
- Time commitment for appointments
- Finding a technician who specializes in natural-looking acrylics
- Potential exposure to harsh chemicals in poorly ventilated salons
- Less control over the final look
DIY Application Pros
- Significant cost savings over time
- Convenience of application on your schedule
- Complete control over the shape, length, and color
- Ability to fix issues immediately
- Satisfaction of learning a new skill
DIY Application Cons
- Steep learning curve for proper application
- Risk of damage to natural nails if done incorrectly
- Initial investment in quality tools and products
- Difficulty working with your non-dominant hand
- Results may not look as polished as professional work
If you’re new to acrylic nails, consider starting with a professional application to understand the process and proper technique. You can then decide if DIY maintenance or application is right for you based on your comfort level and results.
Ready to Try DIY Natural Acrylic Nails?
Find everything you need to get started with DIY natural acrylic nails.
Natural Acrylic Nail Inspiration Gallery
Looking for ideas for your next natural acrylic nail set? Here are some stunning yet subtle designs that maintain that coveted natural appearance while adding just enough interest to make your manicure special.

Skin-Matched Nude: This perfect nude shade creates the illusion of naturally flawless nails.

Minimalist French: A thin white line creates a modern take on the classic French manicure.

Soft Ombre: The gradual fade from pink to white creates dimension without obvious artifice.

Subtle Accent: A single nail with minimal gold line art adds interest while maintaining a natural look.
Create Your Own Natural Nail Art
Find subtle nail art supplies to enhance your natural acrylic nails with delicate designs.
Embracing Natural Beauty with Acrylic Enhancement
Natural acrylic nails represent the perfect marriage between enhancement and authenticity. They allow you to enjoy the strength and longevity of acrylics while maintaining an elegant, understated appearance suitable for any occasion or environment.
Whether you choose to visit a salon or embark on a DIY journey, the key to successful natural acrylic nails lies in attention to detail – the proper thickness, complementary shape, and harmonious color selection all work together to create nails that look like the best version of your natural nails rather than obvious enhancements.
Remember that maintenance is just as important as application. With proper care, your natural acrylic nails can remain beautiful for weeks, providing the perfect canvas for subtle expression of your personal style while keeping your hands looking polished and professional.
Save This Guide for Later!
Pin this comprehensive guide to natural acrylic nails to your Pinterest board for easy reference when you’re ready to try these techniques.